15 ELECTRICAL SYSTEM 88
15.1 Removing the 12 V battery
Warning
Risk of injury Battery gases cause serious chemical burns.
– Keep batteries out of the reach of children.
– Wear suitable protective clothing and goggles.
– Avoid contact with battery gases.
– Keep sparks or open flames away from the battery.
– Only charge batteries in well-ventilated rooms.
– With skin contact rinse the affected area with plenty of water.
– Flush eyes with water for at least 15 minutes and consult a physician if battery gases have come into contact with the eyes.
Warning
Environmental hazard The battery contains elements that are harmful to the environment.
– Do not dispose of batteries with the household waste. Dispose of a defective battery in an environmentally friendly manner.
Give the battery to your authorized KTM dealer or dispose of it at a collection point for used batteries.
Preparatory work
– Fold the seat up. ( p. 63)
C00738-10
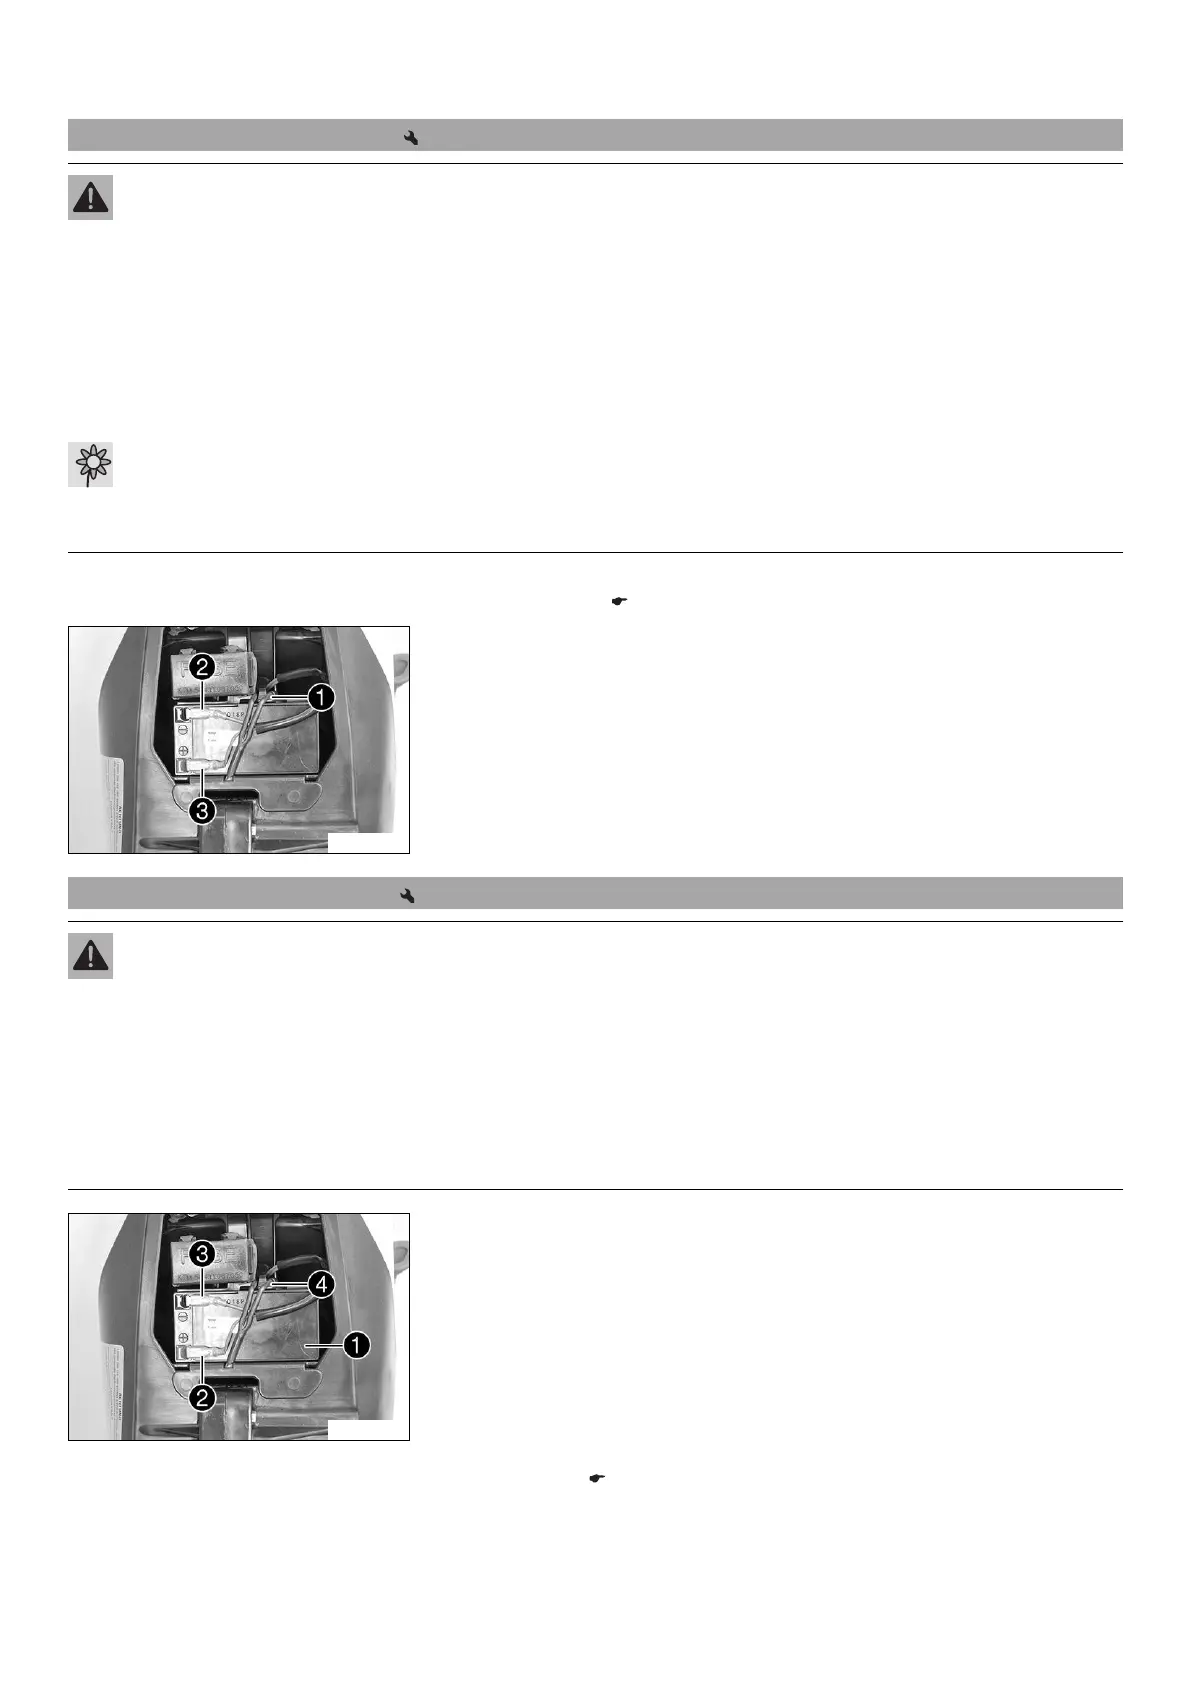
Main work
–
Detach rubber strap
.
–
Disconnect negative cable
from the 12 V battery.
–
Disconnect positive cable
from the 12 V battery.
– Remove the 12 V battery.
15.2 Installing the 12 V battery
Warning
Risk of injury Battery gases cause serious chemical burns.
– Keep batteries out of the reach of children.
– Wear suitable protective clothing and goggles.
– Avoid contact with battery gases.
– Keep sparks or open flames away from the battery.
– Only charge batteries in well-ventilated rooms.
– With skin contact rinse the affected area with plenty of water.
– Flush eyes with water for at least 15 minutes and consult a physician if battery gases have come into contact with the eyes.
C00738-11
Main work
–
Position the 12 V battery
in the battery compartment.
–
Connect the positive cable
to the 12 V battery.
–
Connect the negative cable
to the 12 V battery.
–
Reconnect rubber band
.
Finishing work
– Lock the seat. ( p. 63)