CloudBox User Manual 156
UPDATE USING LACIE NETWORK ASSISTANT
Important info: Before proceeding:
Connect your PC or Mac to the network using an Ethernet cable (turn off all wireless connections).
■
Make sure users have stopped data transfers to the LaCie CloudBox.
■
Turn off other storage devices on the network except for the LaCie CloudBox.
■
Disconnect all computers from the LaCie CloudBox folders.
■
Click here to confirm that you are using the latest version of LaCie Network Assistant. If you download a1.
newer version, make sure to uninstall previous versions before installing the update.
Download the latest software update for your product from here. Keep it in a known location on your2.
computer as you will be prompted to browse for it in step 9.
Launch LaCie Network Assistant.3.
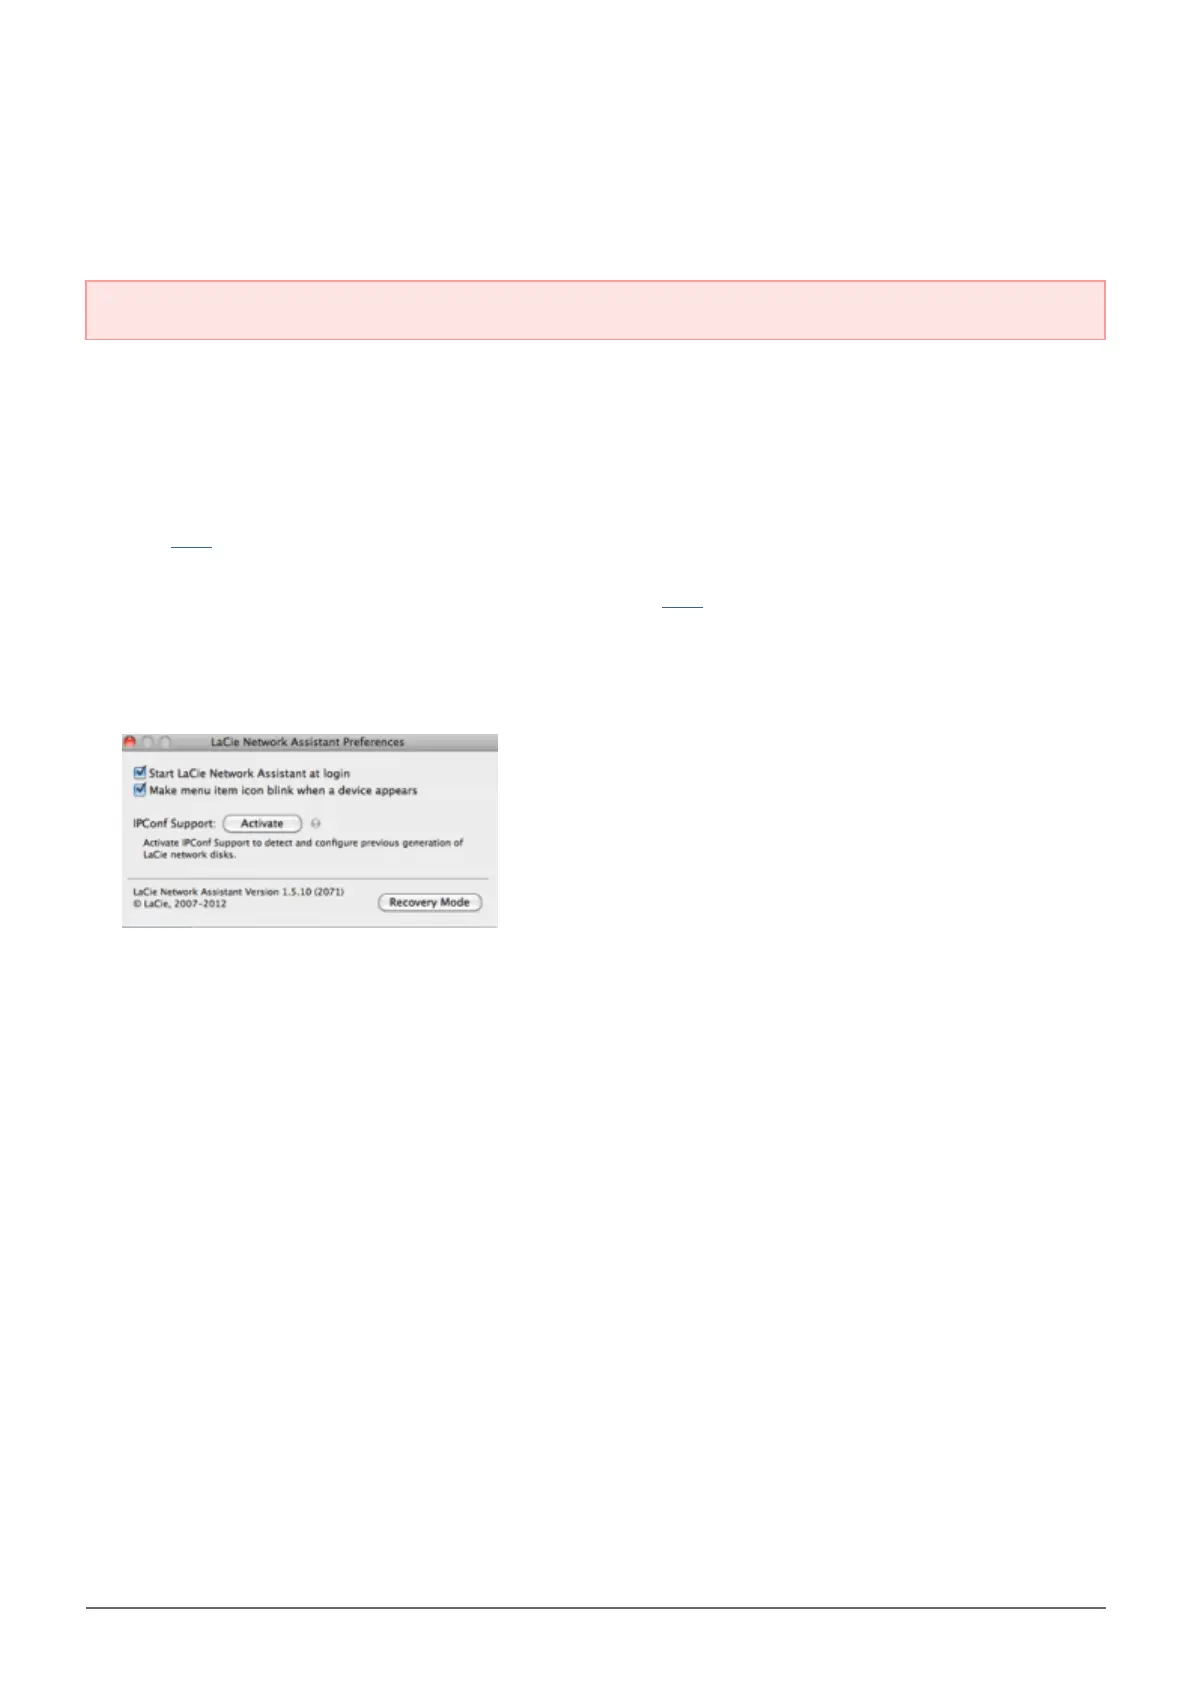
Go to Preferences and make sure IPConf Support is deactivated. You will know it is off if the button reads4.
Activate.
IP Config is off
Click the Configuration tab.5.
If you have more than one LaCie network storage device on your network, select the LaCie CloudBox from6.
the list on the left.
Click on the Update your NAS… button.7.
Enter your administrator username and password.8.
Browse to and load the update package (.capsule file) that you downloaded from the LaCie website.9.
Click on Continue… to begin the update. Mac users may be prompted to enter the computer's10.
administrator username and password.
Once the update is complete, verify the update on the Dashboard Support page or LaCie Network Assistant:11.
Go to LaCie Network Assistant and choose Open LaCie Network Assistant….1.
Select the Configuration tab.2.
The system version will be listed.3.