Rugged RAID User Manual 29
MODIFY THE RAID LEVEL
Important info: Changing the RAID level deletes data stored on the LaCie Rugged RAID. Back up all your
data before adjusting the RAID.
Consider the following before moving to the steps below:
Confirm that the Rugged RAID is connected to a computer and powered on.
■
The RAID select and RAID confirm buttons are located within small recesses. To push them, you can use a thin
■
pointed object such as the end of a paperclip.
Know the the RAID level you want to use.
■
Step 4 is time sensitive.
■
Unmount the LaCie Rugged RAID’s volumes from your computer (see Unmounting Your Hard Drive).1.
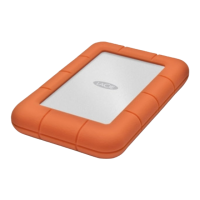
Use the pointed end of the paperclip to push the RAID select button two times. Make certain that the second2.
push is applied immediately after the first push.
The RAID LED:3.
Turns solid if the device will be changed to RAID 0.
■
Blinks if the device will be changed to RAID 1.
■
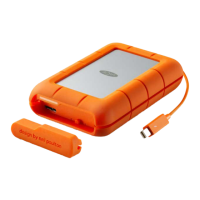
Use the pointed end of the paperclip to push the RAID confirm button. The RAID confirm button must be4.
pushed within five seconds of completing the second push of the RAID select button. The Rugged RAID
restarts after pushing the RAID confirm button.
Once the Rugged RAID has restarted, your computer prompts you to initialize the new volume. You must5.