Registering Addresses and Users for Facsimile/Scanner Functions
84
5
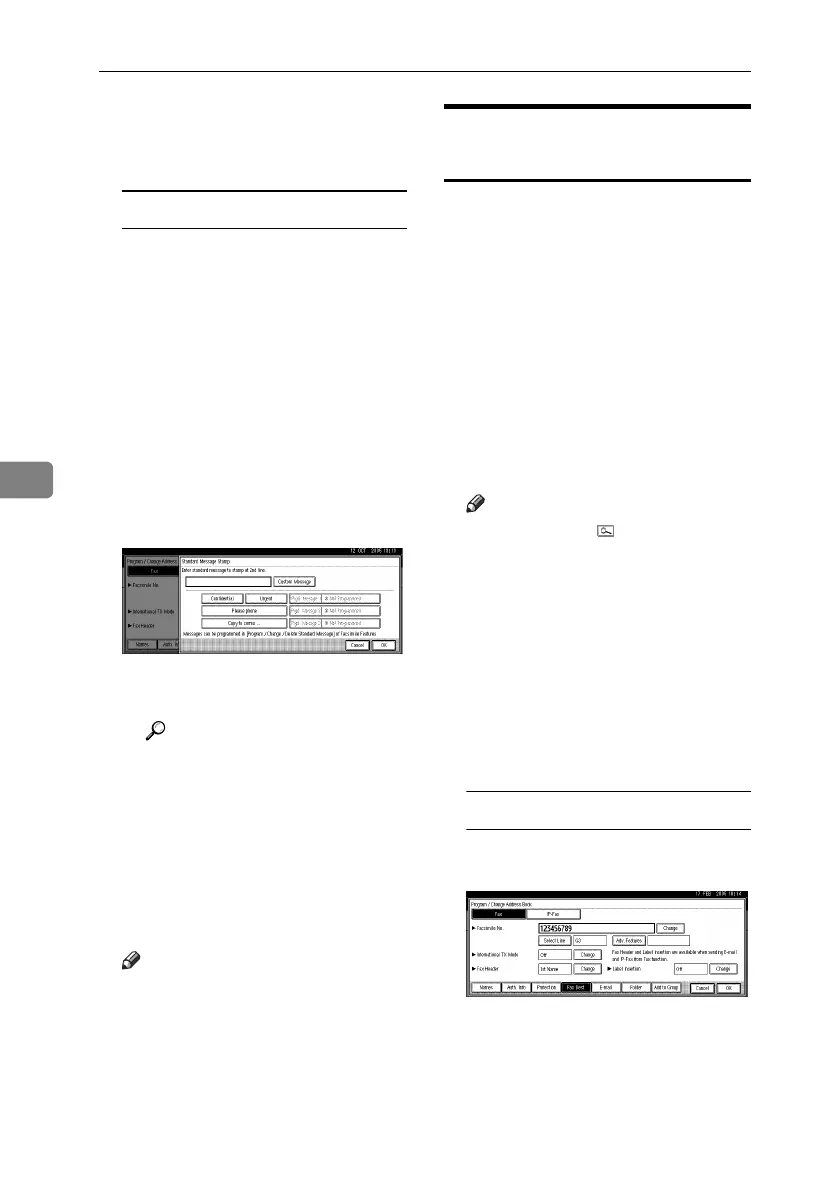
A
Press
[
Change
]
under Fax Header.
B Select [1st Name] or [2nd Name],
and then press [OK].
To set label insertion
When Label Insertion is set to ON,
the receiver's name and standard
messages are printed on the fax
message when it is received at the
other end.
A Press [Change] under Label In-
sertion.
B Select [On].
C Press [Change] under Line 2.
D Select a standard message to
print on the second line. To
stamp a customized message,
press [Custom Message].
E
Enter a message, and then press
[OK].
Reference
p.151 “Entering Text”
F Press [OK].
G Press [Change] under Line 3.
H Select a standard message, and
then press [OK].
I Press [OK].
H Press [OK].
Note
❒ When a group is registered, you
can also add this fax destination
to the group. See p.104 “Regis-
tering Names to a Group”.
I Press [Exit].
J Press the {User Tools/Counter} key.
Changing a Registered Fax
Destination
A Press the {User Tools/Counter} key.
B Press [System Settings].
C
Press
[
Administrator Tools
]
, and then
press [TNext].
D Press [Address Book Management].
E Select the name whose fax desti-
nation you want to change.
Press the name key, or enter the
registered number using the
number keys.
Note
❒ If you press , you can search
by the registered name, user
code, fax number, folder name,
e-mail address, or IP-Fax desti-
nation.
❒ To change the name, key dis-
play and title, see p.75 “Chang-
ing a Registered Name”.
F Press [Fax Dest.].
G Change the settings.
To change the fax number
A Press [Change] under Facsimile
No..
B Enter the new fax number us-
ing the number keys, and then
press [OK].
RuC4_EN_gsg-F_FM_forPaper.book Page 84 Tuesday, April 5, 2005 12:06 PM
 Loading...


