Features
Calculating Mode (SumTime™)
• Fully automatic time clock for up to 100 employees
• DualMode™ feature provides Calculating or Non-Calculating operation
• SumTime™ Calculating mode option calculates elapsed hours between
punches and total accumulated hours for pay period in exact minute or
rounded time format
• Supports weekly, bi-weekly, semi-monthly and monthly pay periods
• Employee identification using E17 bar coded time cards, provides automatic
top card feed, punch alignment and print activation for simple one-hand
operation
• SmartClock™ technology keeps time, date and settings during power
outages, and auto-adjusts for Daylight Saving Time and Leap Years
• Display and print 1-12 AM/PM or 24 Hour format
• Print time in regular minutes (00-59) or hundredths of an hour (.00-.98)
• Print the Month, Year, Day of Week and Date, Hours between Punches,
and Total Accumulated Hours for the pay period
• Unlimited punches per day, 64 total punches in the pay period
Non-Calculating Mode
• Print Date or Day of Week and Time
• Up to six (6) punches per day. Each row of the time card is one day
Date
Date
Hours between punches
Up to 6 punches per day
Accumulated hours
for pay period
IN OUT
This clock requires the use of E17 Time Cards only.
E17 time cards are bar coded and support all pay periods.
Cover
Projections
<1>
<2>
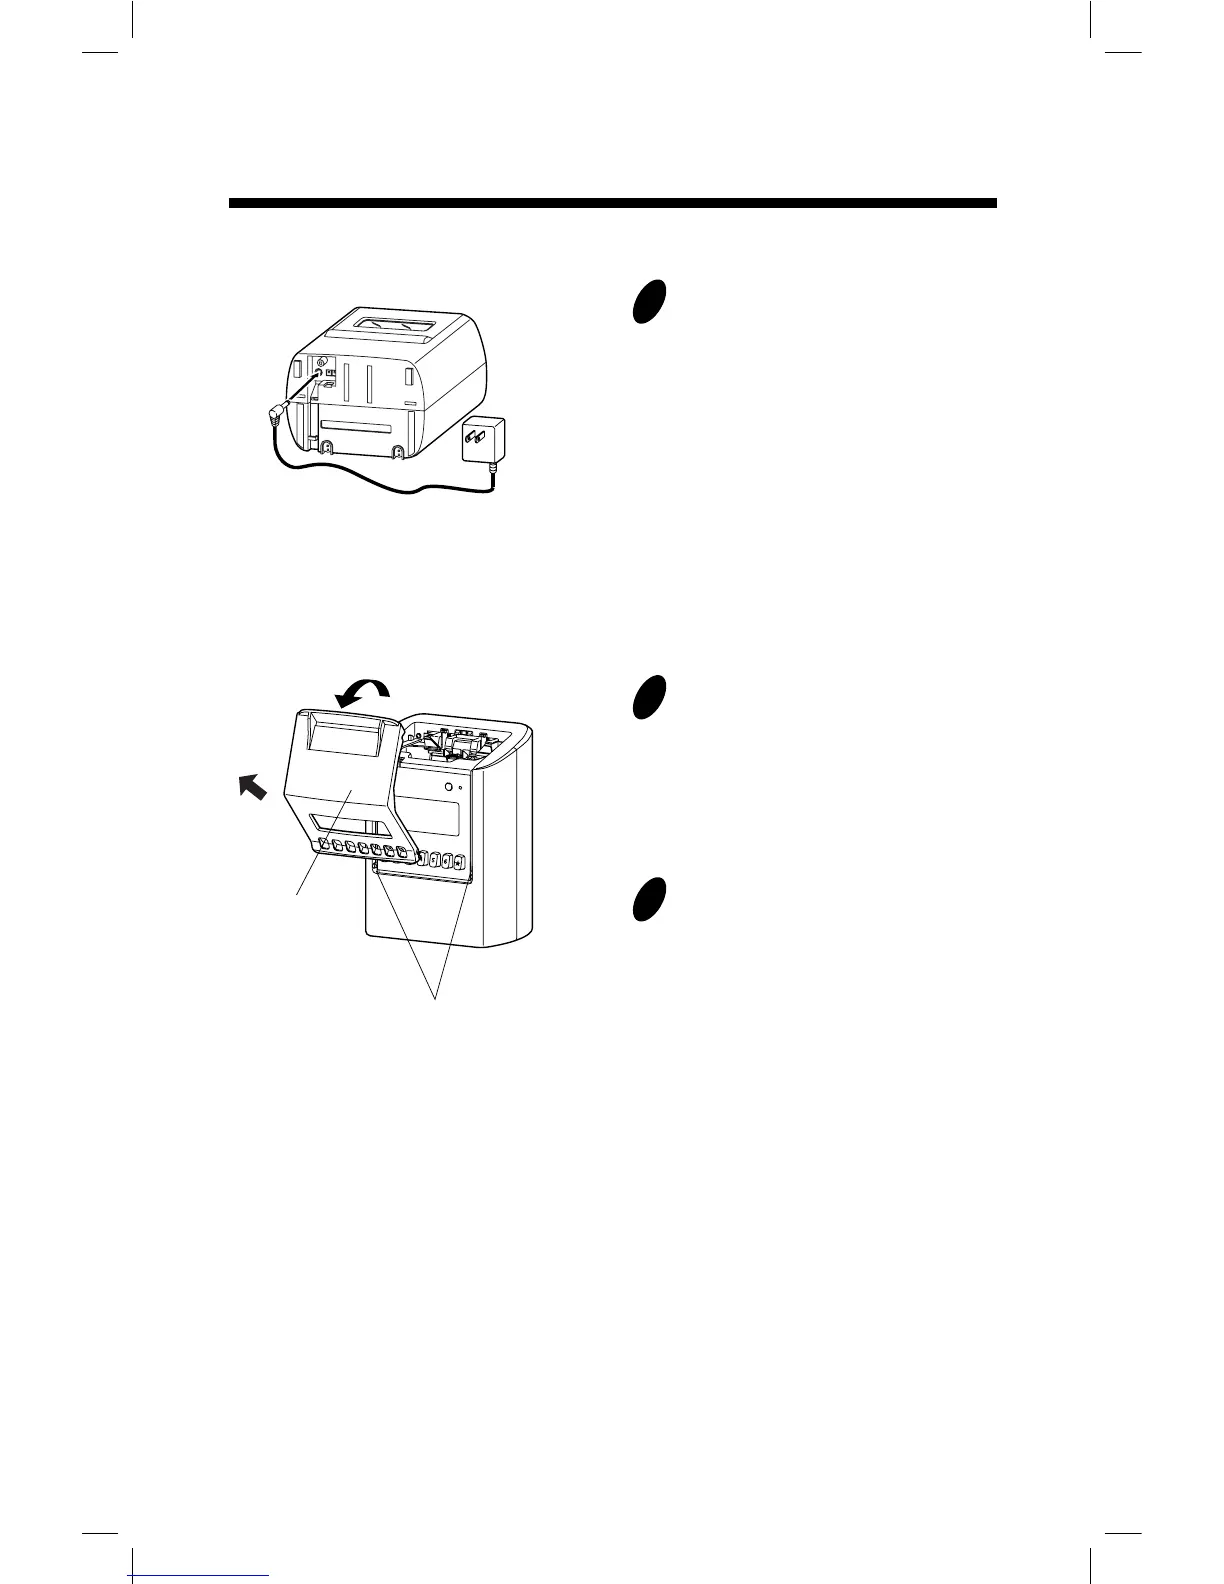
SETUP: AC adapter
1
Put the bottom face of a time recorder
toward you. Connect a plug of AC
adapter into the time recorder, and run
the cord into the groove on the bottom.
Then, plug the AC adapter into AC
outlet.
SETUP: Remove/Attach the Cover
1
2
Remove the cover.
<1> Pull the top of the cover toward
you supporting the bottom side of the
cover.
<2> Pull it to front and upper
direction. Then, remove the cover.
Attach the cover.
Fit the right and left sides on the
bottom of the cover in projections of
the unit. Then, attach the cover in the
reverse order of <1> and <2> in step 2.
2. SETUP
7