4PSXXIVXIWXW
%P]WQEMRXIRERGIQERYEP %%
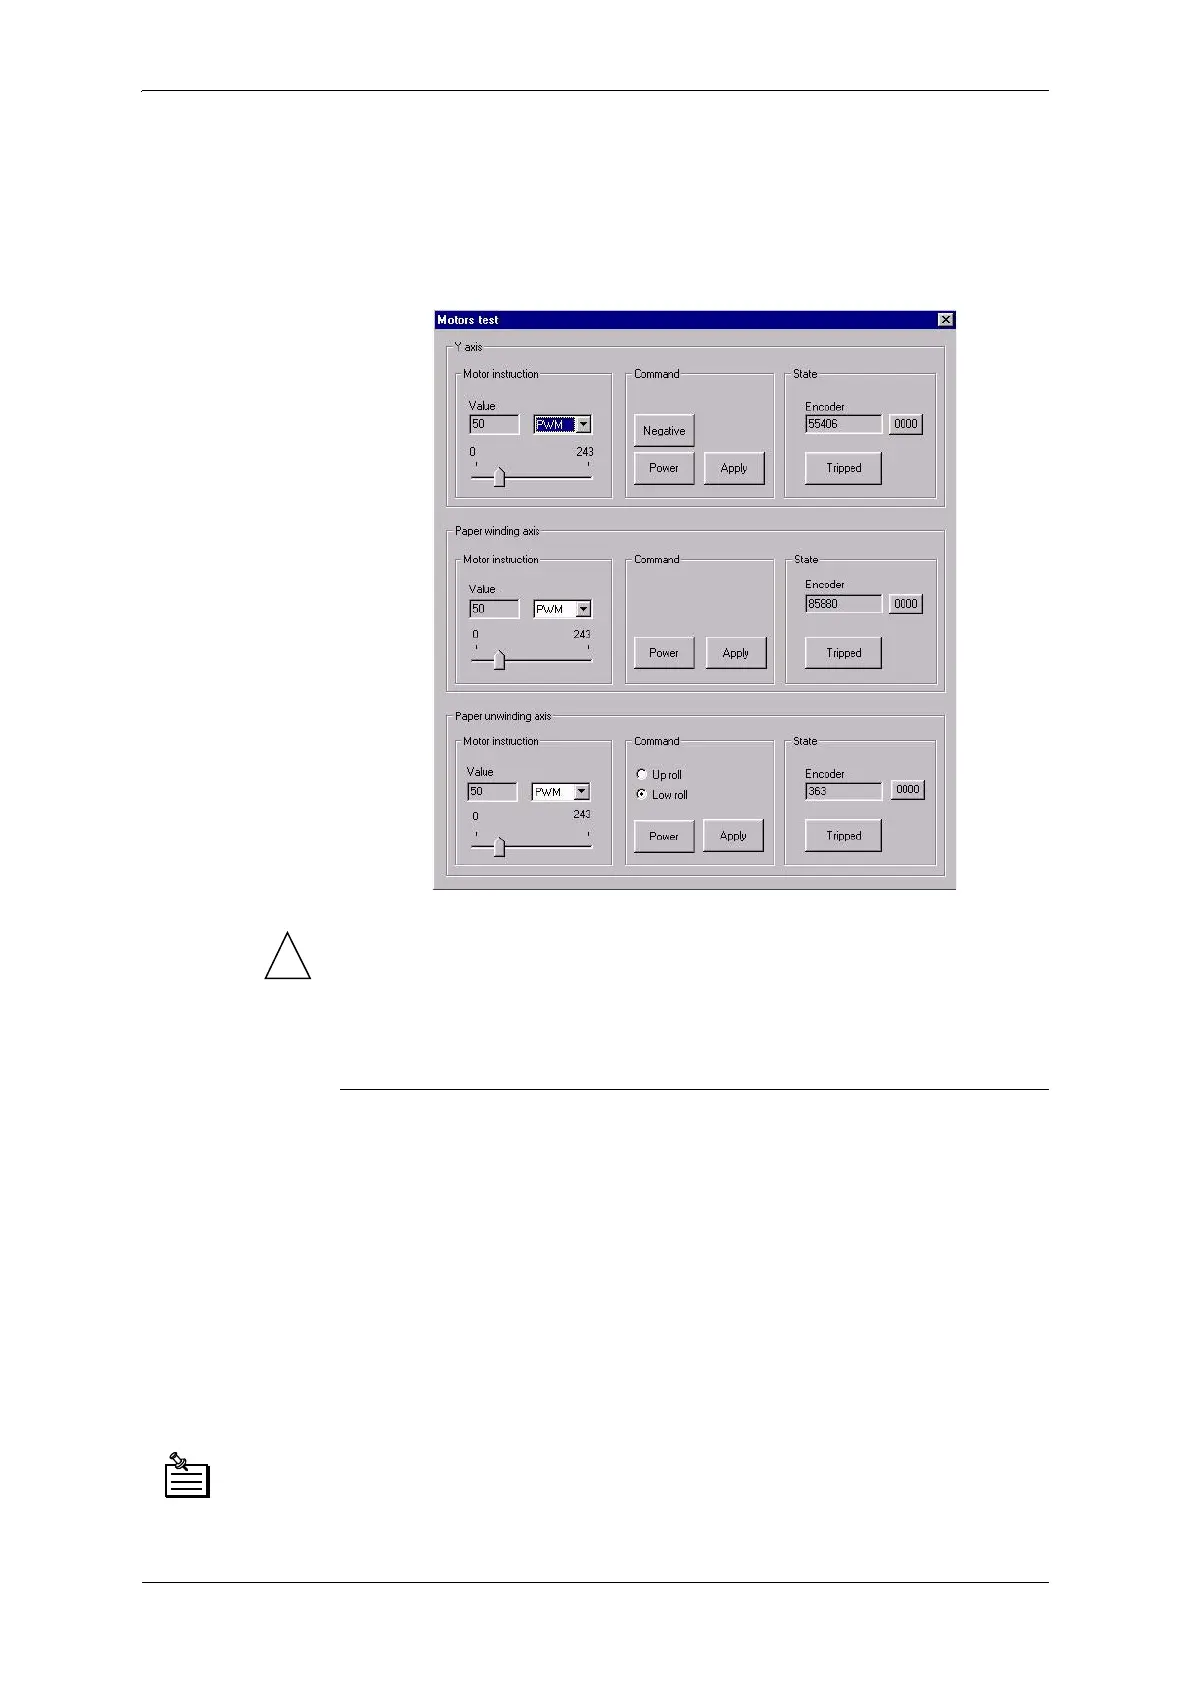
8IWXMRKQSXSVM^EXMSRW
Click the “Test actuators/sensors” button in the “Advanced functions”
window. The following window appears:
!
(DFKRIWKHVHWHVWVPXVWEHGRQHZLWKWKHFRYHUFORVHG
,WLVKLJKO\UHFRPPHQGHGWRXVHVHWYDOXHVLGHQWLFDOWRWKRVHVHHQ
LQWKHDERYHLPDJH
8VHk390yPRGHWRGRWKHVHWHVWV
=%\MWQSZMRKXLITVMRXLIEH
1. Click the “MST” button
2. To validate this command, click the “Apply” button. The head moves
along the beam.
Positive travel direction: towards purge station
Negative travel direction: towards control keyboard.
3. Make sure the value displayed in the “Status - Y encoder” varies as the
head moves.
4. Make sure the direction of the value shown corresponds to the travel
direction (see point 2).
'LVM<%XWWRQLIWKLVEXWWRQOLJKWVXSGLVMXQFWLRQH[LVWVLQWKH<PRWRU
FRPPDQG&OLFNWKH067EXWWRQWRUHDUPWKHEUHDNHU
&OLFNWKH067EXWWRQDJDLQWRUHVWDUWWKHWHVW
5HVHWWLQJWKHHQFRGHUGLVSOD\ZLQGRZFOLFNWKHEXWWRQ