UHF Digital Hybrid Wireless
®
Rio Rancho, NM
19
Spectrum scanning with the receiver itself is the best
way to find clear operating frequencies, since it will
reveal all RF signals present in the receiver, including
thosegeneratedbyIM(intermodulation).
Navigate to the Setup Scan screen and press the Sel
button to start the scanner. The display will switch to the
SCANWINDOWandstartscanningimmediately.Allow
the receiver to scan.
Scroll through the screen and find a frequency where
no RF signals (or in the worst case, only very weak RF
signals) are present. With the cursor on this frequency,
simultaneously press the Sel Up, Down and Sel buttons
to leave the scan mode.
Data gathered during a scan is stored until it is inten-
tionally erased or the power is turned off. Previous
data will remain and subsequent scans can be made
to search for additional signals or to accumulate higher
peaks.
To stop scanning, press the Sel button once. The scan-
ning will stop immediately, and the display will switch to
theVIEWwindow.PressingtheUPorDOWNbuttons
will scroll the cursor coarsely across the tuning range.
The transmitter switch settings matching the frequency
indicated by the cursor are shown in the upper right
corner of the screen.
Scanning for Clear Frequencies
PressboththeUPandDOWNbuttonsatthesame
timetoswitchtotheZoomView.Inthisview,thecursor
remains fixed in the center of the screen and the back-
ground scrolls behind it. The frequency can be stepped
upanddownin100kHzincrementsusingtheUPand
DOWNarrowbuttons.
To clear the scan memory and screens, press the
back button repeatedly to return to the Main Window,
then press and hold the PWR button briefly. As soon
as “Powering off...” appears on the display, release the
button. The receiver will remain turned on, and the scan
data will be erased.
Set your transmitter switches to the same settings as
shown on the display, turn the transmitter on and verify
that a strong RF signal is present.
NOTE:Whenoperatinginthe2-channelmode,
always set Receiver 2 to a higher frequency than
Receiver1byatleast400kHz(four100kHzsteps
on the switches).
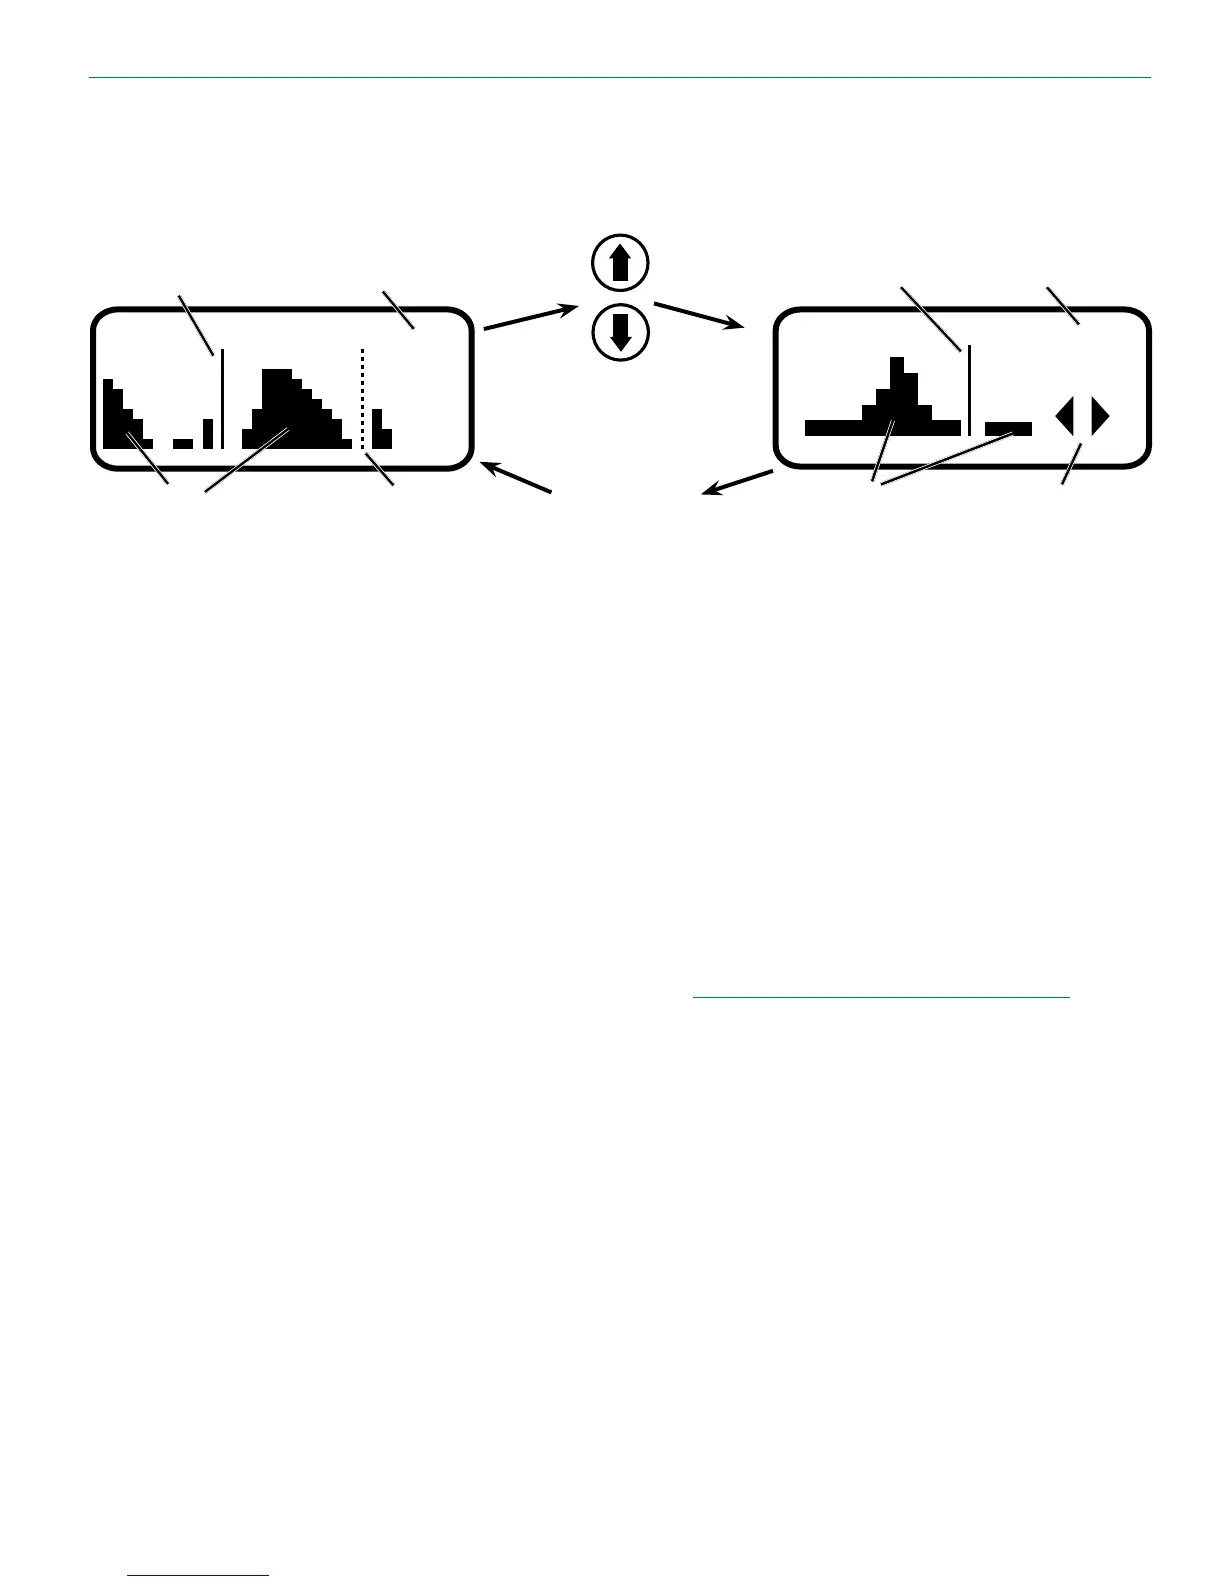
Scan View Window
RF Signal
indicators
Transmitter
Switch Settings
Cursor (center bar)
SCROLL
reminders
Zoom View Window
Transmitter Switch Settings
for the currently tuned
frequency.
Dashed line (cursor)
shows the currently
tuned frequency.
RF activity level.
Previously tuned
frequency
Press both UP and
DOWN arrows on
control panel to switch
to the Zoom View
Press the BACK
button to return
to the Scan View
Window