25
6. Assembling the Microscope
HC PLAN 10x/20 M and HC PLAN 12.5x/16 M:
• Unscrew the retainer sleeve from the lower
part of the eyepiece 12.5x/16M, remove the
plastic part of the eyepiece 10x/20M.
• Insert the graticule so that the coated side
faces downward (toward the objective) and
any marking appears laterally correct when
viewed in the later observation direction.
• Bring it back in.
6.4 Objectives
• Remove the screw caps on the objective
threads.
• Screw the objectives into the nosepiece open-
ing so that incremental change of the magnifi-
cation levels is possible (e.g. in the sequence
4x, 10x, 20x, 40x).
• If objective threads are left unused, cover
these with screw caps to protect the micro-
scope optics against dust.
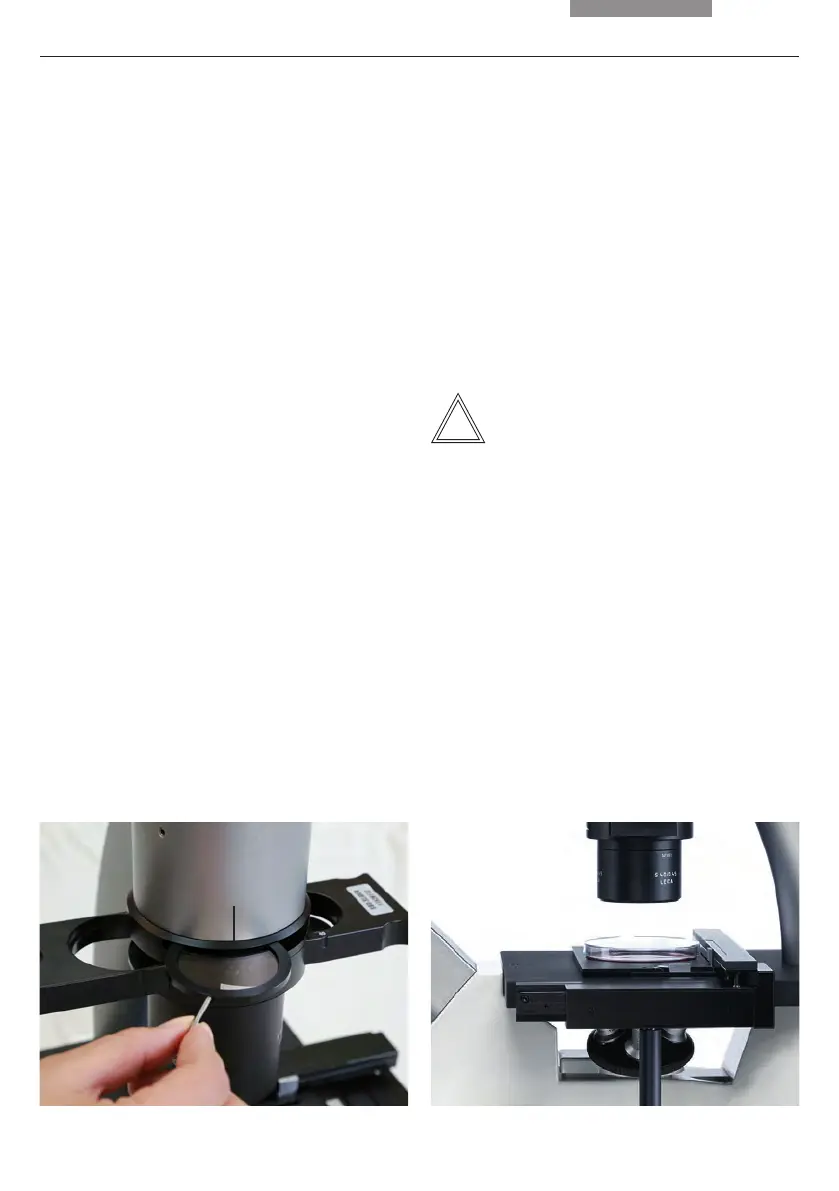
Fig. 15 Insert of transmitted light filter
1 Transmitted light filter slot
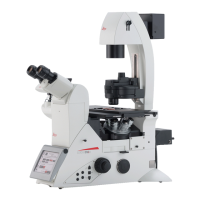
Fig. 16 Object guide
6.5 Inserting the filter
• Insert the filter (Fig. 15) into the filter slot (Fig.
15.1) on the transmitted light illumination car-
rier.
6.6 Object guide
• Attach the attachable object guide to the
right or left side of the stage to accommodate
brackets for different culture flasks (Fig. 16).
• Mount the attachable object guide with the 3
mm hexagon socket wrench.
Note:
Some holders come with self-adhesive scale for
reading the coordinate adjustment.
Attach these in the recesses on the attachable
mechanical stage.
1


 To Next Page