SLIDING DOVETAILS
52
Chapter 13 Super Jig-12-18-24 User Guide
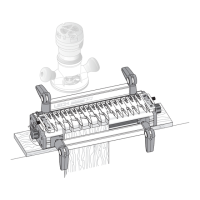
13-1 With the finger assembly in the
H
HB TAILS mode, the
cross cut fence fits into the recesses in the ends of the tail guides
to allow routing of sliding dovetails.
Space the guides fairly evenly across the jig and firmly seat the
fence into end of each guidefinger to ensure a straight cut.
13-2 Using the cross cut fence as a guide surface for the guidebush,
you can make lateral router cuts across the faces of horizontal
boards (dovetail slots), and...
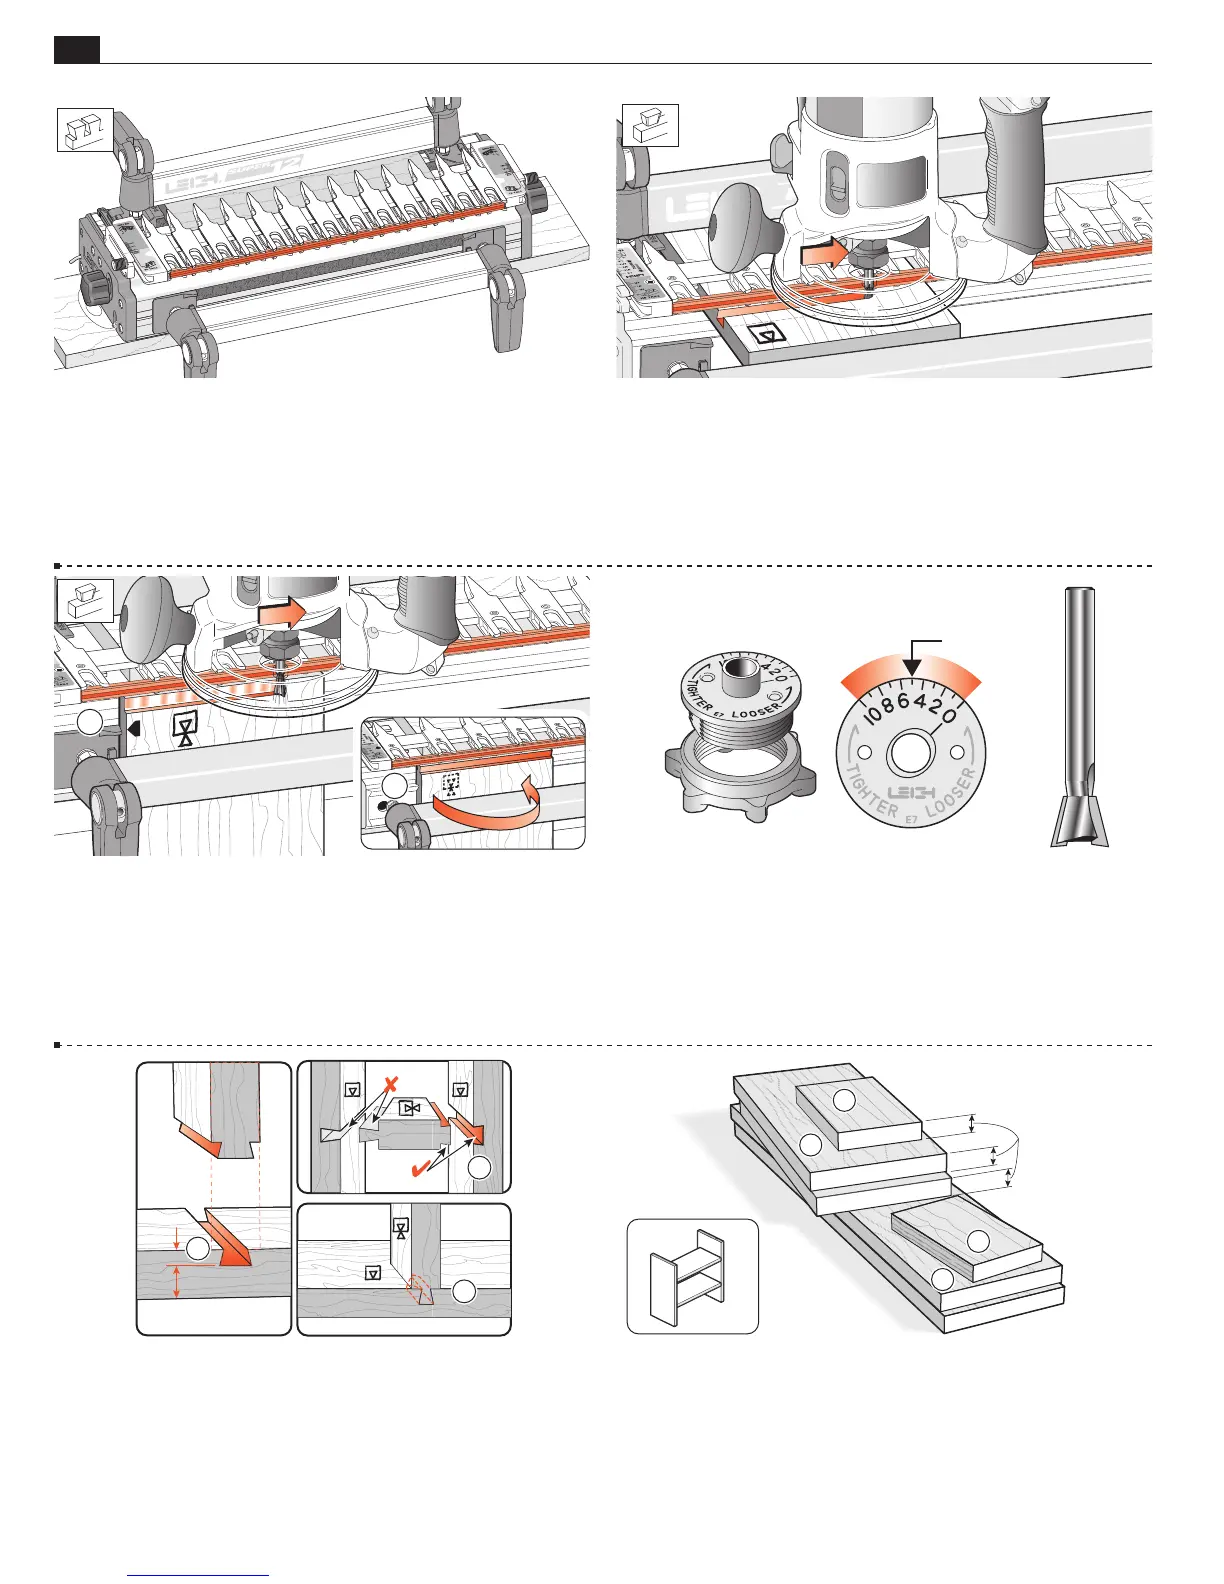
13-3 Across the top ends of vertical boards to cut the tails. First
rout one side
...
Then turn the board side-over-side to cut the other half of the
tail
.
1
2
13-4 Turn the e7-Bush to “5” and use the No. 120-8,
1
⁄2"x 14°
bit for sliding dovetails. This e7-Bush setting will allow for fine
fit adjustment later.
A standard ~
7
⁄16"[11,1mm] guidebush (min. depth
1
/4" see page
67) can be used but without the fine adjustment provided by the
e7-Bush.
5
13-5 On a full width joint, the slot depth-of-cut should be no more than
1
⁄3 the board thickness
. If the tail board is a load-bearing horizontal
member (e.g., bookshelf or step), make the tail fairly thick for good tail
neck strength
. Shorter sliding dovetails for less structural demand
may be slightly deeper, with narrower profiles, especially if appearance
is important
(e.g., where narrow rails join wider boards).
3
2
2/3
1/3
1
13-6 Use
3
⁄4"x5
1
⁄2"[20x140mm] softwood to make two slot
boards
, plus one narrow test slot board
, two tail boards
and one narrow test tail board
➃
. The tail boards
and test tail
board
➃
must be exactly the same thickness. This will make two
uprights and two shelves.
1
2
3
4
=