11
NOTE: DIAGRAMS & ILLUSTRATIONS ARE NOT TO SCALE.
Log Set and Ember Installation
If logs are not installed according to the log installation instruc-
tions, flame impingement and improper combustion could
occur and result in soot and/or excessive production of carbon
monoxide (CO), a colorless, odorless, toxic gas.
The size and position of the log set is critical to achieve a safe,
reliable and attractive flame pattern. Any attempt to use a differ-
ent log set in the fireplace will void the warranty and will result
in incomplete combustion, sooting and poor flame quality.
Packaging List: Log set [rear log (A), left rear log (B), left front log
(C), center log (D)], embers (E) and rockwool (F)
1. Carefully remove the logs from their packaging and ensure you
have a complete set. The logs are fragile, so handle them with
care.
3. Place the rear log (
A) onto log stands 1 and 2 (see Burner Pan
Diagram, Page 9). The charred surface of the log should face the
front.
4. Place the embers (
E) on the burner pan. Using the larger embers
first, create a small pile on the elevated air deflector near the center
and place
them along the front edge of the burner (leaving about 1/4”
in between each ember and a 2” gap in the center). It will not affect the
performance, but smaller embers may
fall into the front air gap.
Place
the rest of the embers throughout the firebox taking care not to block
off any secondary air holes or gas ports (see example below for proper
placement of embers).
5. Place the rockwool (F) over the gas ports and in between the embers
along the front of the firebox. The rockwool can be placed over gas
ports but do not cover the secondary air holes (see Burner Pan
Diagram, Page 9).
6. Place the left front log (
C) on log stand 3 (see Burner Pan Diagram,
Page 9) and the center log (D) spanning from log stand 4 to the
peg found on the right side of rear log (A). When installed correctly,
both logs should sit firmly in place with the charred side facing
forward.
2. Install left rear log (
B) onto the front half of log stand 1 (see Burner
Pan Diagram, Page 9). When installed correctly it should sit firmly
in place with the charred surface facing the center of the firebox.
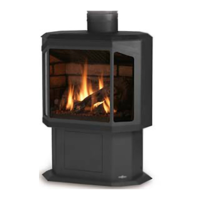
NOTE: All logs are designed to fit only one way. For the ap-
pliance to function properly, it is essential that the logs be
installed correctly. See below for an example of a correctly
burning Epic™ gas stove.
Figure 17
Figure 20
Figure 16
Figure 18
Figure 19
A
B
C
D
E
F
B
A
C
D
 Loading...