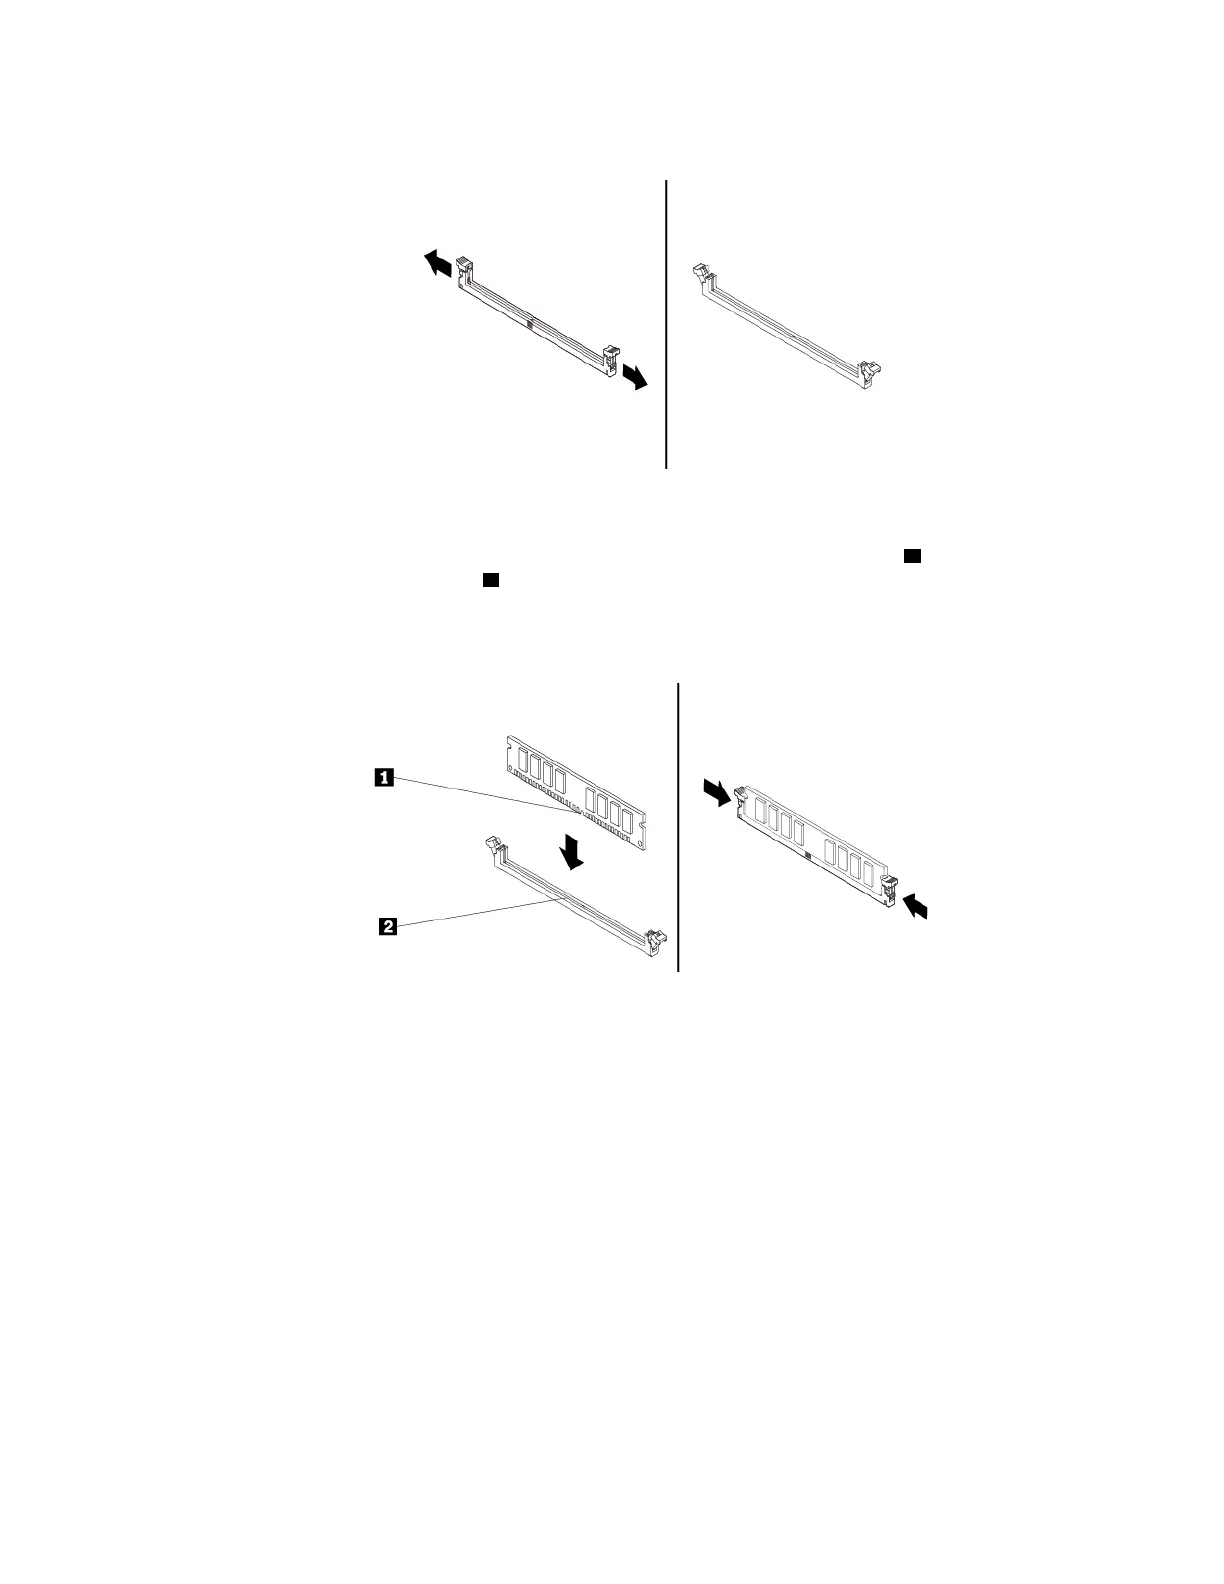
a. Open the retaining clips of the memory slot.
Figure 31. Opening the retaining clips
b. Position the new memory module over the memory slot. Ensure that the notch 1 on the memory
module is aligned with the key
2 in the slot. Push the memory module straight down into the slot until
the retaining clips completely close.
Note: Do not touch the circuit board or the contact edge of the memory module.
Figure 32. Installing a memory module
6. Reinstall the PCIe x16 graphics card if you have removed it.
What to do next:
• To work with another piece of hardware, go to the appropriate section.
• To complete the installation or replacement, go to “Completing the parts replacement” on page 89.
Slim optical drive
Attention: Do not open your computer or attempt any repair before reading and understanding the “Read
this first: Important safety information” on page iii.
To remove or install a slim optical drive, do the following:
1. Remove the computer cover and the front bezel for access to the slim optical drive. See “Preparing your
computer” on page 54.
2. To remove a slim optical drive, do the following:
Chapter 7. Hardware removal and installation 67
![Preview: Lenovo F0B2 [C20-30]](https://data.easymanua.ls/products/594284/200x200/lenovo-f0b2-c20-30.webp)