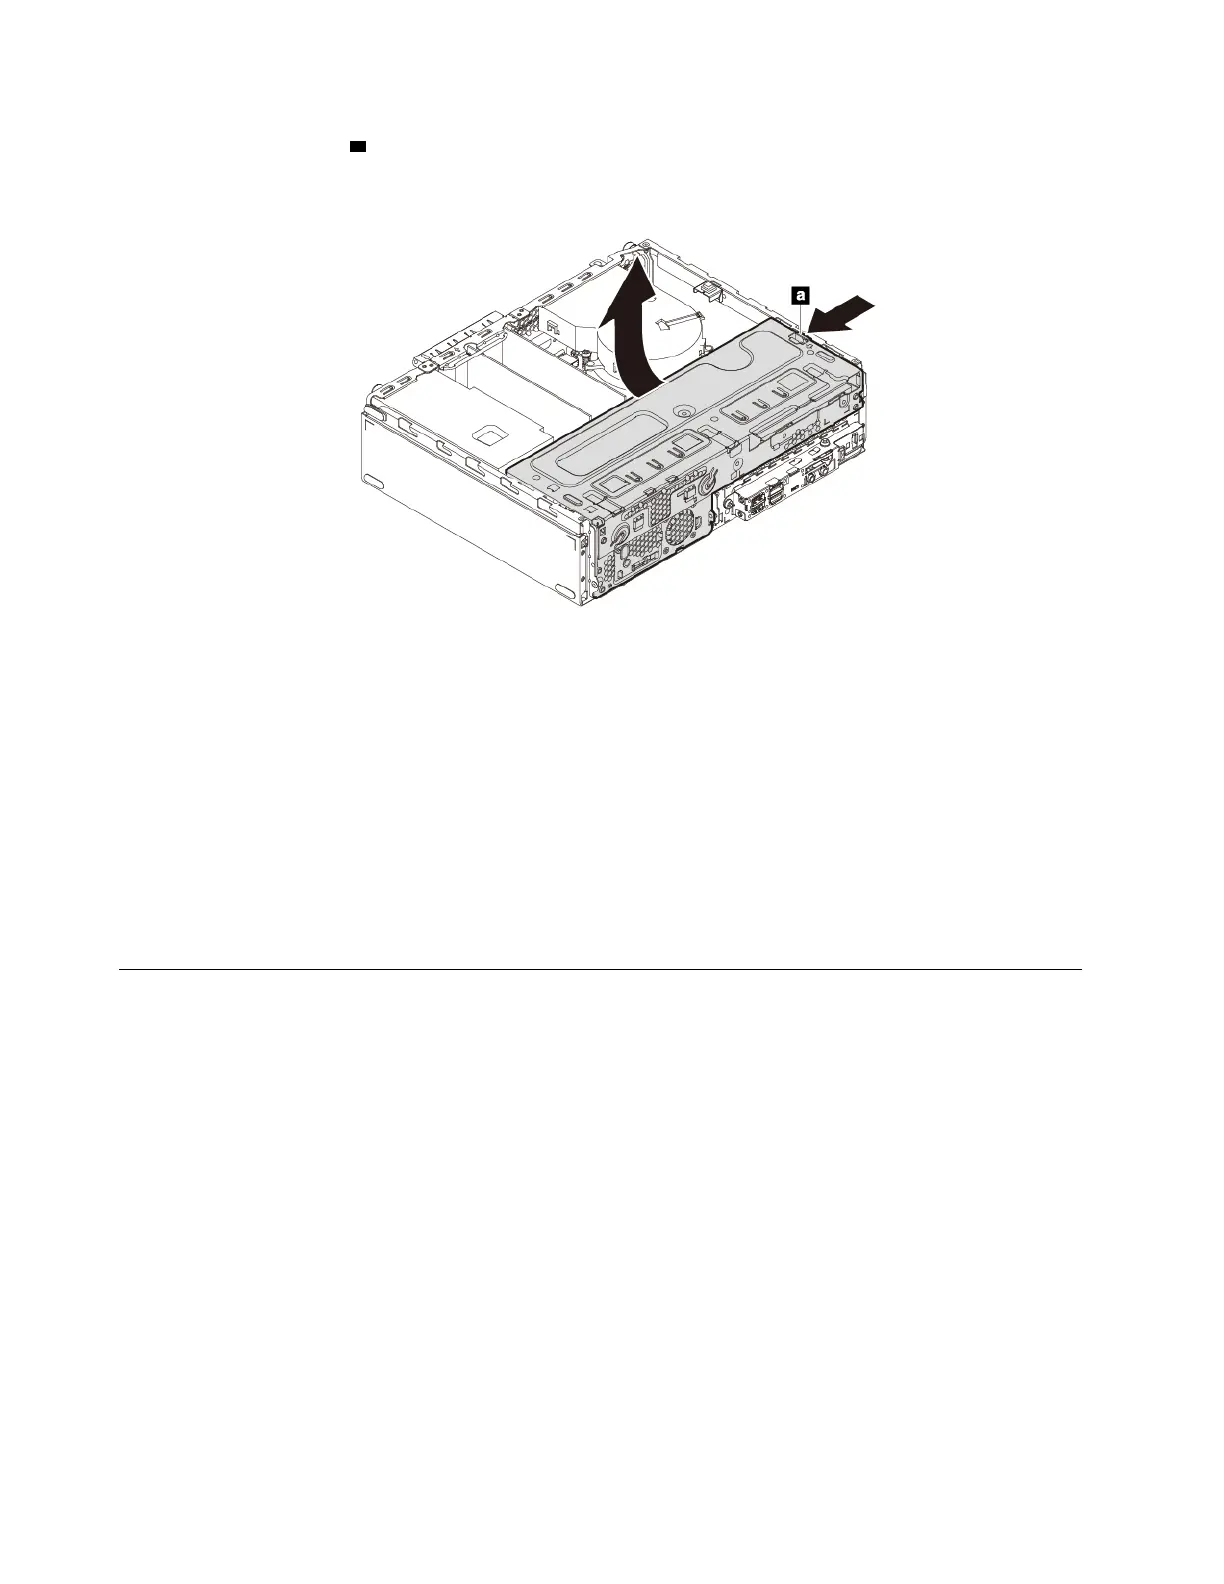
6. Press the release tab a as shown and pivot the drive bay assembly upward to open the drive bay
assembly.
Figure 13. Opening the drive bay assembly
Notes:
• Depending on your computer model, some of the hardware parts in the removal and installation section
might not be available.
• Use computer parts provided only by Lenovo.
• When removing or installing an option, use the appropriate instructions in this section along with the
instructions that come with the option.
• In most areas of the world, Lenovo requires the return of the defective CRU. Information about this will
come with the CRU or will come a few days after the CRU arrives.
Removing and installing hardware
This section provides instructions on how to remove and install hardware for your computer. You can expand
the capabilities of your computer and maintain your computer by removing or installing hardware.
Attention: Do not open your computer or attempt any repair before reading and understanding the “Read
this first: Important safety information” on page iii.
External options
You can connect external options to your computer, such as external speakers, a printer, or a scanner. For
some external options, you must install additional software in addition to making the physical connection.
When installing an external option, see “Hardware locations” on page 1 to identify the required connector.
Then, use the instructions that come with the option to help you make the connection and install any required
software or device drivers.
PCIe card
Attention: Do not open your computer or attempt any repair before reading and understanding the “Read
this first: Important safety information” on page iii.
56
P330 User Guide
![Preview: Lenovo F0B2 [C20-30]](https://data.easymanua.ls/products/594284/200x200/lenovo-f0b2-c20-30.webp)