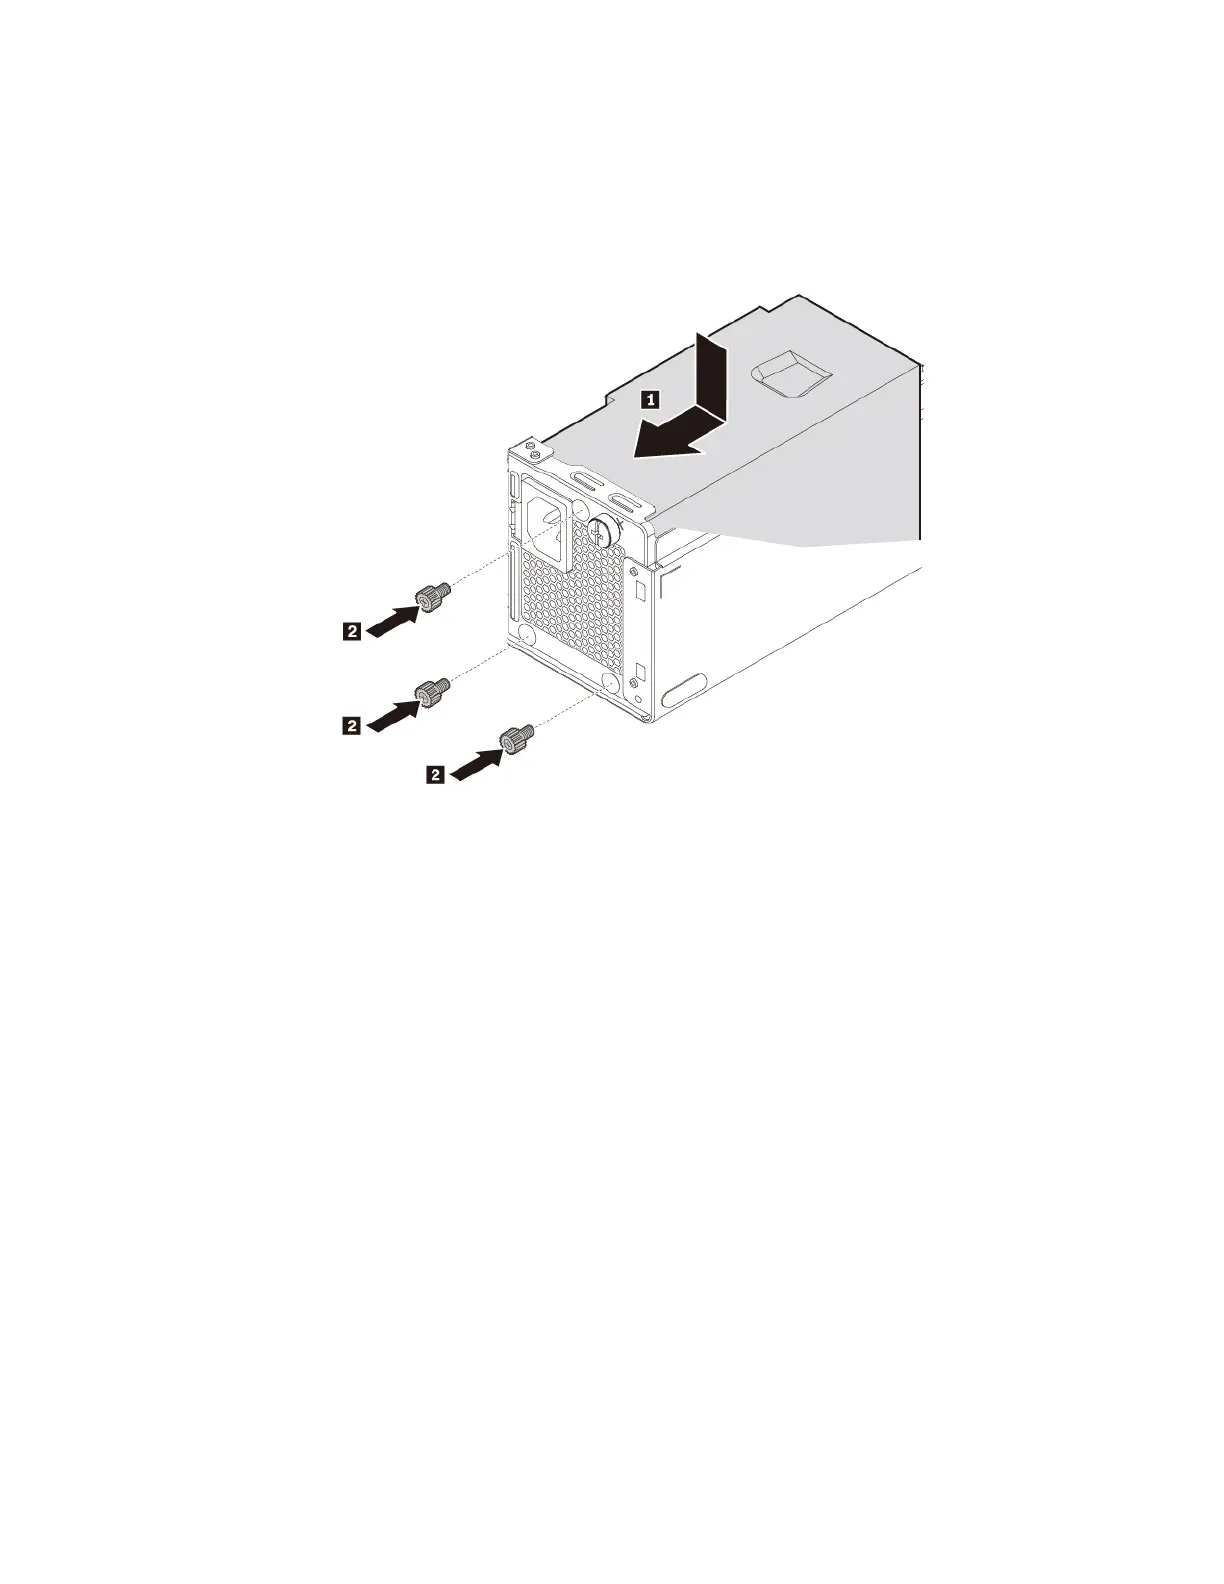
b. Install the new power supply assembly into the chassis so that the screw holes in the power supply
assembly align with those in the chassis. Install and tighten the three screws to secure the power
supply assembly.
Note: Use only screws provided by Lenovo.
Figure 44. Installing the power supply assembly
c. Connect the power supply assembly cables to the system board and each of the drives.
d. Secure the power supply assembly cables with the cable clips and ties in the chassis.
What to do next:
• To work with another piece of hardware, go to the appropriate section.
• To complete the installation or replacement, go to “Completing the parts replacement” on page 89.
Storage drive in the storage drive bay
Attention: Do not open your computer or attempt any repair before reading and understanding the “Read
this first: Important safety information” on page iii.
Depending on your computer model, one of the following devices might be installed in the storage drive bay:
• 3.5-inch storage drive
• 2.5-inch storage drive
3.5-inch storage drive
To remove or install the 3.5-inch storage drive in the bay, do the following:
1. Prepare your computer. See “Preparing your computer” on page 54.
Chapter 7. Hardware removal and installation 75
 Loading...
![Preview: Lenovo F0B2 [C20-30]](https://data.easymanua.ls/products/594284/200x200/lenovo-f0b2-c20-30.webp)