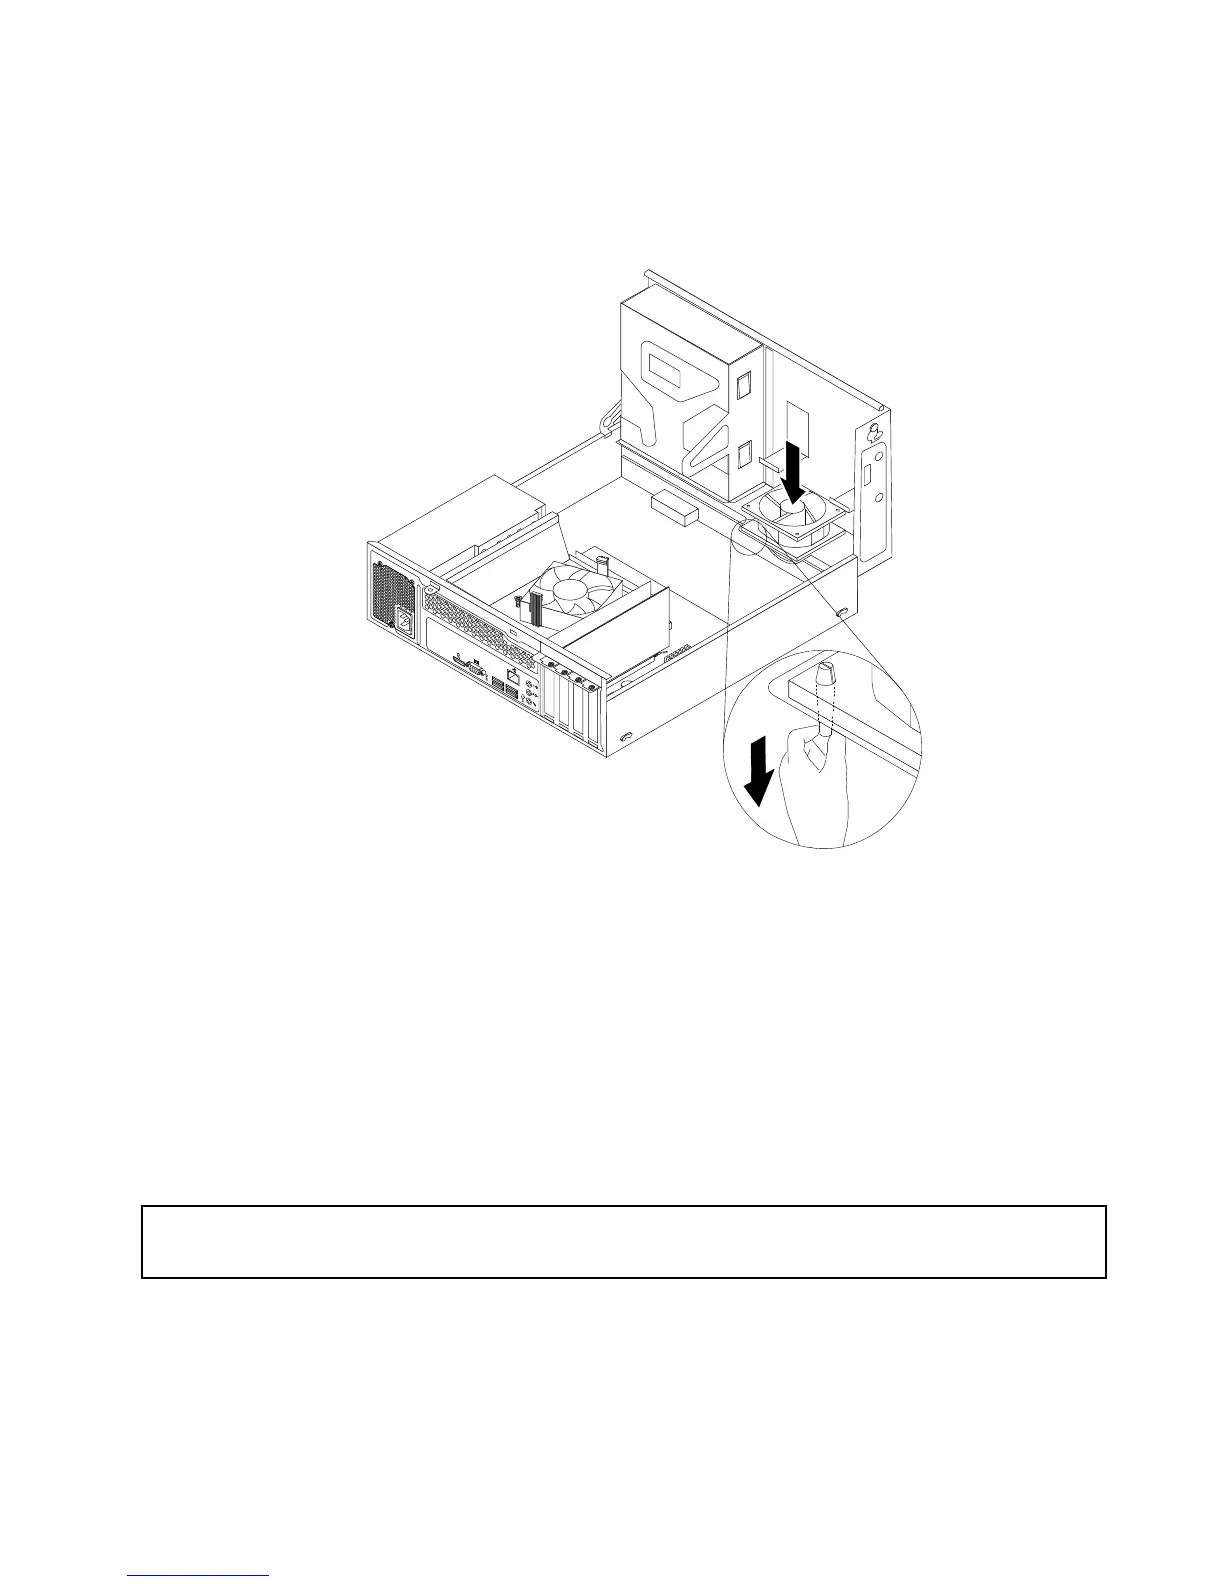
9.Installthenewsystemfanassemblybyaligningthenewrubbermountsthatcamewiththenewsystem
fanassemblywiththecorrespondingholesinthechassis,andthenpushtherubbermountsthroughthe
holes.Then,carefullypullonthetipsoftherubbermountsfromthebottomuntilthenewsystemfan
assemblyissecuredinplace.
Figure48.Installingthesystemfanassembly
10.Connectthenewsystemfanassemblycabletothesystemfanconnectoronthesystemboard.See
“Locatingpartsonthesystemboard”onpage13.
11.Reinstalltheheatsinkfanduct.See“Replacingtheheatsinkandfanassembly”onpage60.
12.Reinstalltheharddiskdrive.See“Replacingtheharddiskdrive”onpage46.
Whattodonext:
•Toworkwithanotherpieceofhardware,gototheappropriatesection.
•Tocompletetheinstallationorreplacement,goto“Completingthepartsreplacement”onpage78.
ReplacingthefrontaudioandUSBassembly
Attention:
Donotopenyourcomputerorattemptanyrepairbeforereadingandunderstandingthe“Importantsafetyinformation”
onpagev.
ThissectionprovidesinstructionsonhowtoreplacethefrontaudioandUSBassembly.
ToreplacethefrontaudioandUSBassembly,dothefollowing:
1.Turnoffthecomputeranddisconnectallpowercordsfromelectricaloutlets.
2.Removethecomputercover.See“Removingthecomputercover”onpage38.
Chapter5.Installingorreplacinghardware67