2.Iftheserverisinstalledinarackcabinet,removetheserverfromtherackcabinetandplaceitonaat,
clean,andstatic-protectivesurface.SeetheRackInstallationInstructionsthatcomeswiththeserver.
3.Removetheservercover.See“Removingtheservercover”onpage83.
4.Locatethebackplane.See“Componentsofservermodelswith123.5-inchharddiskdrivebays”
onpage33.
5.Removealltheinstalled3.5-inchhot-swapharddiskdrivesanddummytrays(ifany)fromtheharddisk
drivebays.See“Installingorreplacingahot-swapharddiskdrive”onpage148.
6.Recordthecableconnectionsonthebackplaneandthendisconnectallcablesfromthebackplane.
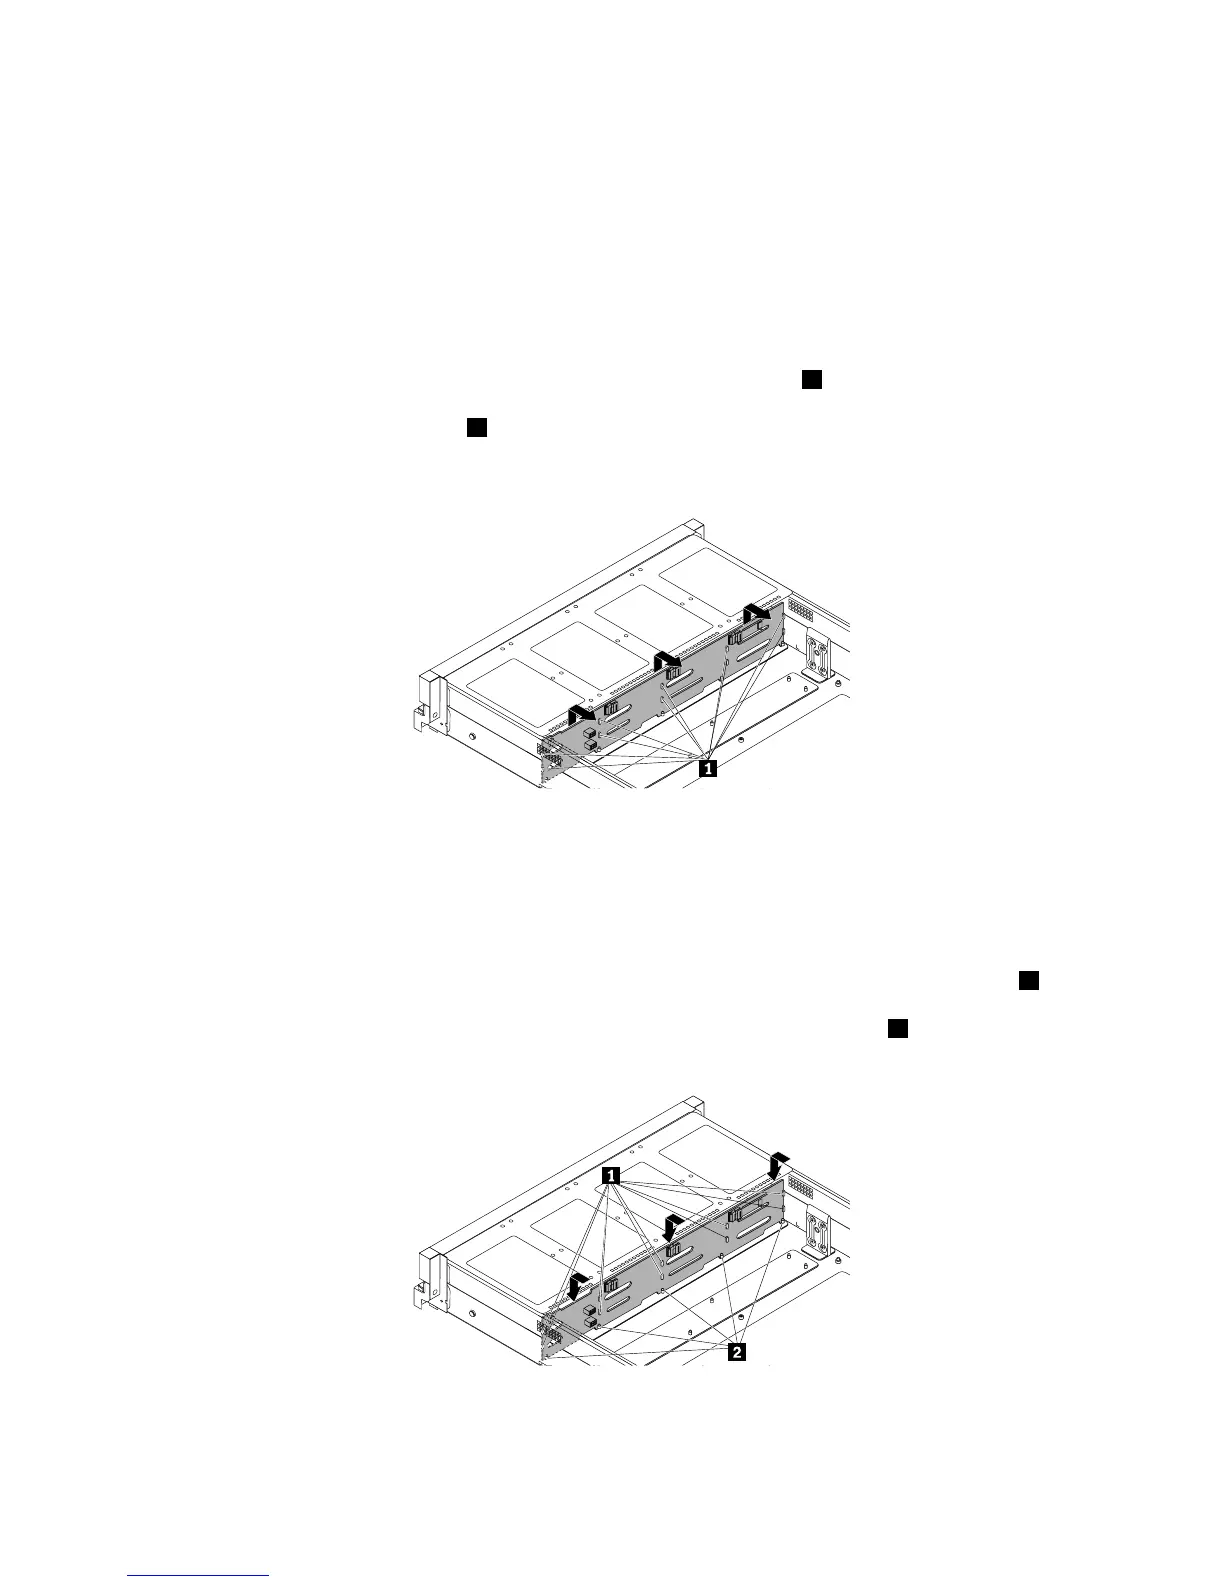
7.Carefullyliftthebackplanestraightupalittlebitsothatthesmallhooks1onthechassisarealigned
withthecorrespondingholesinthebackplane.Then,slowlyandcarefullymovethebackplanetothe
rearofthechassisuntilthehooks1passthroughtheholesinthebackplaneandthencompletely
removethebackplaneoutofthechassis.
Figure115.Removingthebackplaneforservermodelswith123.5-inchharddiskdrivebays
8.Touchthestatic-protectivepackagethatcontainsthenewhot-swapharddiskdrivebackplanetoany
unpaintedsurfaceontheoutsideoftheserver.Then,removethenewbackplanefromthepackage.
Note:Carefullyhandlethebackplanebyitsedges.
9.Notetheorientationofthenewbackplaneandpositionitonthechassissothatthesmallhooks1on
thechassispassthroughthecorrespondingholesinthenewbackplane.Then,carefullypressthenew
backplanestraightdownsothatitissecuredinplacebythesmallretainingstuds
2onthechassis.
Figure116.Installingthebackplaneforservermodelswith123.5-inchharddiskdrivebays
156ThinkServerRD430HardwareMaintenanceManual