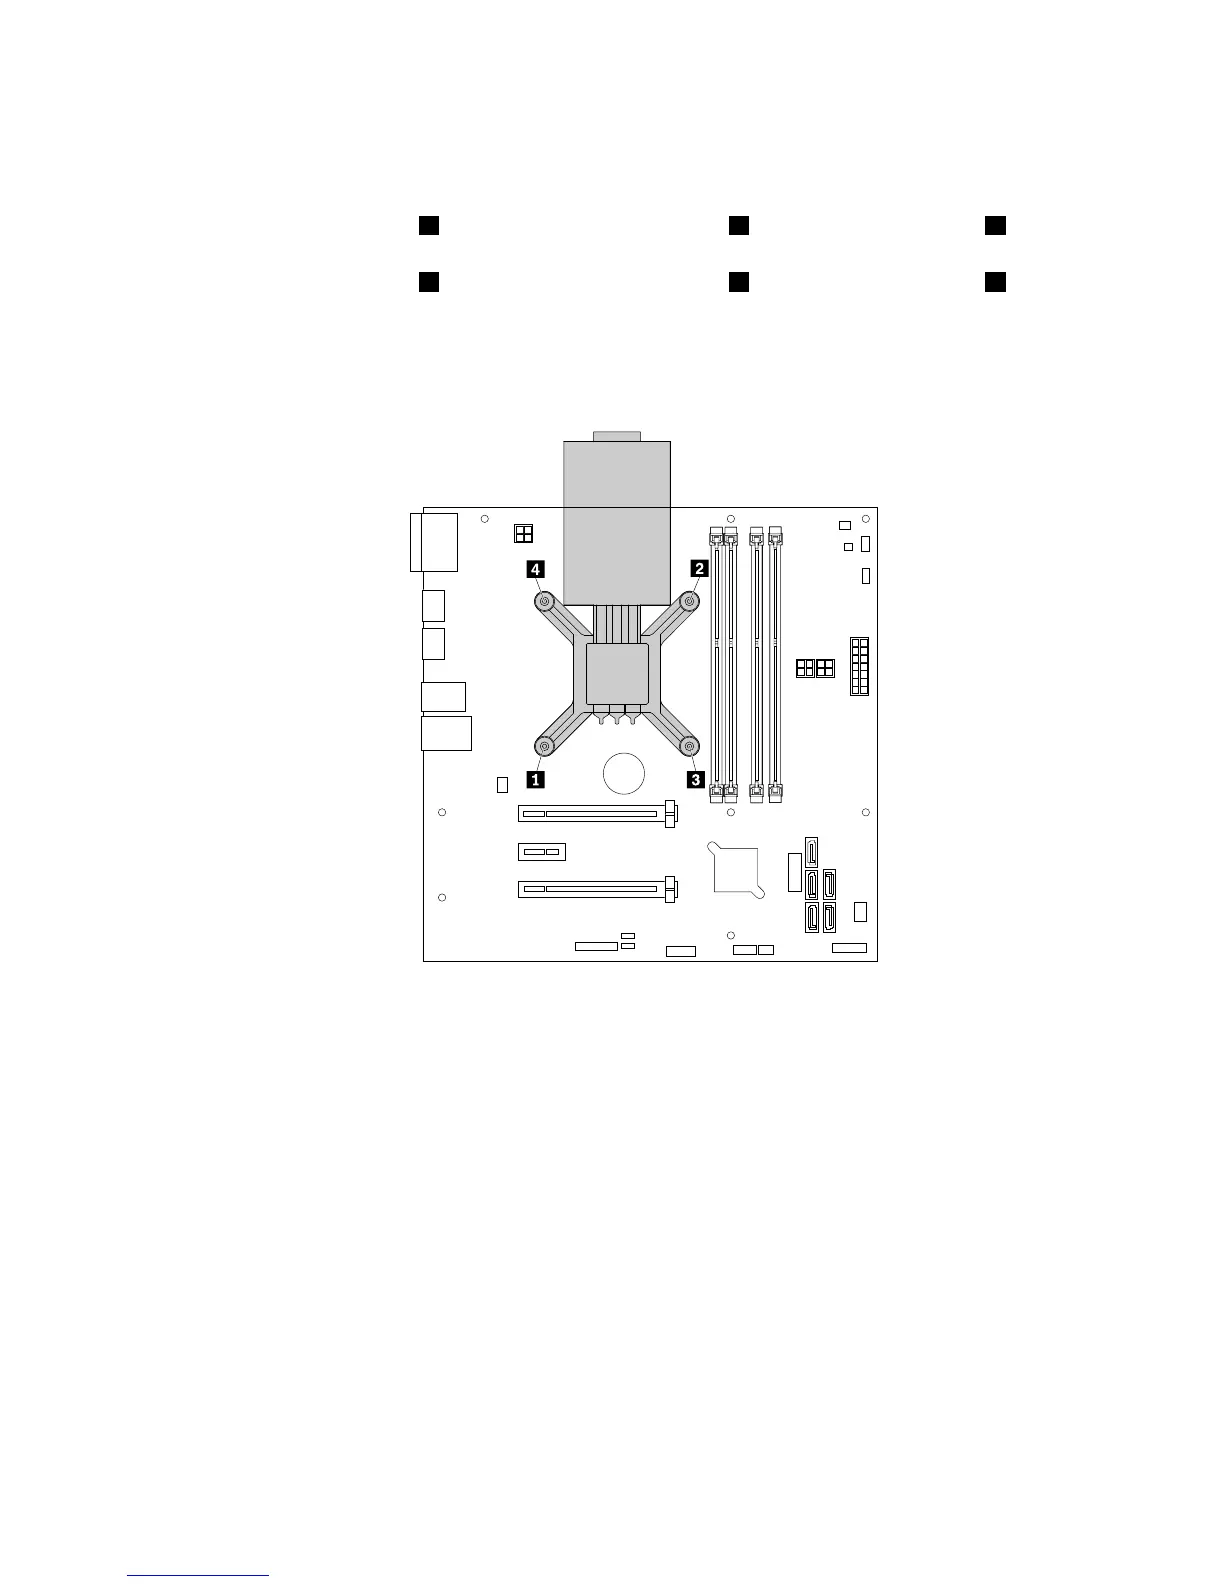
6.Removethefourscrewsthatsecuretheheatsinktothesystemboard.Itisrecommendedthatyou
carefullyremovethefourscrewsfromthesystemboardusingthefollowingmethodtoavoidany
possibledamagetothesystemboard.
a.Partiallyremovescrew1,thencompletelyremovescrew2,andthenreturntoscrew1and
completelyremoveit.
b.Partiallyremovescrew3,thencompletelyremovescrew4,andthenreturntoscrew3and
completelyremoveit.
Note:Thefourscrewsareintegratedpartsoftheheatsink.Donottrytoremovethefourscrews
fromtheheatsink.
Figure69.Removingthescrewsthatsecuretheheatsink
7.Gentlytwisttheheatsinktofreeitfromthemicroprocessorandthenlifttheheatsinkoffthesystem
board.
8.Layasidetheoldheatsink.Touchthestatic-protectivepackagethatcontainsthenewheatsinktoany
unpaintedsurfaceontheoutsideoftheserver.Then,removethenewheatsinkfromthepackage.
Notes:
•Ifyouarereplacingaheatsink,youmustuseacleaningpadthatmightcomewiththenewheatsink
towipethethermalgreasefromthetopofthemicroprocessorbeforeinstallingthenewheatsink.
Disposeofthecleaningpadafterallthermalgreaseisremovedfromthemicroprocessor.
•Whenhandlingtheheatsink,donottouchthethermalgreaseonthebottomofit.
9.Removeanyprotectivecoverthatprotectsthethermalgreaseonthebottomofthenewheatsink.Then,
placethenewheatsinkonthesystemboardsothatthefourscrewsonthenewheatsinkarealigned
withthecorrespondingmountingstudsonthesystemboard.
Chapter6.Installing,removing,orreplacinghardware95

 Loading...


