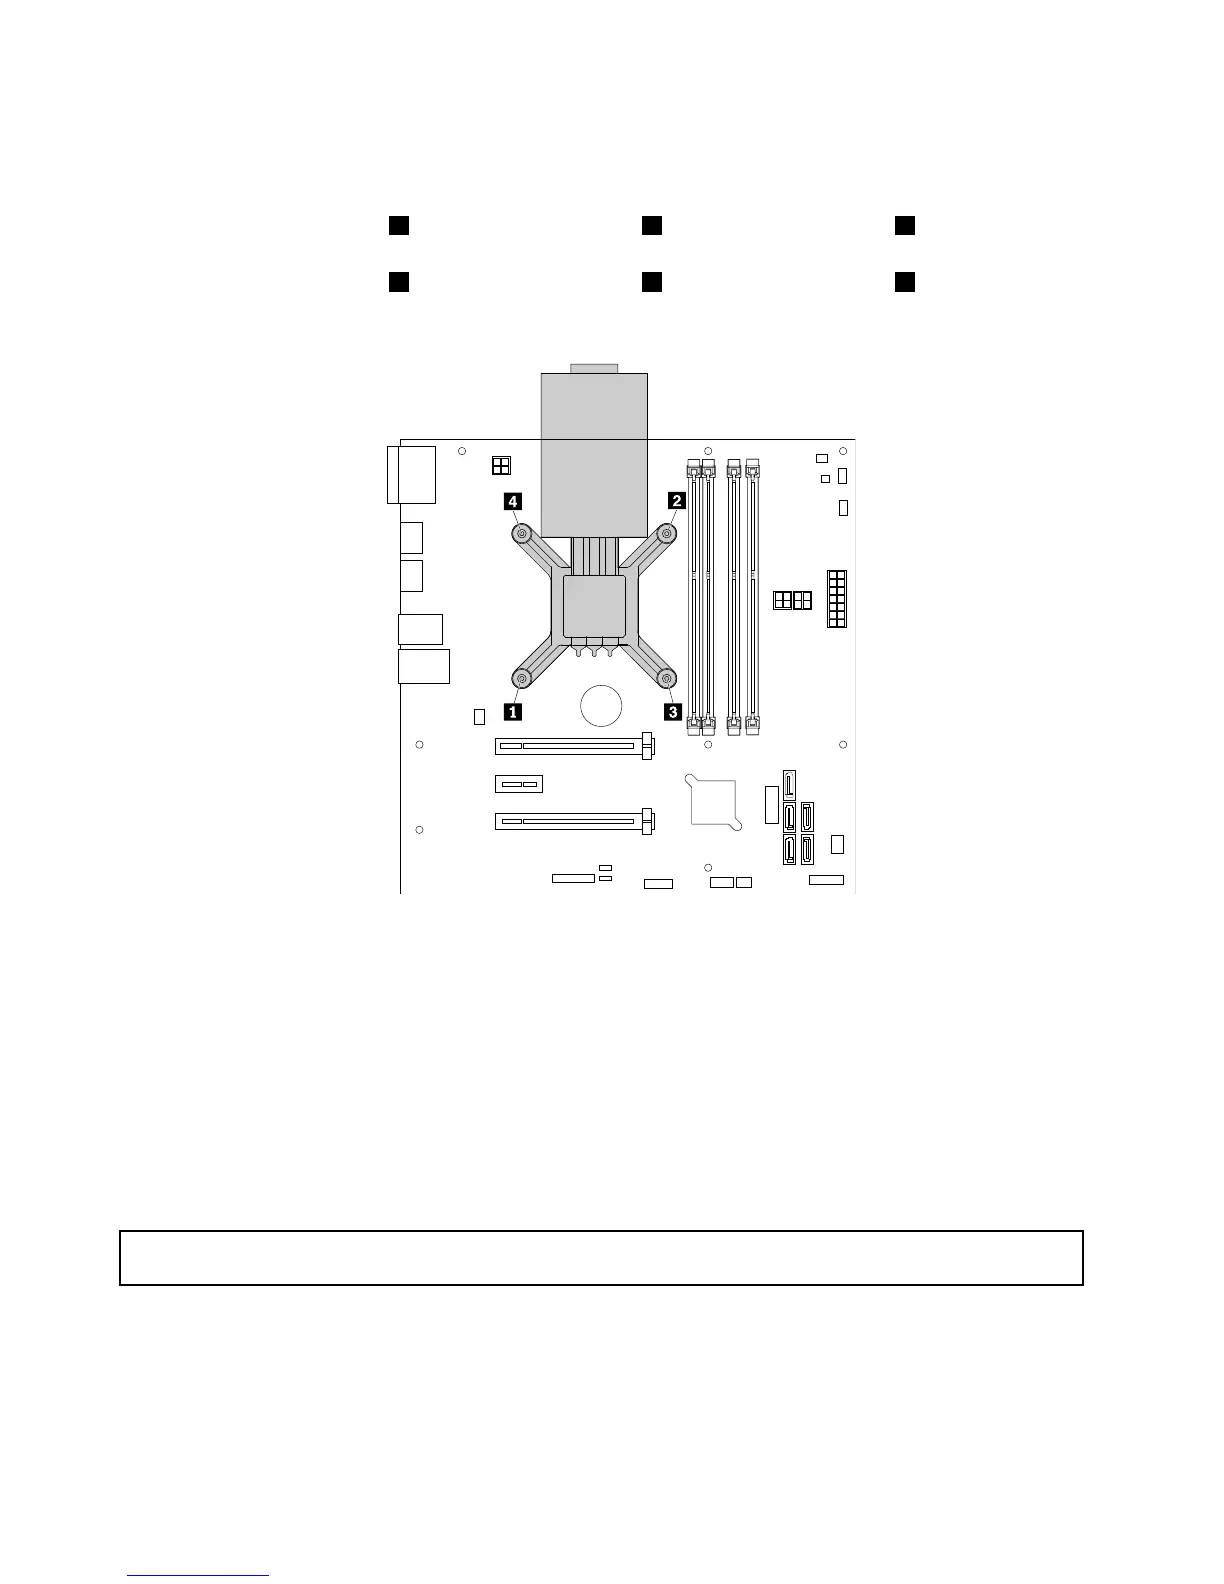
10.Installthefourscrewstosecurethenewheatsinkonthesystemboard.Itisrecommendedthatyou
carefullyinstallthefourscrewsusingthefollowingmethodtoavoidanypossibledamagetothesystem
board.
a.Partiallytightenscrew1,thenfirmlytightenscrew2,andthenreturntoscrew1andfirmlytighten
it.Donotover-tightenthescrews.
b.Partiallytightenscrew3,thenfirmlytightenscrew4,andthenreturntoscrew3andfirmlytighten
it.Donotover-tightenthescrews.
Figure70.Installingthescrewstosecuretheheatsink
11.Reinstallthefanduct.See“Removingandreinstallingthefanduct”onpage57.
12.Ifyouareinstructedtoreturntheoldheatsink,followallpackaginginstructionsanduseanypackaging
materialsthataresuppliedtoyouforshipping.
Whattodonext:
•Toworkwithanotherpieceofhardware,gototheappropriatesection.
•Tocompletethereplacement,goto“Completingthepartsreplacement”onpage106.
Replacingthemicroprocessor
Attention:Donotopenyourserverorattemptanyrepairbeforereadingandunderstanding“Safetyinformation”
onpageiii
and“Guidelines”onpage53.
96ThinkServerRS140UserGuideandHardwareMaintenanceManual

 Loading...


