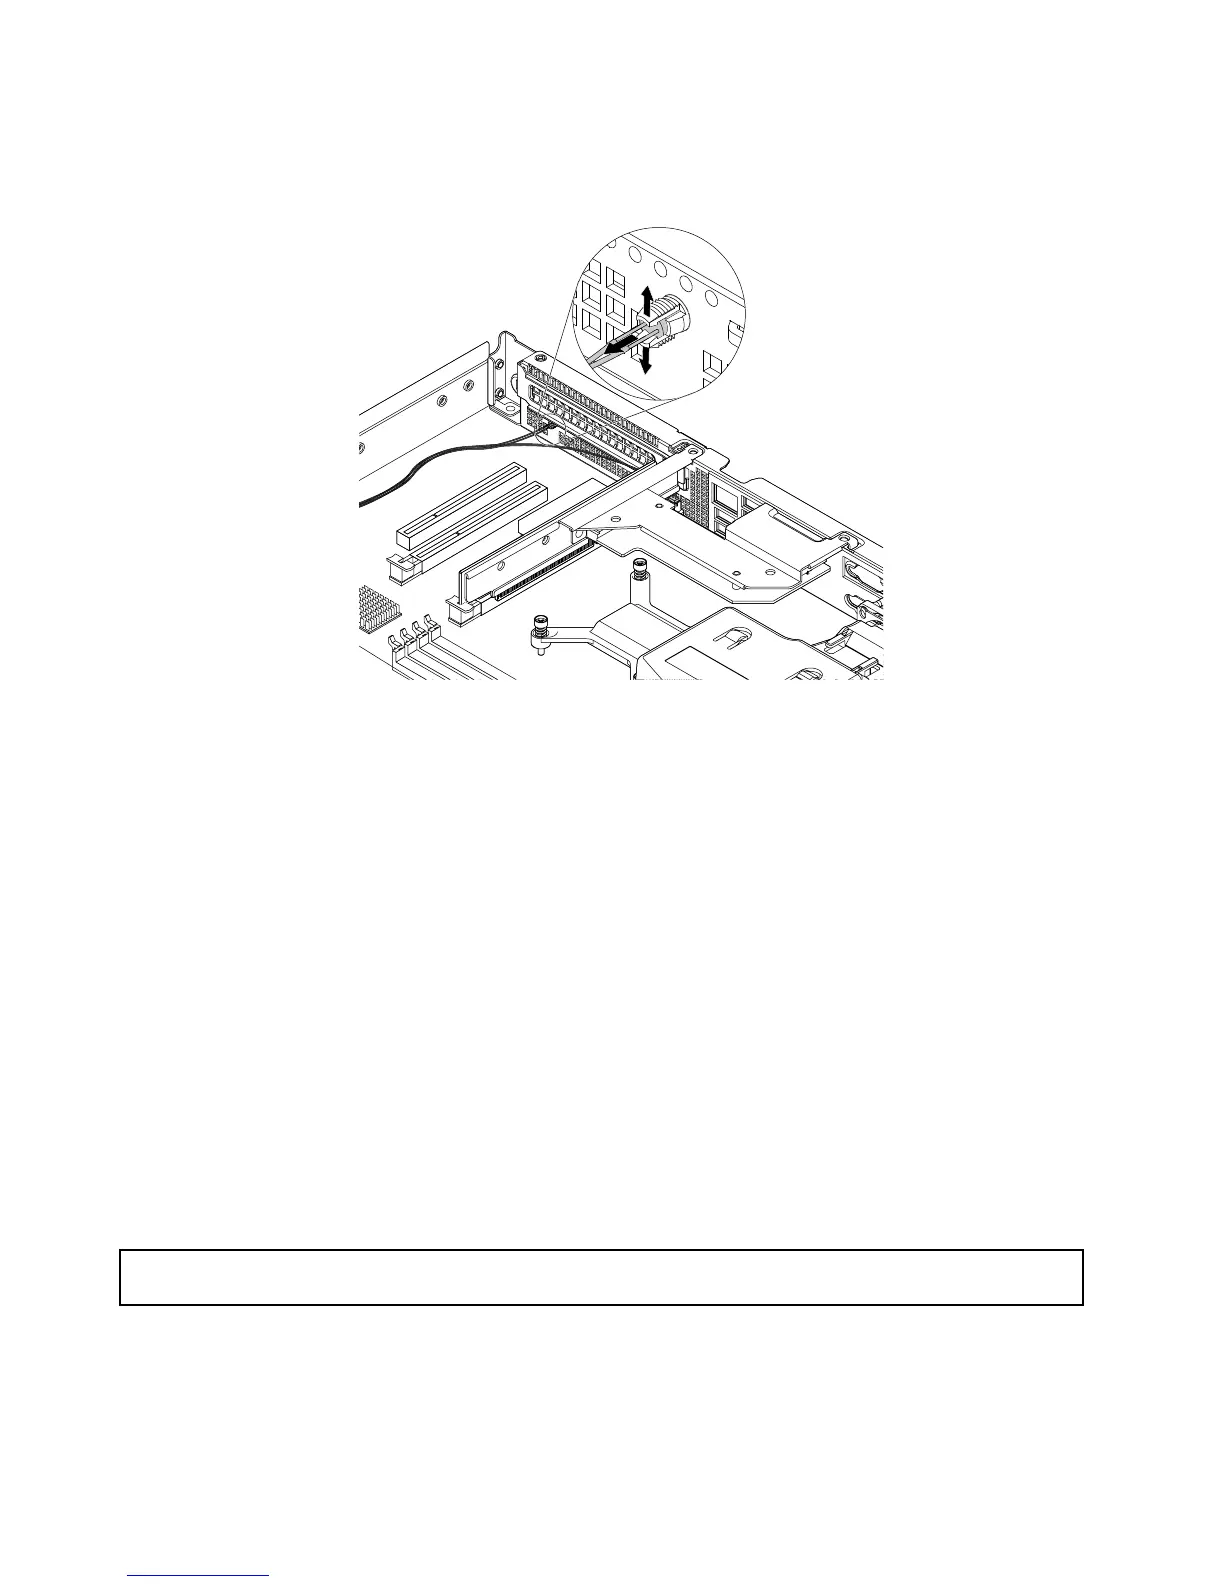
6.LocatetheIDLEDattherearoftheserver.Flexthetwosidesoftheplasticretainingclipthatsecures
theIDLEDandthenremovetheIDLEDfromtheplasticretainingclip.
Figure52.RemovingtheIDLEDfromtheplasticretainingclip
7.Notethecableroutinginthechassis.Then,removetheEthernet-card/ID-LEDcablefromthecable
tiesinthechassis.
8.Removethefrontpanelboardfromtheserver.See“Replacingthefrontpanelboard”onpage90.
9.DisconnecttheEthernet-card/ID-LEDcablefromthefrontpanelboard.
10.ConnectthenewEthernet-card/ID-LEDcabletothefrontpanelboardandthenreinstallthefrontpanel
board.See“Replacingthefrontpanelboard”onpage90.
11.CorrectlyroutethenewEthernet-card/ID-LEDcableandsecurethecablewiththecabletiesinthe
chassis.
12.FlexthetwosidesoftheplasticretainingclipandtheninserttheIDLEDintotheplasticretainingclip
tosecuretheIDLED.
13.ConnecttheEthernet-card/ID-LEDcabletotheEthernetcard.Ifyouhaveremovedtherisercard
assembly,reinstallitintothechassis.See“Replacingtherisercardassembly”onpage75.
Whattodonext:
•Toworkwithanotherpieceofhardware,gototheappropriatesection.
•Tocompletethereplacement,goto“Completingthepartsreplacement”onpage106.
Replacingthepowersupplyassembly
Attention:Donotopenyourserverorattemptanyrepairbeforereadingandunderstanding“Safetyinformation”
onpageiii
and“Guidelines”onpage53.
Althoughtherearenomovingpartsinyourcomputerafterthepowercordhasbeendisconnected,the
followingwarningsarerequiredforyoursafetyandproperUnderwritersLaboratories(UL)certification.
80ThinkServerRS140UserGuideandHardwareMaintenanceManual

 Loading...


