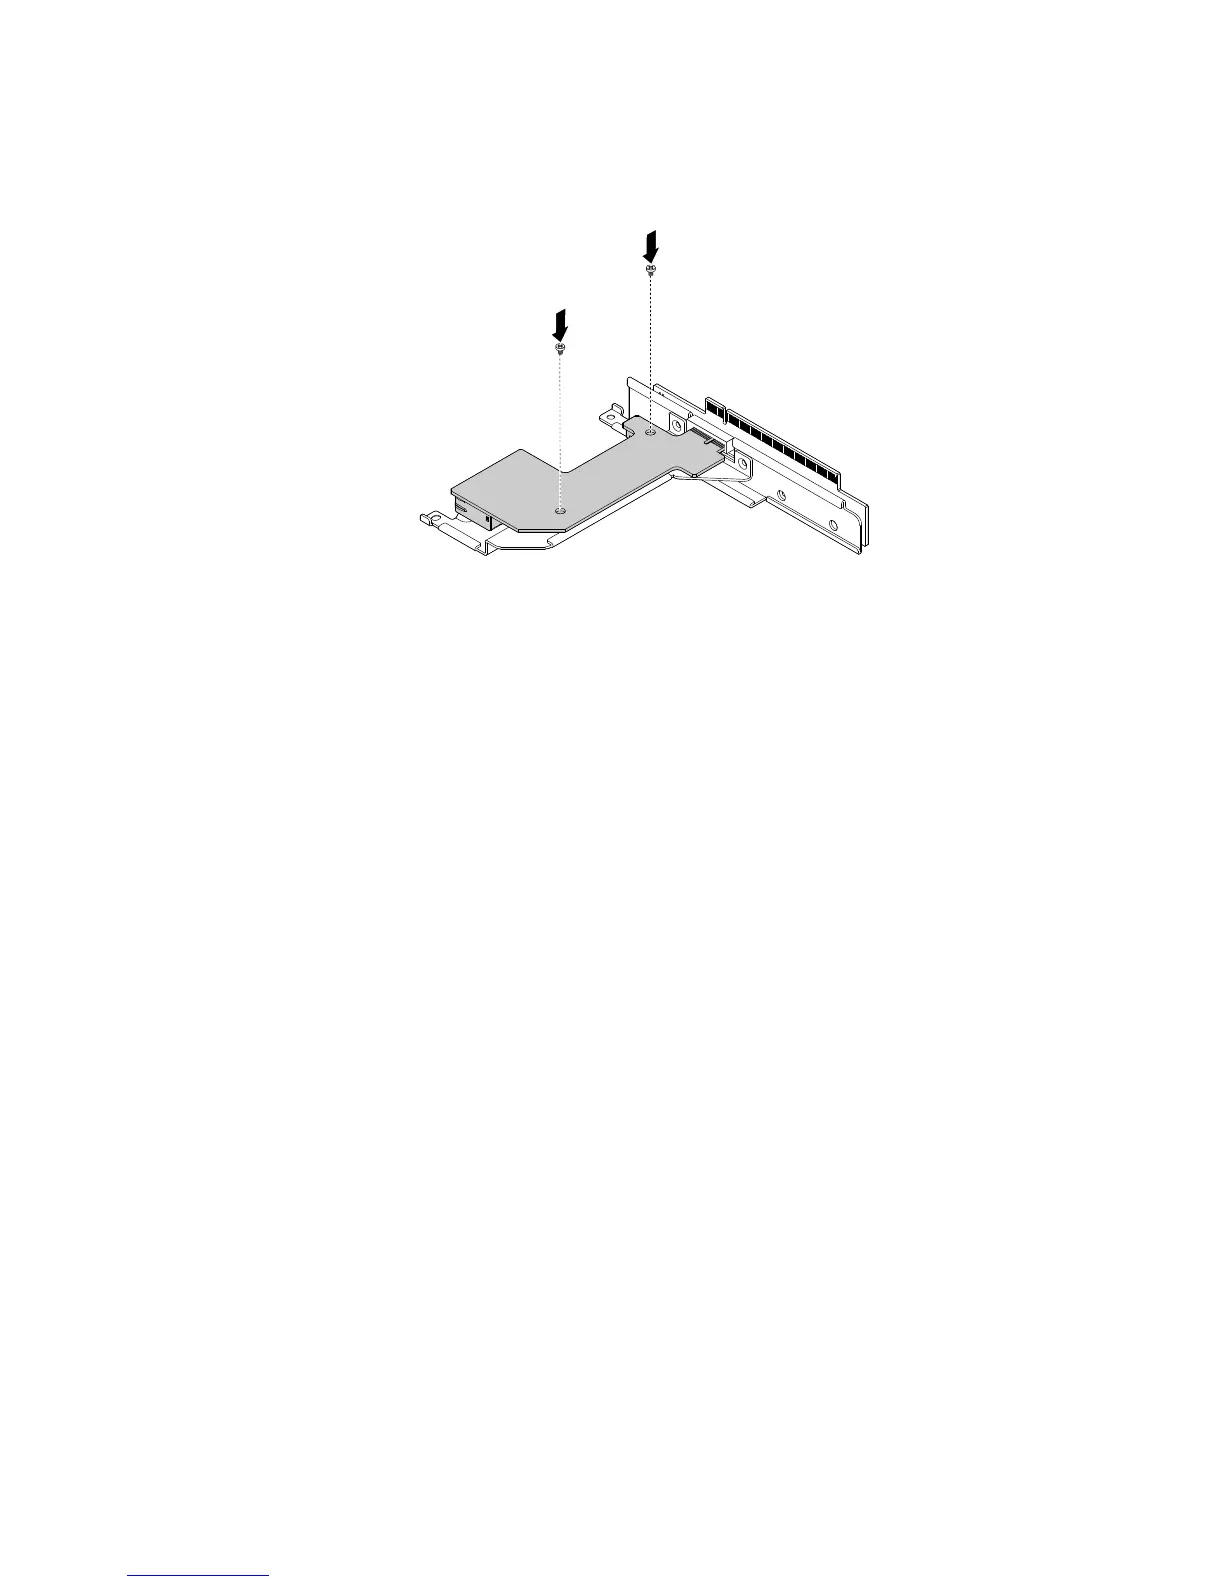
10.AlignthetwoscrewholesinthenewEthernetcardwiththecorrespondingholesintherisercard
assembly.Then,installthetwoscrewstosecurethenewEthernetcard.
Figure51.InstallingthescrewstosecurethenewEthernetcard
11.ConnecttheEthernet-card/ID-LEDcabletothenewEthernetcard.RoutetheEthernet-card/ID-LED
cablefromthebottomoftherisercardassemblytoavoidinterferencewithreinstallingtheservercover.
12.Reinstalltherisercardassembly.See“Replacingtherisercardassembly”onpage75.
13.IfyouareinstructedtoreturntheoldEthernetcard,followallpackaginginstructionsanduseany
packagingmaterialsthataresuppliedtoyouforshipping.
Whattodonext:
•Toworkwithanotherpieceofhardware,gototheappropriatesection.
•Tocompletethereplacement,goto“Completingthepartsreplacement”onpage106.
ReplacingtheEthernet-card/ID-LEDcable
ToreplacetheEthernet-card/ID-LEDcable,dothefollowing:
1.Removeallmediafromthedrivesandturnoffallattacheddevicesandtheserver.Then,disconnectall
powercordsfromelectricaloutletsanddisconnectallcablesthatareconnectedtotheserver.
2.Iftheserverisinstalledinarackcabinet,removetheserverfromtherackcabinetandplaceitonaflat,
clean,andstatic-protectivesurface.
3.Removetheservercover.See“Removingtheservercover”onpage55.
4.LocatetheEthernetcardinyourserver.See“Servercomponents”onpage17.
5.DisconnecttheEthernet-card/ID-LEDcablefromtheEthernetcard.Youmightneedtoremovethe
risercardassemblyforeasieraccesstotheEthernet-card-cableconnector.See“Replacingtheriser
cardassembly”onpage75.
Chapter6.Installing,removing,orreplacinghardware79

 Loading...


