•Useanydocumentationthatcomeswiththenewopticaldriveandfollowthoseinstructionsinadditionto
theinstructionsinthistopic.
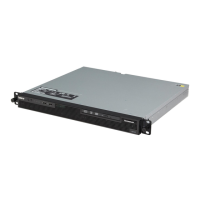
Toremovetheslimopticaldrive,dothefollowing:
1.Removeallmediafromthedrivesandturnoffallattacheddevicesandtheserver.Then,disconnectall
powercordsfromelectricaloutletsanddisconnectallcablesthatareconnectedtotheserver.
2.Iftheserverisinstalledinarackcabinet,removetheserverfromtherackcabinetandplaceitonaflat,
clean,andstatic-protectivesurface.
3.Removetheservercover.See“Removingtheservercover”onpage55.
4.Locatetheslimopticaldrive.See“Servercomponents”onpage17.
5.Disconnectthecablesfromtherearoftheslimopticaldrive.
6.Loosenthethumbscrew1thatsecurestheslim-optical-driveretainerandthenremovetheretainerfrom
thechassis.Slidetheslimopticaldriveoutofthefrontoftheserver.
Note:Thethumbscrewisanintegratedpartoftheslim-optical-driveretainer.Donottrytoremovethe
thumbscrewfromtheretainer.
Figure45.Removingtheslimopticaldrive
7.Ifyouwanttoinstallanewslimopticaldrive,see“Installingtheslimopticaldrive”onpage71.
8.Ifyouareinstructedtoreturntheoldopticaldrive,followallpackaginginstructionsanduseany
packagingmaterialsthataresuppliedtoyouforshipping.
Whattodonext:
•Toworkwithanotherpieceofhardware,gototheappropriatesection.
•Tocompletetheremovalprocedure,goto“Completingthepartsreplacement”onpage106.
Replacingtherisercardassembly
Attention:Donotopenyourserverorattemptanyrepairbeforereadingandunderstanding“Safetyinformation”
onpageiii
and“Guidelines”onpage53.
Beforeyoubegin,printalltherelatedinstructionsorensurethatyoucanviewthePDFversiononanother
computerforreference.
Toreplacetherisercardassembly,dothefollowing:
Chapter6.Installing,removing,orreplacinghardware75

 Loading...


