EasyManuals Logo

Lexmark E260dn Series User Manual

Lexmark E260dn Series
156 pages
To Next Page IconTo Next Page
To Previous Page IconTo Previous Page
Page #119 background imageLoading...
Page #119 background image
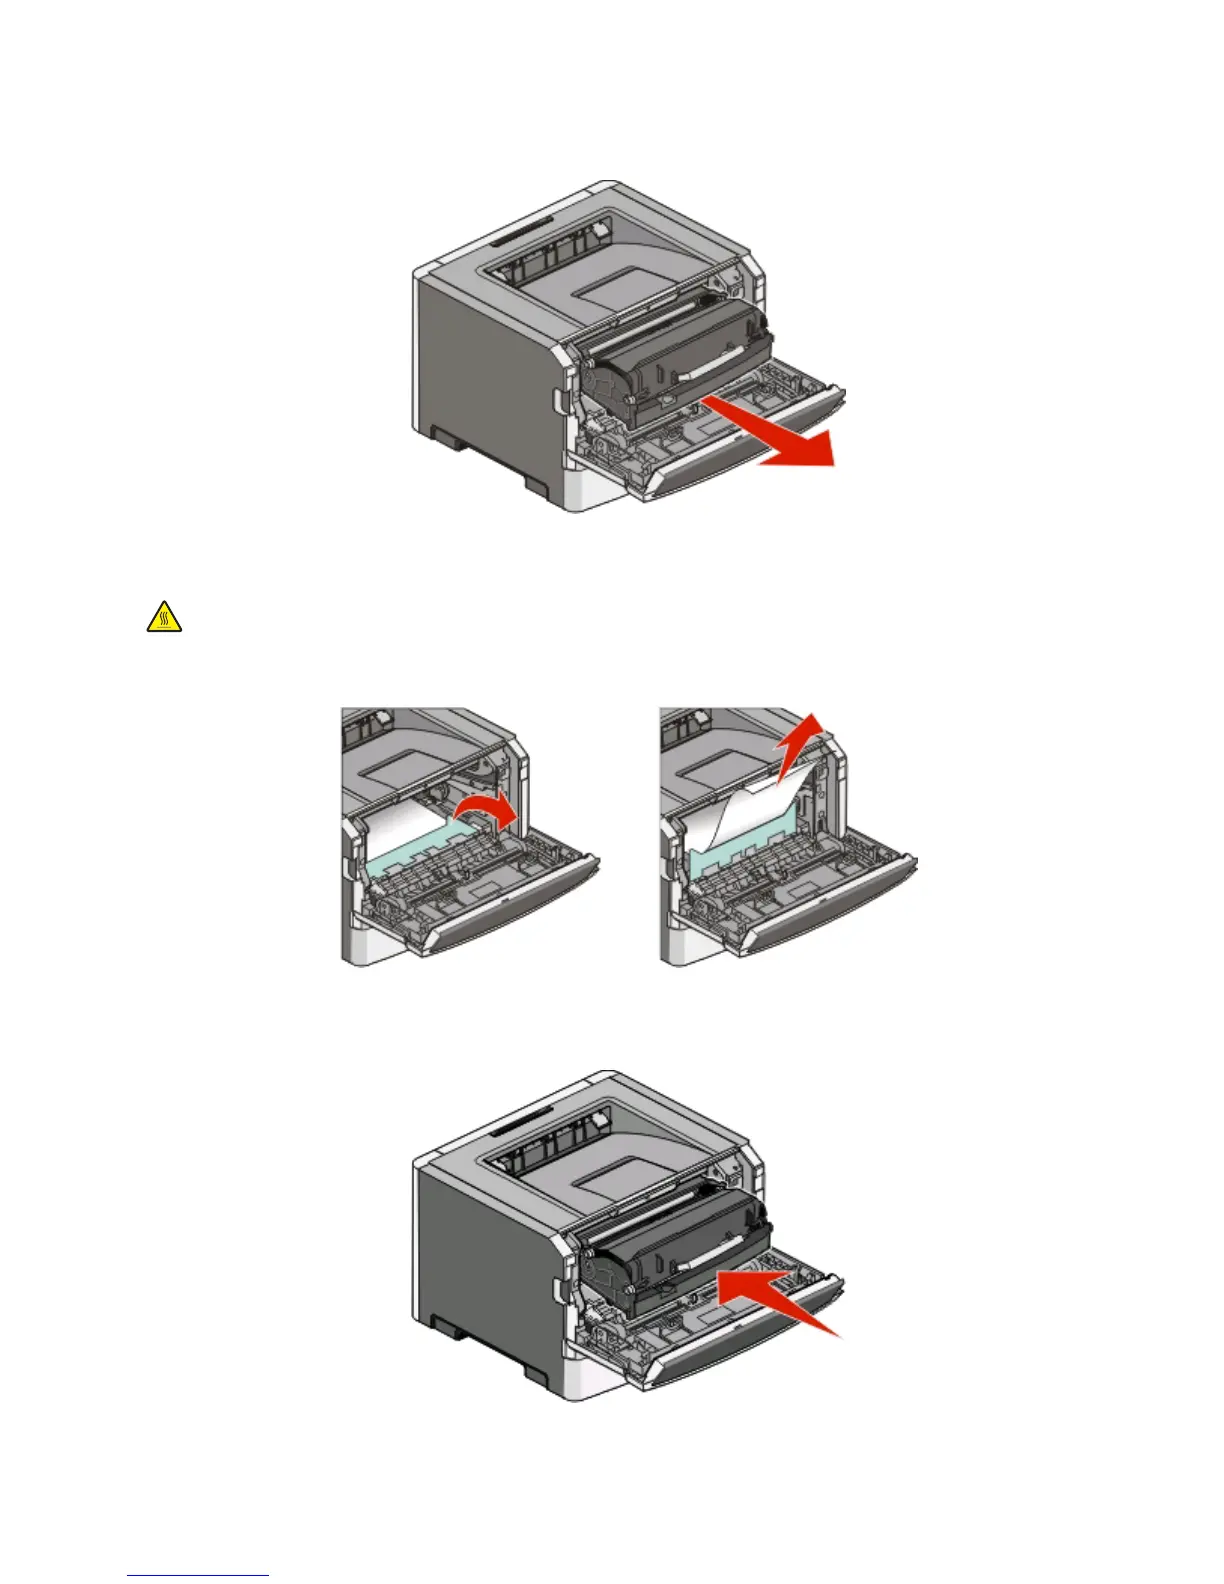
2 Lift and pull the unit containing the photoconductor kit and the toner cartridge out of the printer. Set the unit
aside on a flat, clean surface.
Warning—Potential Damage: Do not touch the photoconductor on the underside of the photoconductor kit.
Use the cartridge handle whenever you are holding the cartridge.
CAUTION—HOT SURFACE: The fuser and the inside of the printer near the fuser may be hot. To reduce the
risk of injury from a hot component, allow the surface to cool before removing paper from this area.
3 Remove the jammed paper.
Note: If the paper is not easy to remove, then open the rear door to remove the paper.
4 Align and reinstall the unit.
Clearing jams
119

Table of Contents

Other manuals for Lexmark E260dn Series

Questions and Answers:

Question and Answer IconNeed help?

Do you have a question about the Lexmark E260dn Series and is the answer not in the manual?

Lexmark E260dn Series Specifications

General IconGeneral
Print TechnologyMonochrome Laser
Duplex PrintingStandard
Paper Input Capacity250 sheets
Paper Output Capacity150 sheets
Resolution1200 x 1200 dpi
Memory32 MB
ConnectivityUSB 2.0, Ethernet
Media Sizes SupportedA4, A5, A6, Executive, Letter, Legal, Statement, Universal
Media Types SupportedPlain Paper, Card Stock, Transparencies, Envelopes, Paper Labels
Operating System CompatibilityMicrosoft Windows, Apple Mac OS, Linux
Dimensions378 x 391 x 259 mm
Weight14.0 kg
Recommended Monthly Page Volume250 - 2, 500 pages

Related product manuals