3 Remove any packing material and tape from inside the tray.
4 Insert the tray into the support unit.
5 Place the drawer in the location chosen for the printer.
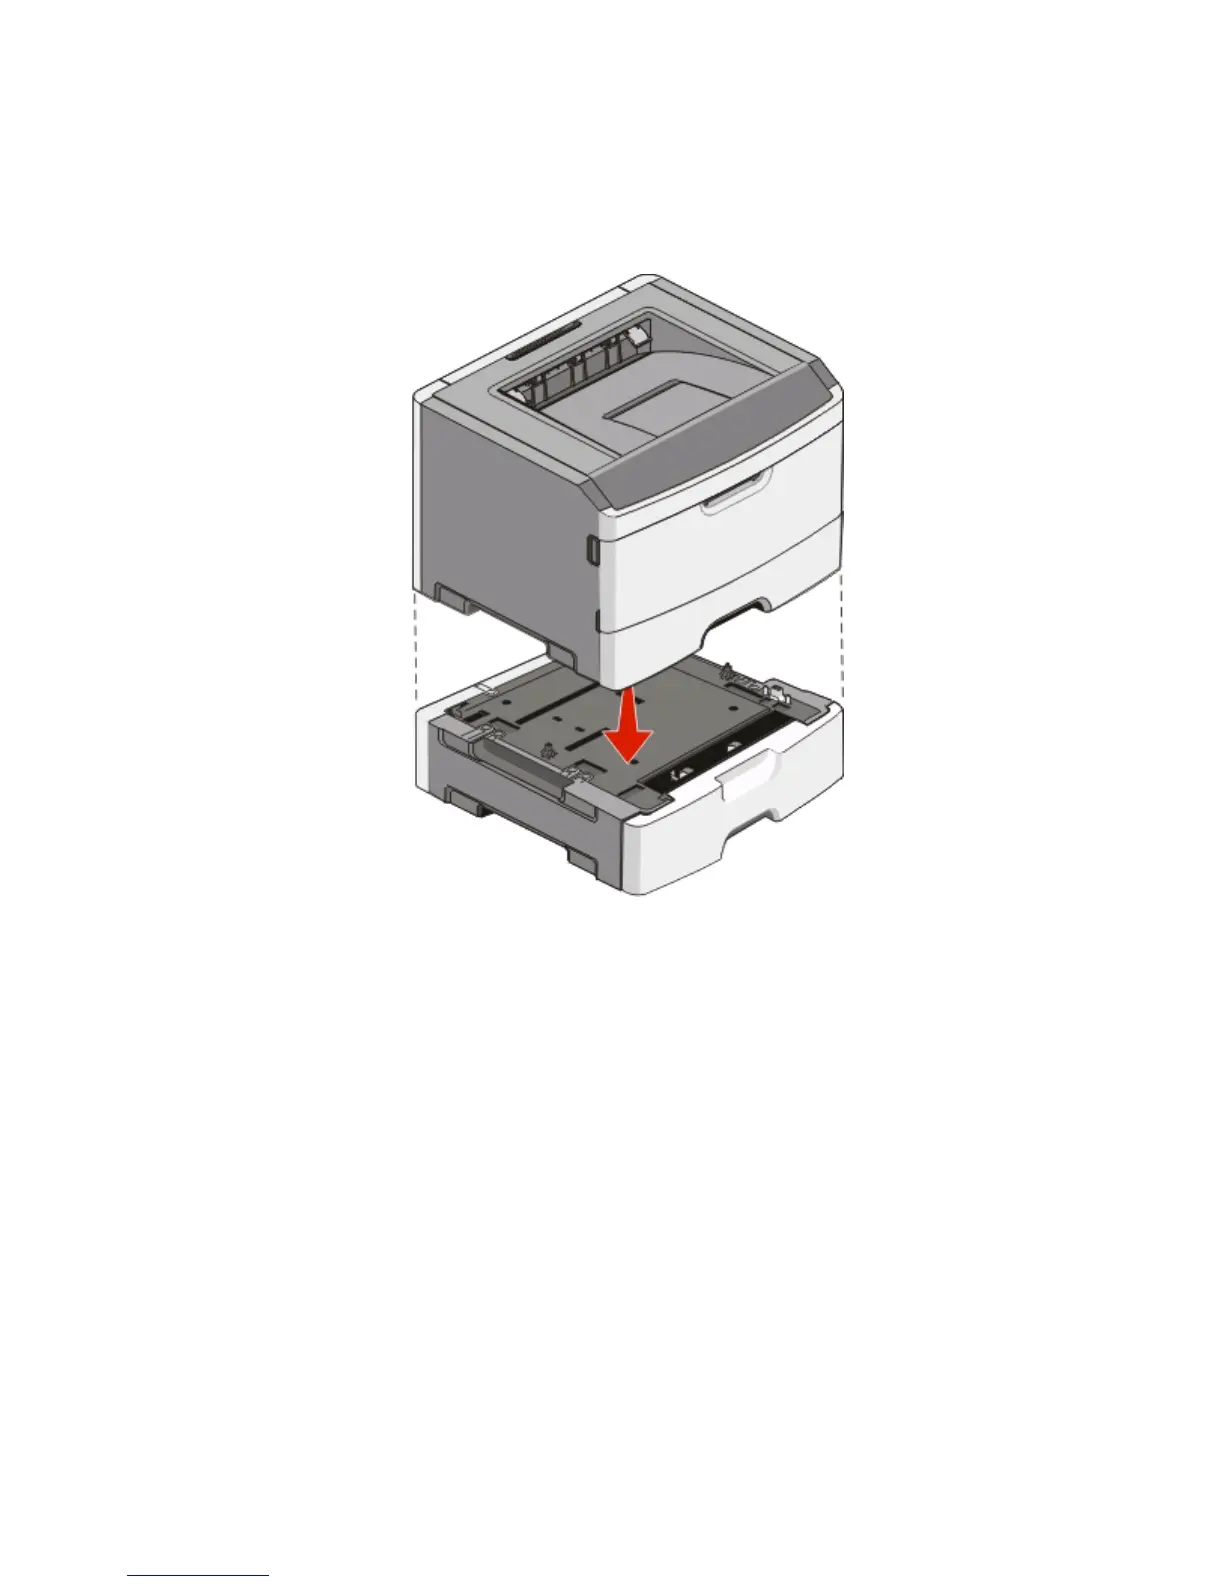
6 Align the printer with the drawer, and then lower the printer into place.
Attaching cables
1 Connect the printer to a computer or a network.
• For a local connection, use a USB or parallel cable.
• For a network connection, use an Ethernet cable.
2 Connect the power cord to the printer first and then to a wall outlet.
Additional printer setup
18