This document is a service manual for an LG LED monitor, specifically models 38WN75C, 38WN75C-BK, 38BN75C, and 38BN75C-BK, all sharing the LM61A chassis. It provides essential information for servicing the device, including safety precautions, specifications, troubleshooting, and disassembly instructions.
Function Description
The device is an LG LED monitor, designed for display purposes. It processes display, audio, and control signals, and includes features for various input sources and user interactions. The monitor supports high-resolution video and audio output, making it suitable for a range of applications from general computing to multimedia consumption.
Important Technical Specifications
General Specifications:
- Customer: BRAND: LGE Product
- User Model Name: 38WN75C
- Sale Region: Worldwide
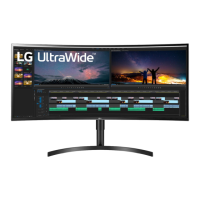
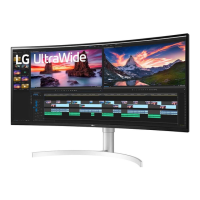
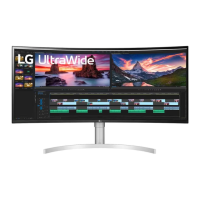
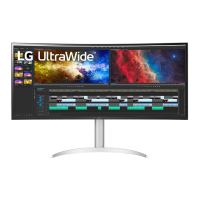
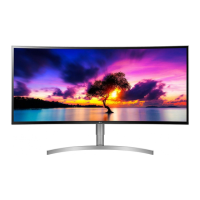
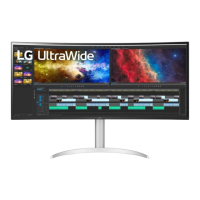
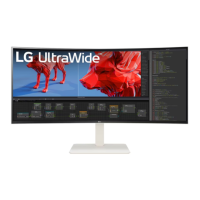
- Feature: 38" LCD MONITOR (21:9 2300R Curved WQHD+)
- Chassis Name: LM95A (PCB, Product spec., Adjustment spec.)
- External SW & Adj.: Joystick switch (Up / Down / Left / Right / OK (Power) - Press and Hold: Power off)
- Function: Picture Mode, Ratio, S.E.S, Six Color, On Screen Control, Dual Controller, Factory calibration
- HDMI IN: HDMI1,2 (2.0)
- DP IN: Display Port (1.4)
- USB Up/DN: N/A (Up to 5V 0.9A DC for USB DN)
- H/P OUT: Audio L/R
- Power Cord: Length: 1.55±0.05m; Weight: 0.17kg ± 10%; Color: Black
- DisplayPort Cable: Length: N/A; Weight: N/A; Color: N/A
- HDMI Cable: Length: 1.50m ± 0.05m; Weight: 0.09kg ± 10%; Color: Black; Impedance: 1)CABLE: 100Ω±5Ω, 2)CONNECTOR: 100Ω±10Ω
- Power (Adapter / PSU /LPB): Input: 100-240V~50/60Hz; Output: DC 19V 3.42A 65W Adapter; Color: Black, Weight: 0.4kg±10%, without vinyl bag
- Power Rating: 19V,3.0
- Applying module list: EAJ63749901 LM340UW3-SSA1 WQHD 34INCH 3440X1440 (LG Display)
Signal Timing (Resolution):
The monitor supports various resolutions and refresh rates, including:
- 640 x 480 (25.175 MHz, 59.94 Hz)
- 800 x 600 (40.0 MHz, 60.317 Hz)
- 1024 x 768 (65.0 MHz, 60.0 Hz)
- 1152 x 864 (79.99 MHz, 60.05 Hz)
- 1280 x 720 (74.25 MHz, 60.0 Hz)
- 1280 x 800 (83.5 MHz, 59.810 Hz)
- 1280 x 1024 (108.0 MHz, 60.02 Hz)
- 1600 x 900 (146.25 MHz, 60.0 Hz)
- 1680 x 1050 (148.50 MHz, 59.954 Hz)
- 1920 x 1080 (174.50 MHz, 60.0 Hz)
- 3840 x 1600 (194.75 MHz, 29.998 Hz)
- 3840 x 1600 (327.50 MHz, 49.985 Hz)
- 3840 x 1600 (395.00 MHz, 59.994 Hz)
HDMI Video Input:
- 480P: 31.5 KHz, 60 Hz
- 720P: 45 KHz, 60 Hz
- 1080P: 67.5 KHz, 60 Hz
- 2160P: 135 KHz, 60 Hz
Internal Components (Troubleshooting Guide):
- MAIN IC (IC200): Processes display/audio signal/control signal.
- DC-DC Converter (IC402, IC403, IC404, IC600, IC601, IC901, IC902, IC903, IC904): Converts 19V to proper voltage according to IC spec.
- Serial flash memory (IC202): Stores monitor firmware.
- LED driver IC (IC600, IC601): Supports proper voltage and current according to BLU spec.
- Headphone AMP (IC503): Amplifies audio signal from Main IC and provides it to the H/P interface.
- USB-C PD Controller (IC801): Sets the signal from USB-C input and communicates with the Source Device.
- Mux IC (IC800): Separates DP and USB signals from USB-C input, controlled by the PD controller.
- USB Hub IC (IC701): Functions as a HUB to the PC, connecting via USB-C/C or USB-C/A cable.
Usage Features
The monitor offers a curved WQHD+ display with a 21:9 aspect ratio and 2300R curvature, providing an immersive viewing experience. It includes a joystick switch for intuitive navigation of on-screen menus and controls, allowing users to adjust picture mode, ratio, and other settings. The monitor supports multiple input sources, including HDMI and DisplayPort, and features USB-C connectivity for power delivery and data transfer. The "Dual Controller" feature enhances productivity by allowing control of multiple devices.
Maintenance Features
Safety Precautions:
- Important Safety Notice: Many electrical and mechanical parts have special safety-related characteristics, identified by a triangle symbol in the Exploded View. These parts must be replaced with recommended components to prevent shock, fire, or other hazards. Modifications to the original design are prohibited without manufacturer permission.
- General Guidance: An isolation transformer should always be used during servicing to protect technicians from electrical shocks and prevent damage to the receiver. Blown fuses or fusible resistors must be replaced with specified components. High wattage resistors (over 1W) should be kept 10mm away from the PCB. Wires must be kept away from high voltage or high-temperature parts.
- AC Leakage Current Check: Before returning the receiver to the customer, an AC leakage current check must be performed on exposed metallic parts (antennas, terminals, etc.) to ensure safe operation.
- Cold Check: With the AC plug removed, connect an electrical jumper across the AC plug prongs. Place the AC switch in the on position. Connect one lead of an ohm-meter to the tied AC plug prongs and touch other exposed metallic parts. Resistance should be between 1 MΩ and 5.2 MΩ if a return path to the chassis exists; otherwise, it should be infinite.
- Hot Check: Plug the AC cord directly into the AC outlet (without an isolation transformer). Connect a 1.5 K / 10 watt resistor in parallel with a 0.15 uF capacitor between a known good earth ground and the exposed metallic parts. Measure the AC voltage across the resistor using an AC voltmeter (1000 ohms/volt or more sensitivity). Reverse the AC plug and repeat measurements. Any voltage measured must not exceed 0.75 volt RMS (0.5 mA). If measurements are out of limits, the set must be repaired before return.
- Ground Resistance: When 25A is impressed between Earth and 2nd Ground for 1 second, Resistance must be less than 0.1 (based on Adjustment standard).
Disassembly:
The manual provides detailed steps for disassembling the monitor:
- Preparation: Use a preparation tool (jig) and a curved PAD to protect the monitor during disassembly.
- Stand Assembly Separation: Lay the set on the curved PAD. Disassemble the stand by pulling the button down.
- Back Cover Removal: Disassemble the thumb screw, remove four screws, and then use a jig to carefully disassemble the back cover.
- Internal Connections: Disconnect the LED Cable, Control Assemble (Latch Type), Bluetooth PCB cable, FFC cable, and Speaker.
- Screw Removal: Remove four screws, then remove eighteen additional screws to further disassemble the unit.
Firmware Download Method:
The monitor's firmware can be updated using two methods:
-
ISP Method (via PC):
- Requirements: ISP_Tool V4.5.1.9.8.exe (Mstar) and a PC.
- Step 1: Connect the monitor to the PC using an HDMI cable (to HDMI1 port) and a USB cable (Type A to Type B).
- Step 3: Install the Mstar ISP USB driver. If the driver doesn't install automatically, ensure an internet connection and Windows updates are functioning.
- Step 4: Verify the installed driver in Device Manager, looking for "USB Serial Port."
- Step 5: Execute ISP_Tool V4.5.1.9.8.exe after extracting the zip file.
- Step 6: Click "Connect" in the ISP Tool. A pop-up "Device Type is MX25L8005" should appear, indicating successful communication.
- Step 7: Click "Read" to open the FW file. Ensure the checksum (E3AD) matches the file name.
- Step 8: Click "Auto," then select the "File Area" of the erase device to maintain system and factory calibration data. Finally, click "Run" to start the firmware update.
-
USB Memory Storage Method (SVC USB port):
- Preparation:
- Prepare a USB memory stick (not an external HDD) formatted as NTFS, FAT, or FAT32.
- Create a folder named "LG_MNT" on the USB stick (e.g., E:\LG_MNT).
- Copy the monitor FW file (e.g., UC99_MST9U11Q1_MSTAR_V3.XX_XXXX_revXXXX_16XXXX.bin) into the "LG_MNT" folder.
- Remove the plastic cover marked "DO NOT USE" on the monitor's rear.
- Insert the USB memory stick into the USB 2.0 port.
- Customer Condition Update: If the USB FW version is higher than the current monitor version, the update will proceed. Users can choose to perform the update.
- Factory Condition Update (Aging On): The monitor automatically searches for the highest FW version in the "LG_MNT" folder and performs the update regardless of the current version.
- Completion: The monitor will automatically turn off/on after 3 seconds once the update is complete.
- Troubleshooting:
- If power turns off during FW update: Remove and reconnect the power cable after inserting the USB stick with FW. The monitor will automatically recover after 40 seconds.
- If power turns off during PD FW update (under 50% progress): The update will resume from the beginning percentage after turning on the power.