Do you have a question about the LG F1403TD Series and is the answer not in the manual?
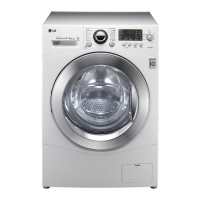
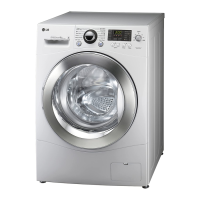
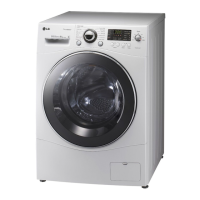
Details key features: Direct Drive, Water Circulation, Built-in Heater, Child Lock, Intelligent Wash System, Low noise, Aqua lock, Steam Wash, Auto Load Detection.
Explains how washing time is determined by sensing water temperature, selected temperature, and laundry amount using Fuzzy Logic.
Describes the water level control system using a pressure sensor and how water supply is managed.
Specifies conditions when the washing machine door cannot be opened (during operation or when Door Lock light is on).
Instructions on how to connect the inlet hose, checking for leaks and rubber packing.
Guidance on connecting the drain hose, ensuring it's not twisted and avoiding submerging the end.
Instructions for connecting the power plug to the wall outlet and avoiding overloading circuits.
Details on rotating the Cycle selector knob to choose cycles for different fabrics and soil levels.
Instructions on using the Power button to turn the washer On/Off.
Instructions on using the Start/Pause button to start or stop the washer.
Explains the use of option buttons like Pre Wash, Soak, Crease Care, and Rinse + Spin.
Describes additional programs like Time Delay, Steam Wash, Intensive, and Medic Rinse.
Explains the LED display for estimated time, error indications, and troubleshooting references.
How to change spin speed using the Spin knob to select available options.
How to set the Tub Clean course and its purpose for cleaning the washer's interior.
How to select water temperature and rinse type using the Rinse and Temp. buttons.
How to set the Beep on/off function by pressing and holding Option and Rinse buttons.
Instructions to prevent unwanted use by pressing and holding Crease Care and Medic Rinse buttons to lock/unlock.
Precautions regarding electric shock and checking voltages before servicing.
Detailed procedure for entering and using the QC Test Mode, including check points and display status.
Method to check water level frequency by pressing Intensive and Option buttons simultaneously.
Lists common error codes (IE, DE, FE, PE, UE, LE, AE, PF) with their symptoms and causes.
Troubleshooting guide for abnormal operations like 'NO POWER' and 'WATER INLET TROUBLE', with step-by-step checks.
Troubleshooting for door not opening or error displayed, including checks for door switch and opening status.
Troubleshooting for drain issues, checking debris filter, drain hose condition, and error display 'DE'.
Guidance for 'POWER FAILURE' symptom, suggesting to restart the cycle.
Troubleshooting for suds overflow, checking detergent type and amount, and the appliance's suds sensing function.
Troubleshooting for softener issues, checking compartment, drawer closure, and softener cap clogging.
Detailed fault diagnosis for 'NO POWER', involving checks on outlet voltage, fuse, LED status, and connector/wire connections.
Troubleshooting for 'NO WATER SUPPLY', including checks on tap, water level frequency, inlet valve filter, and valve resistance.
Diagnosis for 'DETERGENT DOES NOT FLOW IN', covering water supply, receptacle connection, and detergent placement/condition.
Troubleshooting for 'SOFTENER DOES NOT FLOW IN', checking water supply, receptacle connection, and softener placement/clogging.
Diagnosis for 'ABNORMAL SOUND', involving checks on motor bolt tightness and friction noise from the motor.
Troubleshooting for 'HEATING WITHOUT WATER', checking water level frequency and voltage to the heating components.
Diagnosis for 'DRAIN MALFUNCTIONING', including checks on drain hose, pump impeller, connectors, and drain pump coil resistance.
Troubleshooting for 'WASH HEATER TROUBLE', checking voltage, resistance of wire connectors, and heater assembly.
Diagnosis for continuous heating above set temperature, checking temperature display and thermistor resistance.
Troubleshooting for spin issues, checking water level frequency, motor connectors, and resistance.
Troubleshooting for drain trouble, checking latch hook spring, door switch assembly, and clicking sounds.
Step-by-step instructions for disassembling the control panel, including top plate, drawer panel, and main control panel.
Instructions for disassembling the PWB assembly (Display) from the PWB insulator.
Instructions for disassembling the PWB assembly (Main), including back cover, connectors, and wiring.
Steps to disassemble the PWB assembly (Power), covering top plate, cover removal, and connector disconnection.
Instructions for disassembling the dispenser assembly, including top plate, drawer, and hose clamps.
Procedure for disconnecting the wiring connector and removing the inlet valve using screws. Includes connector color coding.
Steps to open the door completely and remove it by unscrewing hinges, noting the need to hold the bracket.
Method for removing residual water by pulling out the hose and preparing a bucket.
Instructions for disassembling the cabinet cover, including top plate, drawer, control panel, lower cover, and screws.
Instructions on lifting and separating the cabinet cover, with a note on connecting the Door S/W connector during reassembly.
Steps to remove cabinet cover clamp, release gasket, unscrew, and disconnect the Door Lock S/W wiring.
Steps to remove the TSG housing, connectors, hoses, earth screw, and the TSG screw itself.
Instructions for removing the back cover, rotor, stator bolts, connectors, and friction damper hinges.
Steps for removing the pump, including outlet hose, bellows, cap, wiring, screws, and the pump itself.
Instructions for removing the washing heater by loosening the nut and pulling it out, with a caution for reassembly.
Procedure to remove washing heater and foreign objects stuck between the drum and tub using a long bar.
Steps to unscrew the back cover, disconnect wiring, and turn the safety switch assembly.
Exploded view and part list for the cabinet assembly, showing various components labeled with part numbers.
Exploded view of the control panel and dispenser assembly, detailing individual components with part numbers.
Exploded view of the drum and tub assembly, showing components like the drum, tub, motor, suspension, and heating elements with part numbers.
| Washing Capacity | 8 kg |
|---|---|
| Maximum Spin Speed | 1400 RPM |
| Energy Efficiency Class | A+++ |
| Noise Level Washing | 54 dB |
| Capacity | 8 kg |
| Energy Rating | A+++ |
| Dimensions (WxDxH) | 600 x 550 x 850 mm |
| Weight | 62 kg |
| Color | White |
| Inverter Motor | Yes |
| Smart Function | No |
| Type | Front Load Washer |
| Load Type | Front |
| Water Consumption | 56 liters |