32
Single Zone High Efciency, Standard, Extended Pipe and Mega Wall Mount Installation Manual
Due to our policy of continuous product innovation, some specifications may change without notification.
©LG Electronics U.S.A., Inc., Englewood Cliffs, NJ. All rights reserved. “LG” is a registered trademark of LG Corp.
GENERAL INSTALLATION GUIDELINES
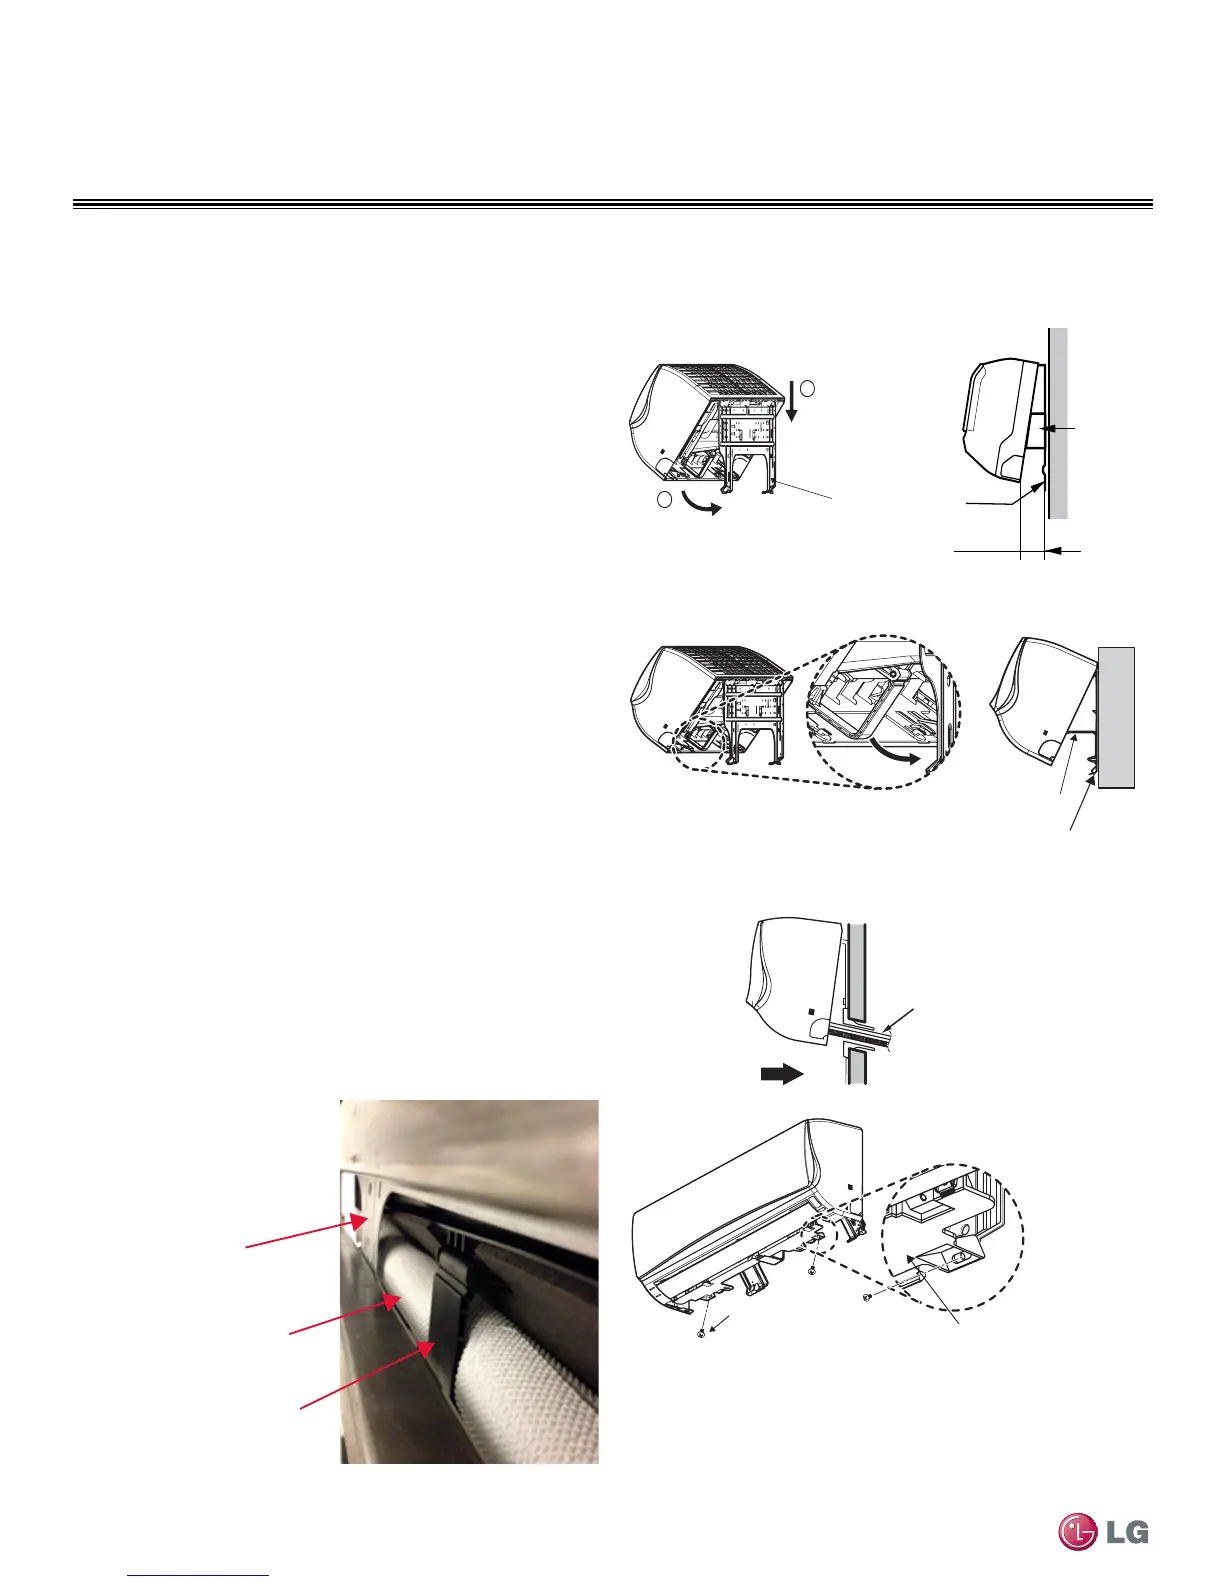
Mounting the Indoor Unit to the Installation Plate
Installation plate
Indoor unit
3”
Spacer
1
2
1. Hook the indoor unit onto the upper portion of the installation
plate ((1) Figure 21).
2. Engage the hooks at the top of the indoor unit with the upper
edge of the installation plate.
• Ensure that the hooks are properly seated on the installation plate
by moving it left and right.
3. Move the bottom of indoor unit towards the installation plate to
anchor to wall ((2) Figure 21).
• It helps to press the lower left and right sides of the unit against the
installation plate until the hooks engage into their slots.
• You will hear a clicking sound as the bottom attaches to the instal-
lation plate successfully.
4. Finish by inserting and tightening two type “C” screws into the
bottom of the installation plate (Figure 23).
• Pay attention to the positioning of the piping through any wall as
shown in the figure, as you insert the screws to the indoor unit.
Preparing for Piping/ Electrical Connection
1. To prepare indoor unit for piping, disengage bottom on indoor unit
from installation plate by reversing step 3 from previous
procedure.
• This step will separate the indoor unit’s bottom side from the wall
mount in order to route drain hose correctly. See Figure 24 for a
reference of the rear view of the indoor unit.
2. Swing drain hose holder (L-bracket) out and anchor as shown in
Figure 22, against installation plate.
3. Optionally, go to Refrigerant Piping Connections section
of this manual to continue with piping connections to the indoor
unit.
4. Optionally, go to Electrical Connections section of this manual to
continue with conduit/electrical wiring to the indoor unit.
Figure 21: Mounting Unit on Installation Plate
Figure 22: Mounting Unit on Installation Plate
Figure 23: Mounting Bottom of Unit to Installation Plate
Figure 24: Rear View of IDU
side of the indoor unit from the wall .
Installation Plate
Drain Hose
Holder
L-bracket
Type 'C' Screws
Bottom of
Indoor Unit
Indoor Unit
Piping
Through
Wall
Installation Plate
Drain Hose
Drain Hose Holder
Mounting of Indoor Unit
 Loading...