58
Single Zone High Efciency, Standard, Extended Pipe and Mega Wall Mount Installation Manual
Due to our policy of continuous product innovation, some specifications may change without notification.
©LG Electronics U.S.A., Inc., Englewood Cliffs, NJ. All rights reserved. “LG” is a registered trademark of LG Corp.
REFRIGERANT PIPING CONNECTIONS
Air Purging
Air Purging Best Practices
Air purging is done to the piping system after all piping has been connected between the indoor and outdoor unit. This step is necessary to
be sure that air refrigerant can flow through the system without danger of leakage or pressure issues. Air and moisture that is left in the pip-
ing can lead to undesirable results and can cause damage to the working unit. It is important to go through a complete air purging cycle to be
sure that the lines are cleared out. Note that you may have to repeat this process should any air or moisture be found to remain in the piping.
After air purging and evacuating the lines, be sure to take a leak test for all piping and tubing.
Insufficient or incorrectly done air purging may lead to the following:
• Pressure in the system can rise.
• Operating current can rise.
• Cooling or heating efficiency falls.
• Moisture in the refrigerant circuit may freeze and block capillary tubing
• Water can lead to corrosion of parts in the system.
Air Purging with a Vacuum Pump - Preparation Steps
1. Verify that each set of pipes (liquid and gas) are properly con-
nected between the indoor and outdoor unit.
• Verify that all wiring for a test run has been completed.
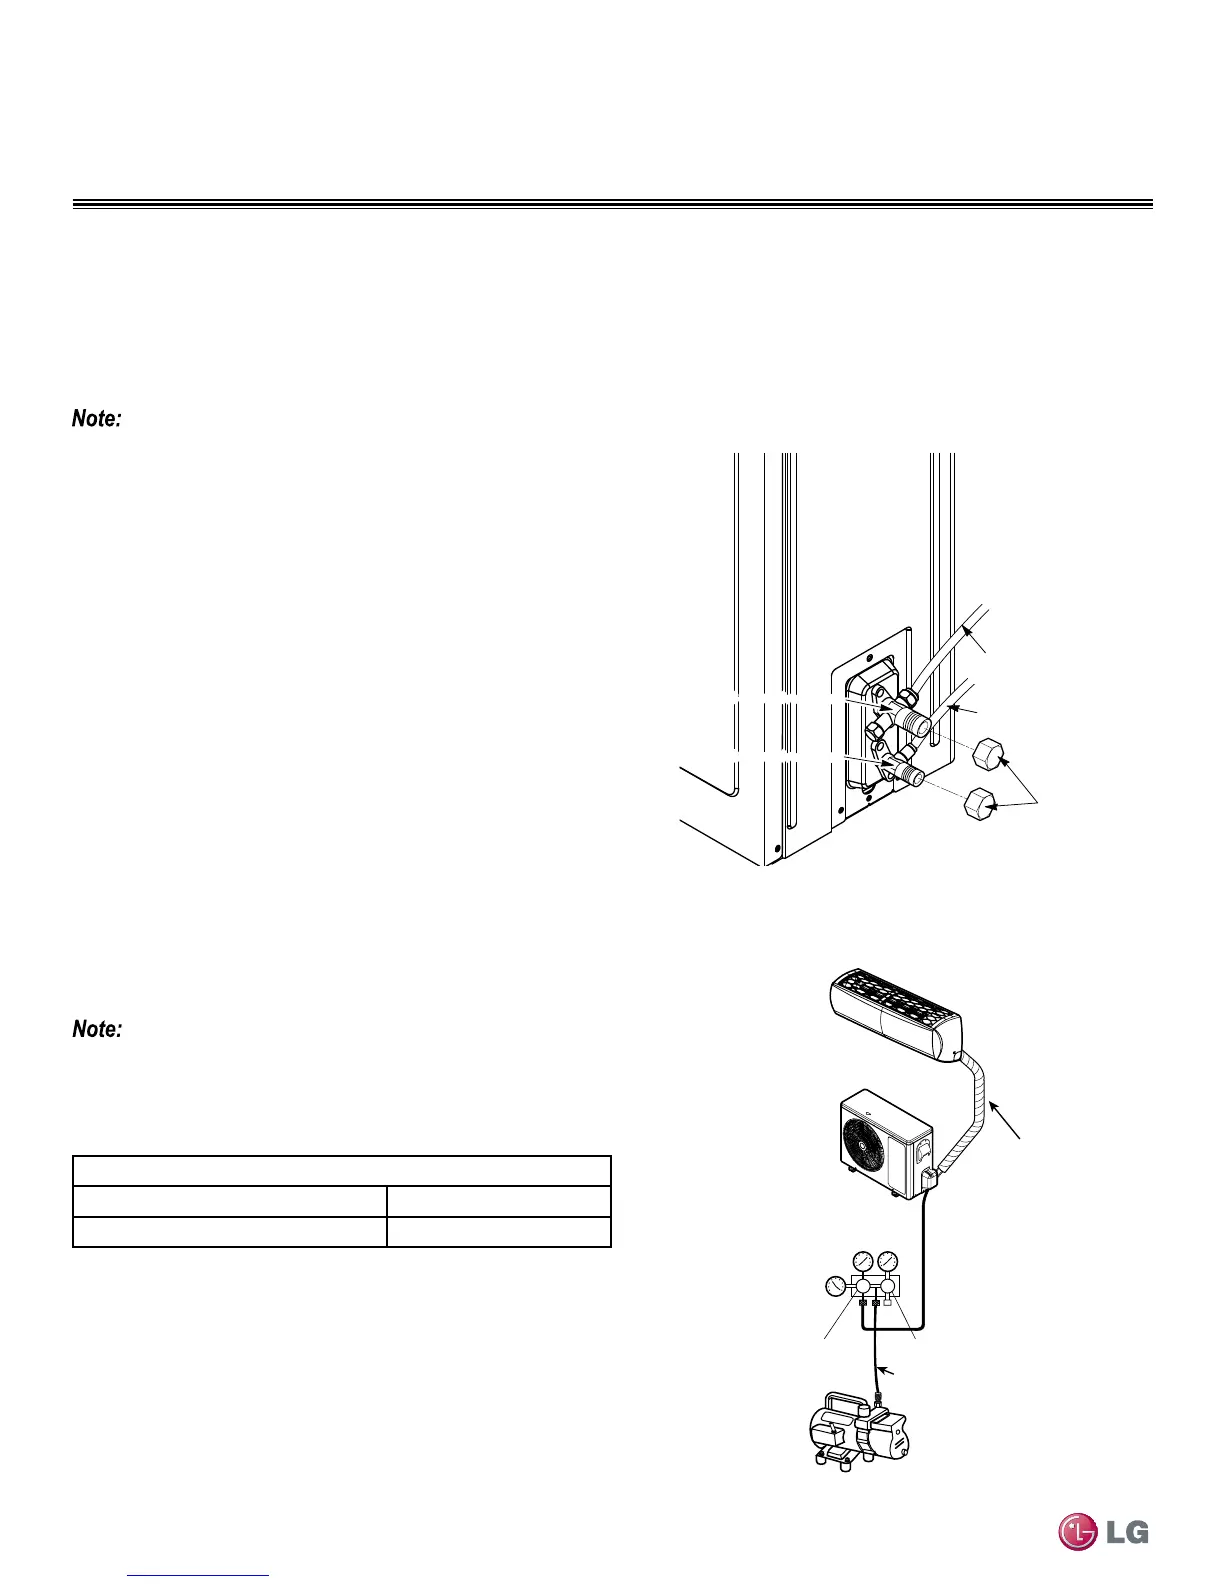
2. Remove service valve caps from the gas and liquid valves at the
outdoor unit (Figure 73).
• Both the liquid and gas side service valves at the outdoor unit
should be kept closed at this step.
3. Set up the purging, hose connections by referring to Figure 74.
4. Do a Leak Test, by proceeding to Soap Water Method - Leak
Testing section on next page.
• Successful leak testing must be performed before Evacuation can
begin.
5. Go to Evacuation section, on page 60 to complete the purg-
ing process.
Evacuation
Outdoor Unit
Gas side
Liquid side
Valve
Caps
2-way valve(Close)
3-way valve(Close)
2-way valve(Close)
3-way valve(Close)
Figure 73: Removing Service Valve Caps - Outdoor Unit
Figure 74: Evacuation Setup
• Be sure to use a manifold valve for air purging. If it is not available,
use a stop valve for this purpose.
• Be sure that the knob of the three-way valve is always kept close.
Outdoor Unit
Lo Hi
Manifold Valve
Vacuum Pump
Charge Hose
Pressure
Gauge
Lo=Open
Hi=Close
Indoor Unit
Air Purging/ Evacuation Setup
Piping Bundle
Evacuation Table*
Tubing = Less than 33 ft. Tubing = More than 33 ft.
10 minutes or more 15 minutes or more
* Required time for evacuation when 30 gal/h vacuum pump is used.
Table 29: Evacuation Table
 Loading...