68
MULTI V Water IV System Installation Manual
Due to our policy of continuous product innovation, some specifications may change without notification.
©LG Electronics U.S.A., Inc., Englewood Cliffs, NJ. All rights reserved. “LG” is a registered trademark of LG Corp.
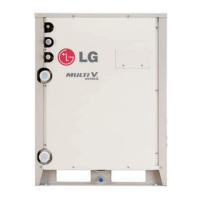
Water Source Unit Service Valves
REFRIGERANT PIPING INSTALLATION
Refrigerant Pipe Connections
Before connecting the piping:
• Remove the front panel.
• Check all pipes (liquid and vapor).
Figure 46:Water Source Unit Front Panel.
1. Field piping.
2. Flare nut.
3. Ball type service valves.
4. Schrader valves.
5. Liquid pipe.
6. Vapor pipe.
7. Field-supplied
90° elbow.
Vapor Pipe Service Port
Liquid Pipe Service Port
2
5
4
3
1
6
7
Figure 47:Service and Schrader Valve Detail.
Do not expose the service valves of the water source unit to heat. Protect the service valve
with a wet towel during brazing.
Operating the Service Valves
1. Loosen or tighten the flare nut by using a torque wrench and backup wrench. Coat the flare
connection with polyvinyl ether (PVE) refrigeration oil.
2. Remove service valve cap. To operate the shutoff valve, turn ball valve stem 90° using an
open-end wrench. Always backseat the valve. After operation, always replace the caps (Tight-
ening torque of service valve cap: = 18.0 lb-ft).
3. Evacuate the system, and then charge the refrigerant using the Schrader valve. Reattach the
Schrader valve cap after servicing is complete. (Tightening torque of service cap: =10.0 lb-ft).
Indicates “open” when the pipe and
the “flats” of the valve stem are parallel.
Cut length of pipe and valve as desired,
but length must be a minimum of 2-3/4 inches.
CLOSE OPEN
Figure 48:Service Valves - Open and Closed Positions.• The unit ships with a factory charge
of refrigerant. When connecting and
brazing the vapor line, using a wet
rag or cooling gel product to protect
the service and Schrader valves
from excessive heat.
• After connections are complete,
verify that the service ports and
caps are securely tightened to pre-
vent leaking refrigerant gas.
• Always take extreme caution to prevent refrigerant gas (R410A) from leaking during use, around re or ame, and during brazing. If the refrigerant gas comes in
contact with a ame from any source, it may break down and generate a poisonous gas. Never braze in a room that is not ventilated. After refrigerant piping work
is complete, securely tighten both service and Schrader valves to help prevent refrigerant gas from leaking. Verify the system is free of leaks after refrigerant piping
installation is complete.
• Do not attempt to remove service valve stem and packing or Schrader valve core. Physical injury or death may occur from uncontrolled rapid release of refrigerant.
• When connecting the refrigerant piping, make sure the service valves of the water source unit are completely closed (factory setting). Do not open the service valves or
attempt to operate the system until the refrigerant pipe system installation has been completed. Never open the valves before a pressure test is performed, the system
is evacuated, a leak test performed, and the Commissioning Agent provides authorization to do so.
• Do not use polyolester (POE) or any other type of mineral oil as a thread lubricant. If introduced to the refrigerant circuit, this type of oil will create oil sludge leading to
system malfunction.
• Use steel wool or comparable material to ll gaps between the unit case and the refrigerant and electrical connections to prevent rodent and animal entry.
ressure
apor
n
u
ne
ater
utle
ow
ressure
a
or
n
 Loading...