Installation
15
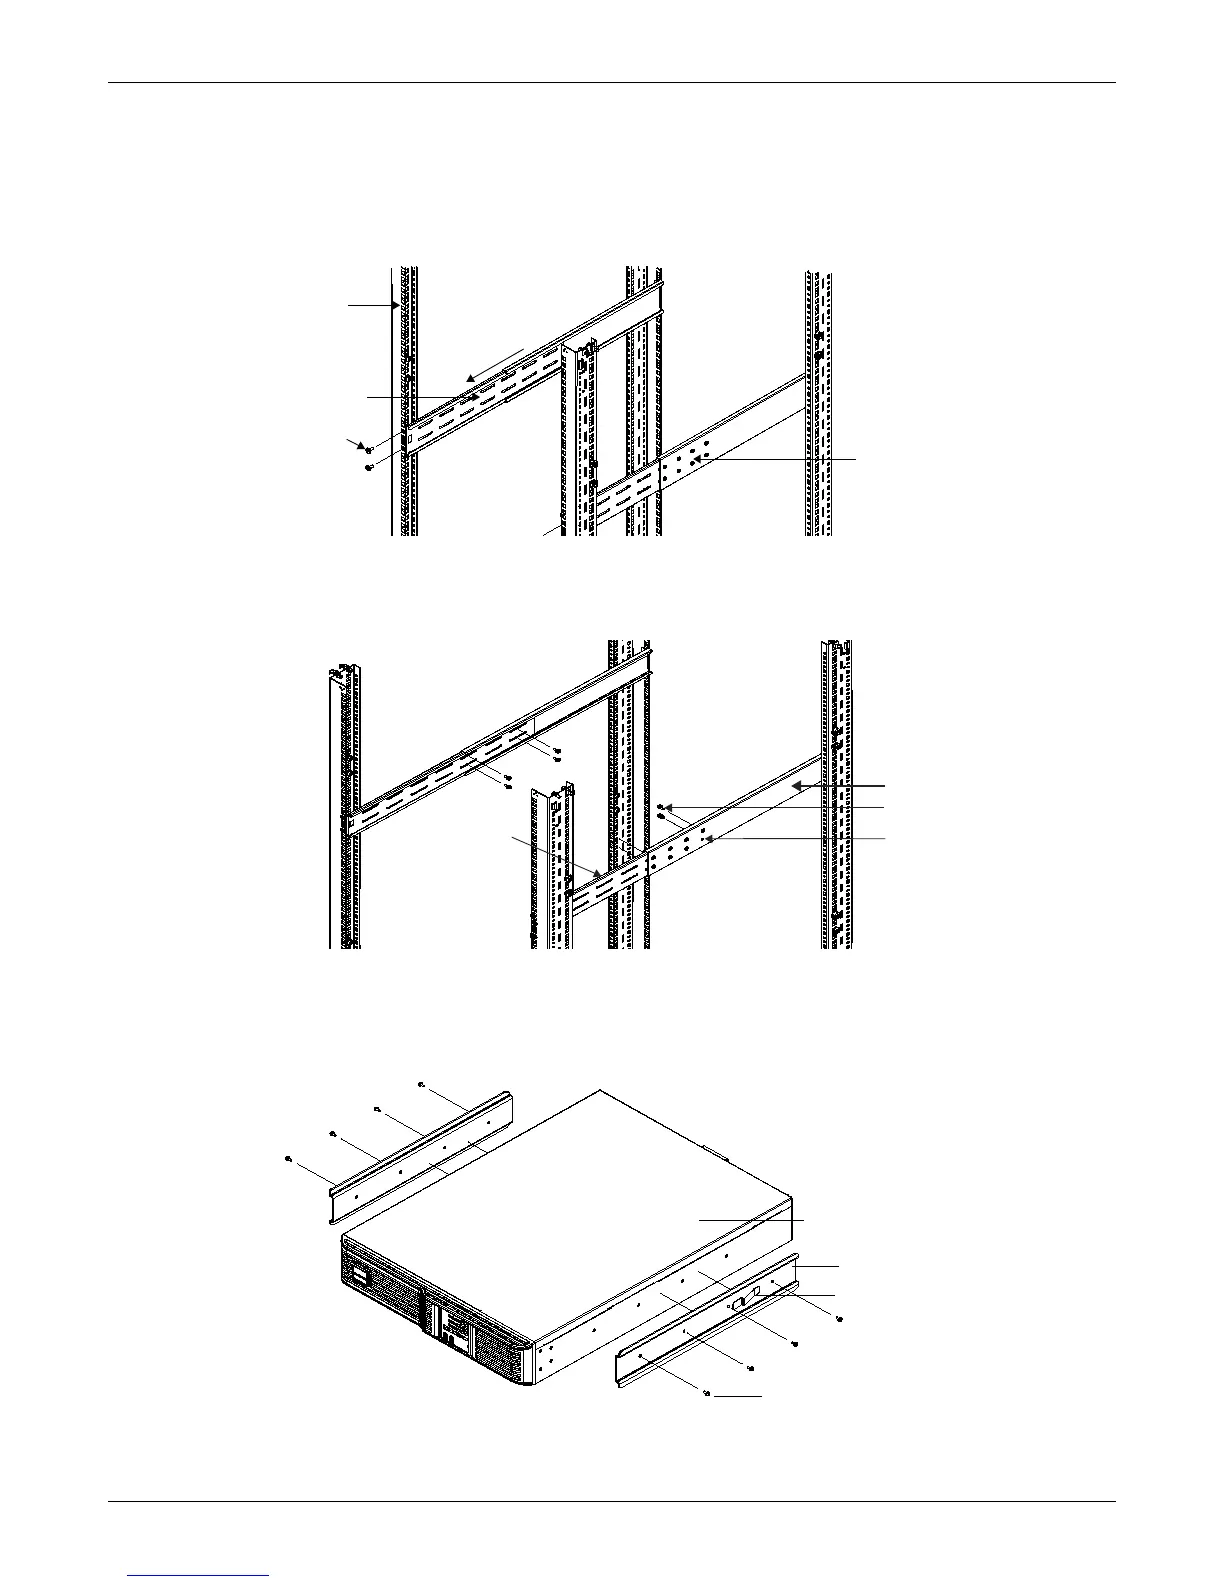
5. Extend the slide rail assembly by sliding the front member forward until it touches the rack’s
front vertical rails (adjustable length: 18 to 32 inches [457-813mm]). Use two M5 screws to fix
each front member onto the front vertical rails through the installation holes. Make sure that
slide rail assemblies are at the same mounting height on all four rack rails, as shown in
Figure 13.
Figure 13 Installing front member of each slide rail assembly
6. Fasten rear member and front member together using four M4 screws and four M4 nuts (M4 nuts
have been factory-installed on the rear member) per slide rail assembly, as shown in Figure 14.
Figure 14 Fastening rear member and front member together
7. Fasten inner members pulled from the slide rail assemblies in Step 2 to the UPS on both sides
with eight M4 screws provided in this kit. Make sure that the retaining latch is near the rear of
the UPS, as shown in Figure 15.
Figure 15 Installing inner members
8. Use M4 screws to install ears of accessories on both sides of the UPS, as shown in Figure 16.
Rear
Member
Front
Vertical
Pole
Front
Member
M5 Screw
4 pieces
Slide
M4 Screw, 8 pieces
Rear Member
Front member
M4 Nut, 8 pieces
M4 screw
, 8 pieces
Retaining Latch
Liebert GXT3 UPS
Inner Member