Netlink Installation and Operation Manual
14 15
Installation and Operation
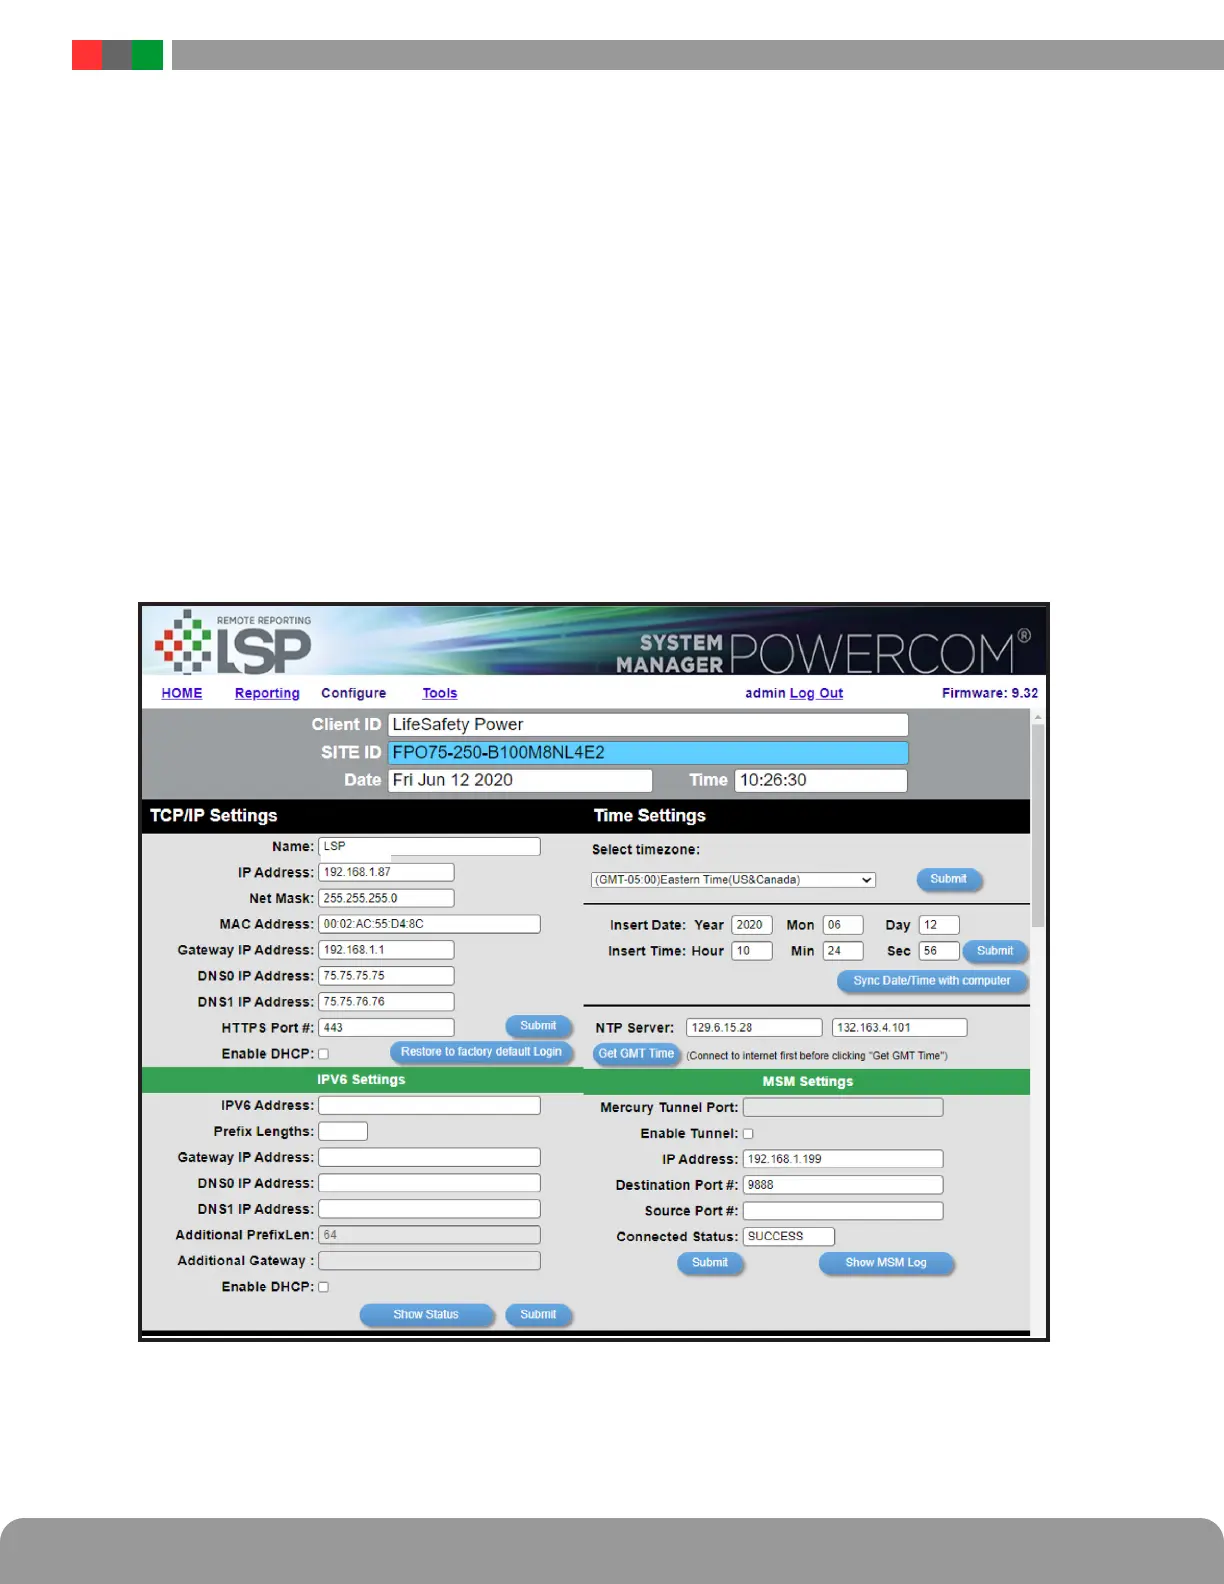
2.2.3 Time Settings
The Time Settings block (See Figure 2.5) is where the time and date are programmed into the Netlink. First, select the correct time zone
from the drop down list and click Submit. After the time zone is set, the time and date can be set one of three ways:
Manual Entry
Enter the correct time and date in the following format and click the "Submit" button:
For Date: YYYY MM DD
For Time: HH MM SS
i ALWAYS enter two digits in time field.. ie., 7AM = 07, not 7
The new date and time will take effect immediately.
Sync With Computer
The "Sync Date/Time with computer" button will set the date and time of the Netlink to match the computer currently being used to
access the Netlink. The new date and time will take effect immediately.
Using an NTP Server
The NTP Server fields allow you to enter one or two NTP servers for automatic setting of the time and date via the internet. The
Netlink must be configured for internet access before this setting will work. Either the IP address of the server or the DNS name
of the server may be entered. After entering at least one server, click the "Get GMT Time" button to set the Netlink time and date.
Depending on server traffic, it could take several seconds for the time setting to complete.
Figure 2.5 - Typical Configure Page (top portion)
2.2.4 MSM Settings
These settings are used when connecting the NetLink to an MSM Enterprise server. Enter the IP address of the MSM Server in the "IP
Address" field. Set the Port numbers as appropriate (typically 9888 for Destination Port). Click Submit when done to save the settings.
Consult the MSM Enterprise manual for more information.
192.168.1.9
 Loading...