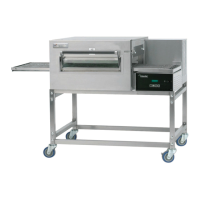
CounterTop – 1300 Series Service Manual
48
ASSEMBLY OF MAGNET TO MOTOR
FOR OVENS WITH 1-12 MINUTE CONVEYOR DRIVE SYSTEM
1. Apply 1 or 2 drops of adhesive (supplied) to magnet. Mount magnet on motor shaft. Be sure to keep
adhesive away from motor bearings.
NOTE: Use magnet marked "8"
FOR OVENS WITH 1-24 MINUTE CONVEYOR DRIVE SYSTEM
1. Apply 1 or 2 drops of adhesive (supplied) to magnet. Mount magnet on motor shaft. Be sure to keep
adhesive away from motor bearing.
NOTE: Use magnet marked "16"
CONVEYOR CONTROL BOARD - REPLACEMENT
1. Remove control box cover.
2. Disconnect and mark all wires from the control board.
3. Remove two (2) screws from mounting bracket at rear wall and remove assembly.
4. Depress nylon clips and remove circuit board from mounting bracket.
5. Reassemble in reverse order and check operation.
CONVEYOR CONTROL BOARD CALIBRATION (S/N 3000480 AND BELOW)
(NOTE: S/N 3000481 & ABOVE, NO CALIBRATION REQUIRED)
1. Remove control box cover.
2. Connect digital meter to A+ & A-.
3. With conveyor running at maximum speed, adjust max pot on board to 21.5 to 22 VDC.
4. With conveyor running at minimum speed, adjust min pot on board to 3 to 4 VDC.
5. Check conveyor belt timing (leading edge in to leading edge out) at 5 min. and adjust, potentiometer
knob if necessary to compensate (S/N 3000481 & above, no calibration required).
ELECTRONIC TEMPERATURE CONTROL BOARD - REPLACEMENT
1. Remove control box cover.
2. Disconnect wires and molded connector and mark wires for reinstallation.
3. Remove two (2) screws from mounting bracket and remove assembly.
4. Depress nylon clips and remove circuit board from mounting bracket.
5. Reassemble in reverse order and check operation.
ELECTRONIC TEMPERATURE CONTROL - CALIBRATION
1. Turn oven on, allow 30 minutes preheat for temperatures to stabilize in oven cavity.
2. Remove control box cover.
3. Place temperature probe in bottom
finger #4 (lower right), 3rd row from outside edge, 3rd hole from the
rear
.
NOTE: Make sure probe is not touching any metal surfaces. (Measure air temperature only)
4. Turn temperature control knob fully clockwise and adjust so the knob indicator is aligned with the mark
past
550°F (288°C) on the dial. (See diagram Pg. 13)