Page 12 of 19 FA69342–2 English
Jun 2013
19
How To Change the System Setup
Linx 5900 & 7900
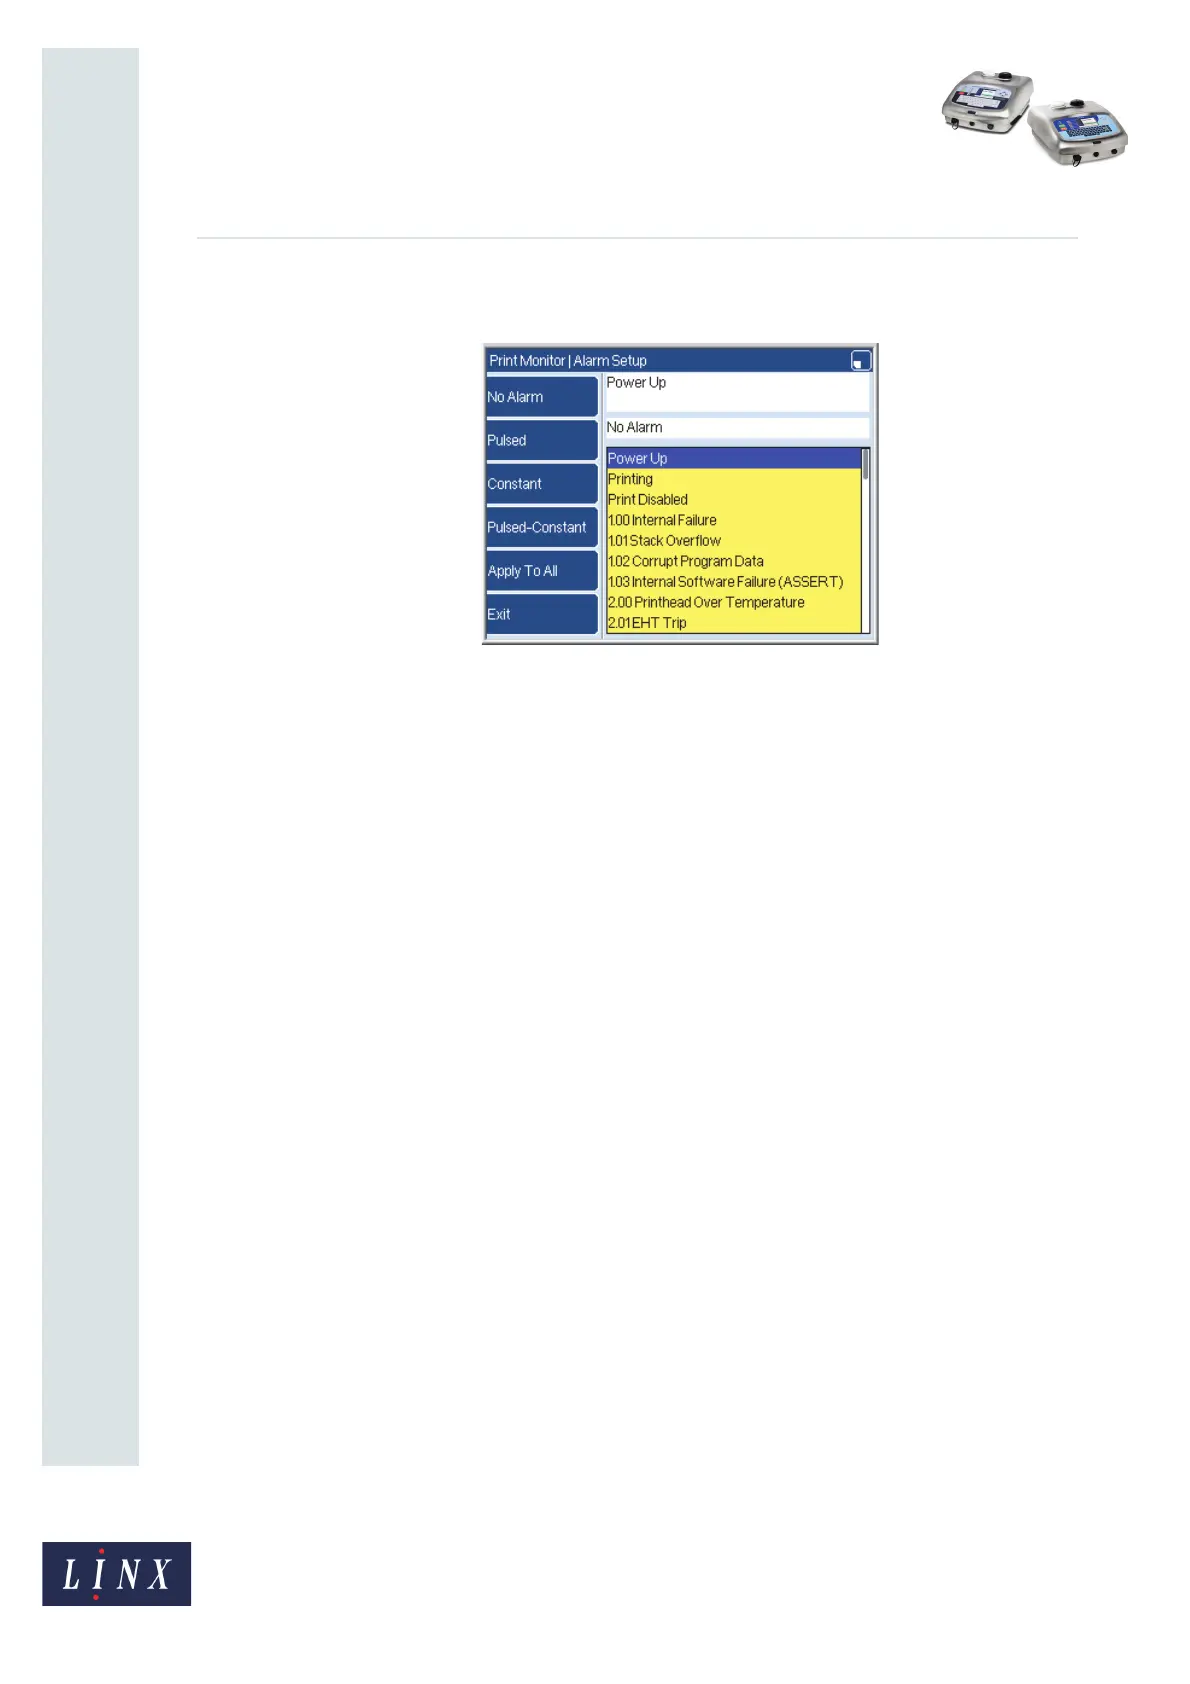
Select the Alarm Setup or Alarm 2 Setup option to display the Alarm Setup or Alarm 2
Setup page.
Figure 13. Alarm Setup page
These pages both display a list of all the conditions and events that can generate an alarm.
To configure the alarms, use the Up arrow and Down arrow keys to highlight an item in the
list, then press one of the following keys:
No Alarm The event does not generate any alarm
Pulsed The event generates a pulsed alarm
Constant The event generates a constant alarm
Pulsed-Constant The event generates a continuous pulsing alarm
Apply To All Apply the current alarm setting to all the events in the list
NOTE: If the event message has the prefix “4” (for example, “4.02 Normal Start”) you can
use only the ‘Pulsed’ setting or the ‘No Alarm’ setting. The Apply To All key does
not change the setting for these event types.
To return to the Print Monitor page, press the Exit key three times.
To test the alarm, select the Alarm Test option in the Alarm page (see Figure 12 on page 11).
The alarm pulses twice.
Alarm priority
For Alarm and Alarm2, each alarm type has a different priority—a Constant alarm has the
highest priority, followed by a Pulsed-Constant alarm, then a Pulsed alarm. If an alarm is
active, and an event occurs with a higher-priority alarm type, the higher-priority alarm
becomes active. For example, if a Constant alarm and a Pulsed-Constant alarm are both
active, the printer generates a Constant alarm.
69145