ATTACK
™
DIGITAL FIRE TRAINING SYSTEM
18
WWW.LIONPROTECTS.COM
control setting on the Smoke Generator 4000 (ETNA).
8.2 USING ATTACK
™
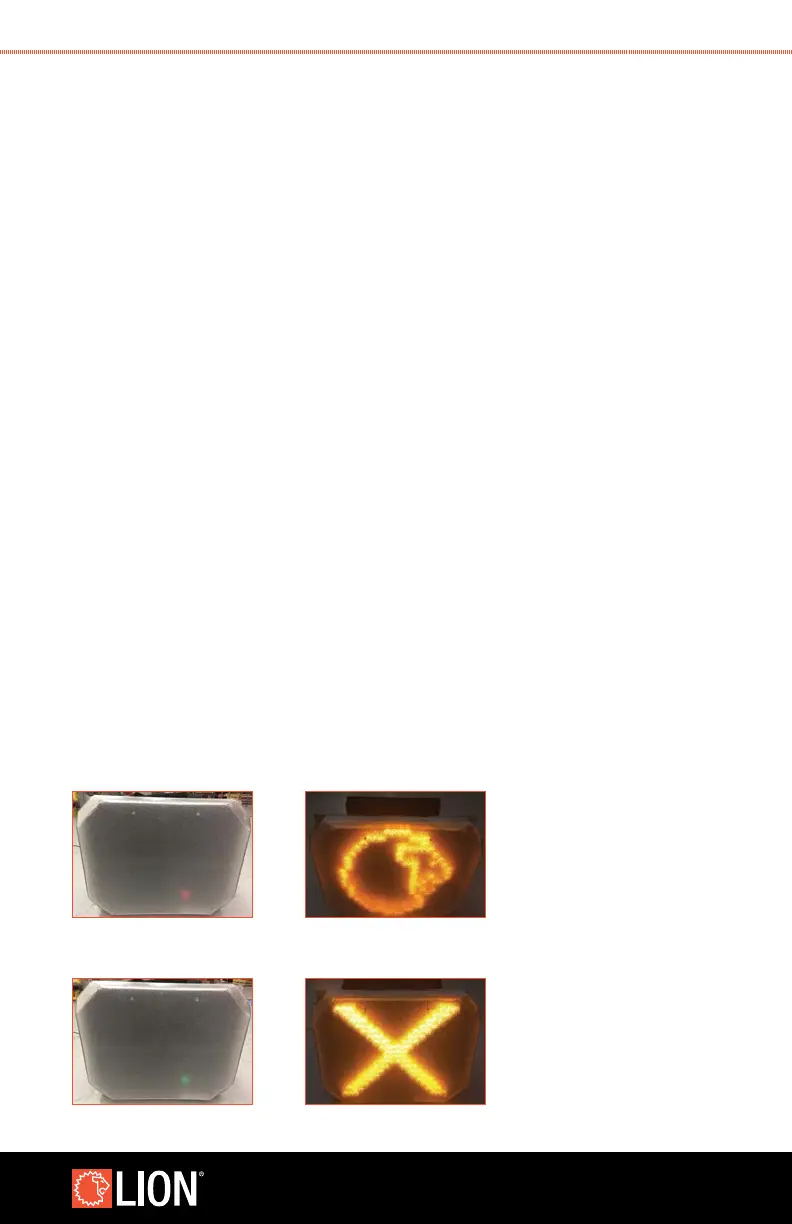
1. Once power is connected to the ATTACK panel, a red light* is displayed on the front
of the panel to indicate power is supplied to the unit.
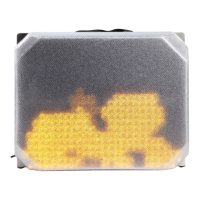
2. The ATTACK panel will boot up automatically when power is supplied. This can take
several minutes. When it boots, you will see a LION graphic and hear three beeps.
3. The panel is now ready for use, and the settings can be veried or adjusted as
desired. A green light* is displayed on the front of the panel to indicate the unit is
ready for use.
* The red or green indicator lights are visible when looking straight on at the unit. They may not be clearly visible from
side angles or when the unit is in a very bright environment. This indicator light is turned off during a training simulation.
USING ATTACK WITH MULTIPLE PANELS
Multiple ATTACK panels can be used together for training.
In a scenario where secondary panels are being used, the secondary panel has all
the features of the primary ATTACK panel, but must be in range of the primary panel in
order to operate. The necessary range between the two panels will vary based on your
training environment.
If a panel is not connected wirelessly to the primary panel, an X will be displayed on the
panel when it is powered on.
Secondary panels cannot be used independent of the primary panel. If you are interested in
using the panels independently of one another, call LION for software upgrade information.
Contact LION for support making scenarios where multiple ATTACK panels are mounted
edge-to-edge in a grid to simulate a re larger than one ATTACK panel. This is a custom
installation and requires a custom setup.
When using the Industrial Remote − all panels that are linked to the Industrial Remote
“X” DISPLAYED ON SCREEN
STEP 1 STEP 2
STEP 3