11
lci1.com 574-537-8900 Rev: 03.21.19
Solera
®
Universal Hardware
Manual Awning to
Solera 18V Power Awning
(For Aftermarket Applications)
CCD-0001267
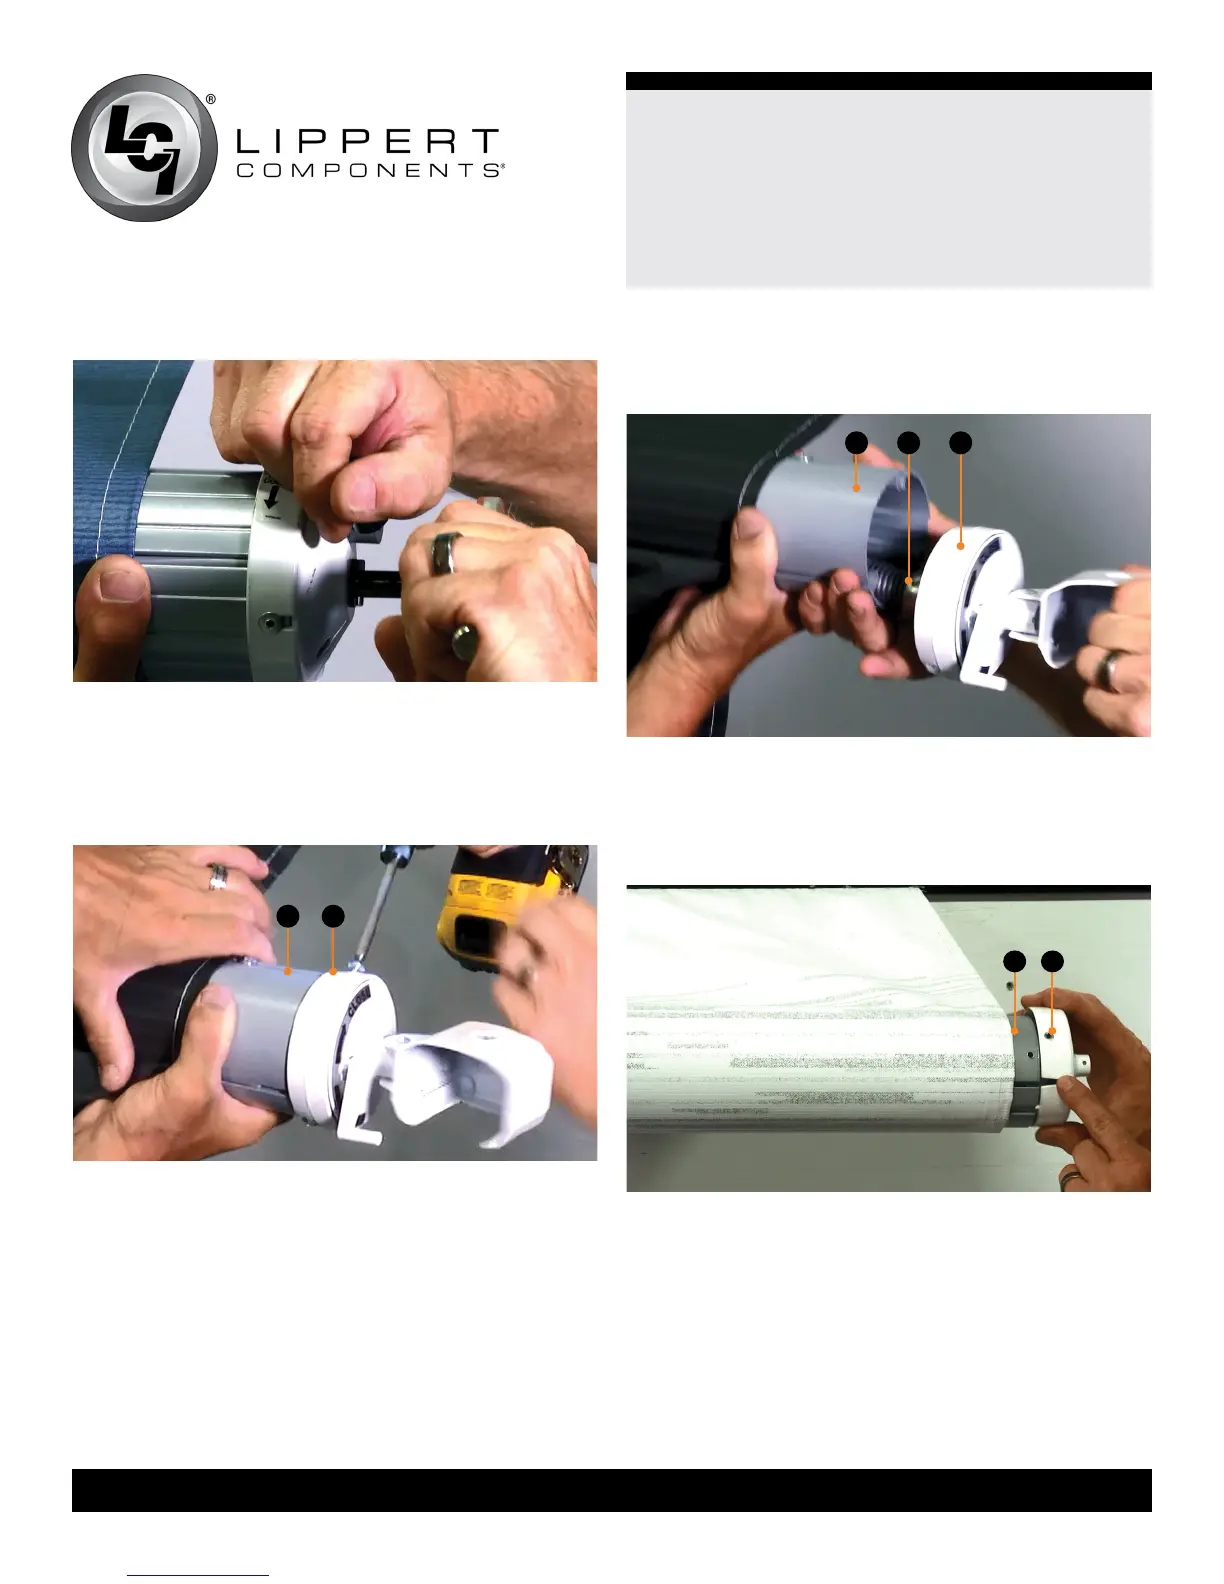
9. Slowly release all of the tension by rotating the drive
head with the locking pliers.
10. Remove the three screws securing the end cap
(Fig.23B) to the roll tube (Fig.23A).
Fig.24
A B
11. Remove the end cap (Fig.24C) and spring assembly
(Fig.24B) from the roll tube (Fig.24A).
A B C
Fig.22
12. Place the Solera end cap (Fig.25B) on the end of the
roll tube (Fig.25A), making sure it is properly seated and
the roll tube channel is aligned with the channel on the
end cap.
A B
Fig.23
13. Secure the Solera end cap to the roll tube with the
provided rivets.
NOTE: It may be necessary to drill out the previous holes
in order to accommodate the larger sized rivets.
14. Pull the cotter pin from the idler side end cap, making
sure to keep a rm hold on the roll tube to avoid injury or
damage to the unit. Pulling the cotter pin allows the roll
tube to turn for installation of the drive head.
Fig.25