Before start-up
11.5
MIG
welding process
71
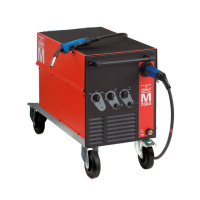
A wire feed case (optional) is required for
MIG welding.
The operations required may differ de-
pending on the version and the configura-
tion
of
the wire feed case!
Please observe the wire feed case operat-
ing manual!
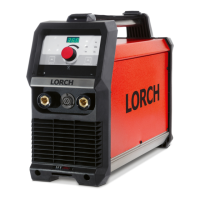
Current source
74
Ground cable
LORCH
:>
Connect the welding cable 73 on the wire feed case
to the connecting plug plus 8
or,
in special cases, mi-
nus 8 on the power source.
:>
Connect the control cable
of
the wire feed case 72
to the wire feed case connecting socket 1
O on the
power source. (only on lnt case type)
:>
Equipping the wire feed case. (See wire feed case
operating instructions)
77
MIG/MAG torch
72
Control cable (only
on
lnt case
75
Wire feed case
type)
76
Ground cable (only on lnt case
73
Welding cable
type)
Fig.
5:
MIG welding connection diagram
11.6
Connecting the ground cable
:>
Connect the ground cable to the free minus or plus 8
socket and secure the cable by rotating it clockwise.
Fastening the ground clamp
~~~~~~~~~-
~!>""T----------------,,...-
Fig.
6: Attaching the ground clamp - Correct!
:>
Fasten the grounding clamp in the immediate vicinity
of
the welding area, so that the welding current can-
not seek its own return path across machine parts,
ball bearings or electric circuitry.
:>
Connect the ground clamp firmly to the welding
bench or the workpiece.
10.13
Fig.
7:
Attaching the ground clamp - Wrong!
a Do not place the ground clamp
on
the welding ma-
chine or the gas cylinder; otherwise the welding cur-
rent will be carried via the protective conductors and
it
will destroy these.
11.7
Connecting the power supply
The machine is suitable for operation on the mains sup-
ply or
on
a current generator.
:>
Plug the mains plug into the appropriate socket.
•••
·I
J .
..
The mains voltage and tolerance as well
as the fuse protection must correspond to
the technical specifications (see Technical
Specifications).
-9-