Installation
4
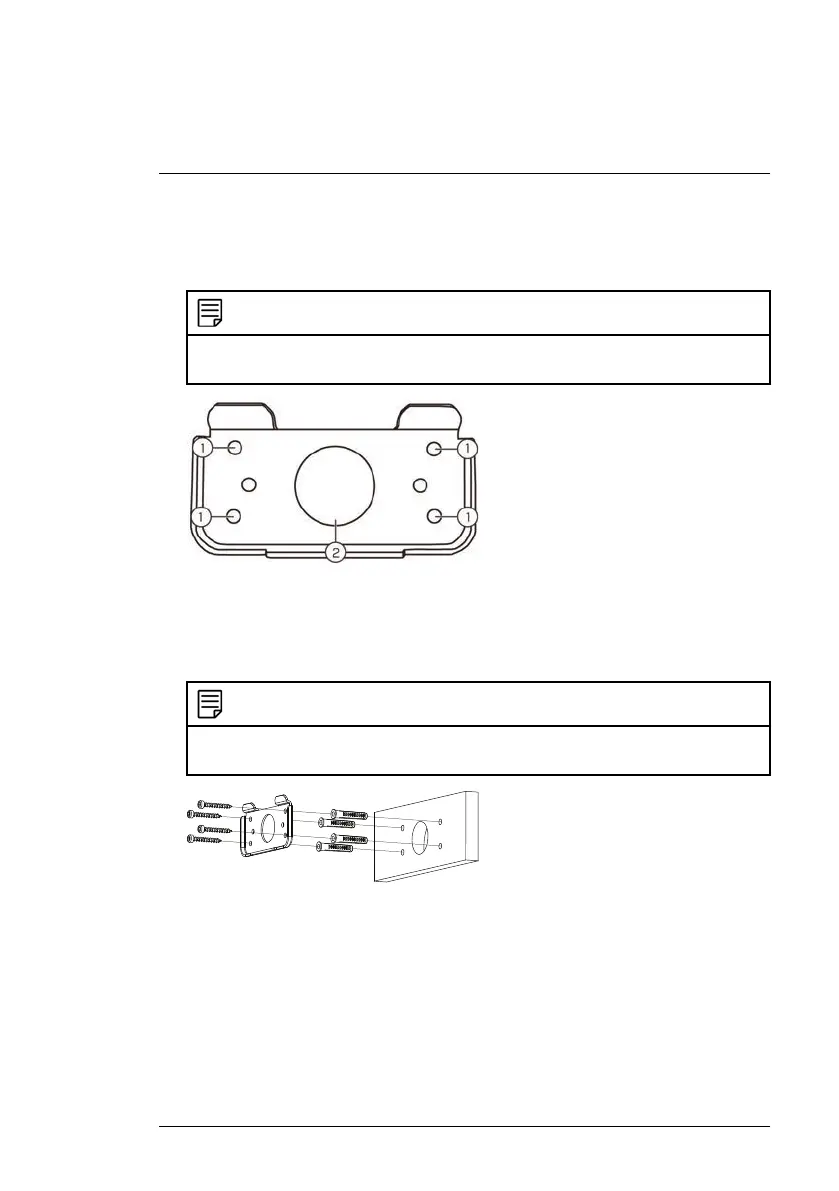
6. Holding the flat side of the back plate against the mounting surface, mark
holes for the mounting screws ST4 (x4) and the camera cable. Remove
the back plate and drill where marked.
NOTE
You do not need to mark holes for the camera cable if you plan to run it along the wall /
ceiling.
1: Mounting screw ST4 (x4) holes, 2: Camera cable hole
7. Attach the back plate to the mounting surface using the mounting screws
ST4 (x4) included with the wall mounting bracket kit.
NOTE
Use the drywall anchors included with the wall mounting bracket kit if installing on a
drywall surface.
#LX400075; r.41474/41994; en-US
12

 Loading...