22
INSTRUCTION MANUAL
TABLE OF CONTENTS
INTRODUCTION 22
SAFETY INSTRUCTIONS 22
CONTENTS OF PACKAGE 23
EXTRA CAMERAS 23
OVERVIEW OF PARENT UNIT MONITOR 24
OVERVIEW OF BABY UNIT CAMERA 26
GETTING STARTED 28
MENU 32
PAIRING 37
TROUBLESHOOTING 39
TECHNICAL SPECIFICATIONS 40
INTRODUCTION
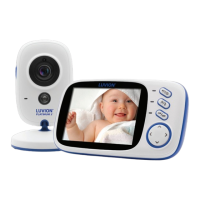
Thank you for purchasing the Luvion Prestige Touch 2. Now, you will be able to see and hear your baby (or even
more babies/children by using up to three additional camera’s) in and around the house.
Please keep the original dated sales receipt for your administration and proof of warranty. For service and warranty
issues, you will always be asked for a copy. For warranty issues, you may contact your Luvion dealer or your local
Luvion distributor. More information can be found on our website: www.luvion.com.
This user manual provides you with all information neccesary for a safe, pleasant, and easy use of the Luvion
Prestige Touch 2. Before use, we ask you to thoroughly read this user manual. We ask for your special attention for
the safety instructions below.
LUVION
Delft, The Netherlands
www. luvion.com
SAFETY INSTRUCTIONS
- Keep small parts away from children.
- This product is not intended as a toy. Please refrain children from playing with the product.
- This product is not intended as a substitute for adult supervision.
- Only use the original supplied power chargers.
- Do not use the product in humid conditions or nearby water.
- Always keep the camera and any cords of the power adapters at least 1,5 meter away from the baby.
- Only use the product between 10°C - 35°C.
- Do not attempt to open the product yourself or you may void your warranty, please contact your local
dealer or distributor.
Batteries:
- Fully charge the monitor before rst use, to ensure an optimal battery capacity. The battery is fully
charged when the charging light, on the side of the monitor, turns green.