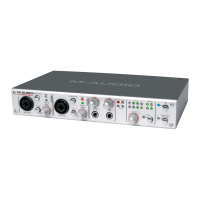
Just click "Search." OMS begins searching. IMPORTANT: If the FireWire cable is
not correctly connected to the FireWire 1814, setup will fail.
5. "OMS Driver Setup" shows the FireWire 1814 in a list when OMS successfully finds
the driver. Click “OK.” OMS will now define (shows "Identifying") the FireWire 1814
output port.
6. The "OMS MIDI Device Setup" dialog box will appear showing the FireWire 1814's
available output port with an open check box to the left of the port. Click to put an
“X” in this open box to enable the port. Click “OK.”
7. Next, the "My Studio Setup" appears with a file save dialog box over it. You will
now need to name and save your new Studio Setup (or use the default name)
before you can assign an instrument to the FireWire 1814's MIDI port. If you
choose to do so, assign your instrument, and you are done.
8. Your FireWire 1814 is ready for use.
You can run the OMS Test Studio utility by going to the “Studio” menu and releasing the
mouse on "Test Studio." Playing a NOTE on your keyboard will give you an audible
message from your computer, "MIDI received," while the arrow pointing to the keyboard
icon flashes. Clicking on a keyboard icon with the mouse pointer will send a tone cluster
to the corresponding FireWire 1814 output port. The LED will light, and your sound
module should play the chord.
You may now exit OMS Setup by quitting the application. The rest is up to configuration
within your music software. Generally, this means selecting “OMS Compatibility,” or
“Open Music System” for your MIDI system setup.