Using the Level Controller Assignments
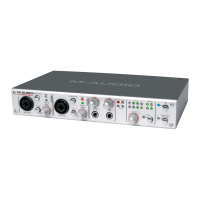
The Level controller on the FireWire 1814’s front panel is a rotary encoder, and its
function is completely software assignable from the FireWire 1814 Control Panel. When
the Control Panel is first installed, the default setting for the Level controller is to control
the Outputs—perfect for most of your monitoring needs.
However, if you are an advanced user, you may find an advantage in modifying the level
controller assignment or making custom settings. A likely scenario for an alternate
assignment would be to use it to control the input monitor levels when you are direct
monitoring the FireWire 1814 inputs. We’ll explore that here, which might give you some
ideas for other ways that you can use the level controller assignments.
1. In the right panel of the FireWire 1814 Control Panel, click input bus as your level
controller assignment.
2. Click the mixer tab. On the mixer page, you should see the ctlr buttons on the
analog in and spdif in or adat in channels. If you’re just recording with the analog
inputs, for example, click the ctrl button on the spdif in or adat in channels to
deselect those faders from the level controller assignment. Then, the Level
controller will ONLY control the analog in channels.
Now, you can keep your audio software open while recording, and avoid having to
switch back and forth between your audio software and the FireWire 1814 Control Panel
to tweak your monitor levels for the inputs that you are recording.
NOTE: Whenever you click on a “new” level controller assignment group, all of the
possible ctrl buttons will become active. You can make changes by clicking an individual
ctrl button to deselect that channel and disassociate it from the level controller
assignment group. The Control Panel will then remember these modifications if you click
to another assignment group and then click back to the previously modified group.
Using the A/B Selector Switch
The front panel A/B Switch can be assigned from your Control Panel’s hardware page to
perform one of two functions. In the default setting, the A/B Switch is a direct monitoring
on/off switch, which allows the user to mute or unmute the input channels manually. If your
audio program is capable of ASIO Direct Monitoring, the program will control the switch
while the indicator LED may serve as an input monitor on/off indicator.
When the “headphone out 1 A/B” radio button is selected under a/b switch settings in the
Control Panel’s hardware page, the front panel A/B Switch will function as a Headphone
Source Selector, allowing you to monitor multiple audio sources by keeping them separate
from the Line Outputs while you cue them for playback. This makes the FireWire 1814 a
perfect companion for laptop-based DJ and live performance.
Different scenarios for using the A/B Switch for turning Direct Monitoring on and off or for
monitoring multiple sources are described in the sections that follow.
Direct Monitoring On/Off – This is the default function for the A/B Switch. To change
the function of the momentary switch to direct monitoring (if the setting has been

 Loading...