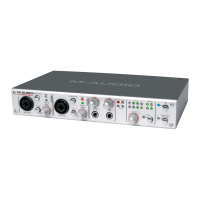
10 Using the FireWire 1814
The following sections address a number of real-life situations that you may encounter
while using your FireWire 1814. These brief tutorials should help guide you. Also check
the M-Audio website from time to time for additional tutorials or FAQs.
Setting Up Your Recording Levels
Using the Mic/Inst Inputs – Connect your microphone or instrument to the FireWire
1814’s front panel Mic/Inst inputs. Make sure the associated channel’s Mic/Line switch is
set to the “out” position to enable these front panel inputs. If you are using a condenser
microphone, be certain to activate the Phantom Power switch (after connecting the
microphone to an XLR input). Adjust the channel’s Input Gain to achieve a fairly steady
green Signal LED without triggering the red Clip LED, while audibly testing your input
levels (i.e., strumming the guitar, or speaking into the mic).
NOTE: When recording with microphones, it is best to keep the mic at some distance
from the main speakers, or use headphones to monitor. Feedback may occur when
microphones are too close to speakers.
Using the Line Inputs – Connect the line level output of your external audio device to
any of the FireWire 1814’s rear panel Line Inputs. If you’re using Line Inputs 1 or 2,
make sure the associated channel’s Mic/Line switch is set to the “in” position. Monitor
the incoming signal using the Line In “signal present” Indicator LEDs.
The signal level that you receive at the Line Inputs will be the signal level that you
record. Any adjustments to that signal level must be made at the source. If you have an
output level control on the device that you’ve connected to the FireWire 1814’s line
inputs, adjust that output level control to change the recording level. Most recording
software will allow you to add gain to a recorded track that was made at a level that is
initially too low, but be careful that the recording level is not reaching digital clipping
(signal over 0dB - going into the red) while recording.
You will then want to route the input signal to your audio software’s inputs. Refer to the
section below on “Monitoring Your Inputs For Recording,” and your software’s
documentation for more information.
Using the ADAT Optical Input – Connect the ADAT optical digital output of your
external audio device to the FireWire 1814’s rear panel optical (TOSLink) digital input.
This may be an ADAT multi-track recorder, the bus output of a digital mixer that is
equipped with an ADAT Optical format output, or the output of an 8-channel mic preamp
with an ADAT Optical output, such as an M-Audio Octane.
Make sure that external – digital is selected as the sync source in the FireWire 1814
Control Panel’s hardware page. Also, adat should be selected as your digital port
selection input on the hardware page. You may also use word clock if your ADAT
Optical source has a BNC word clock output.