Page 15
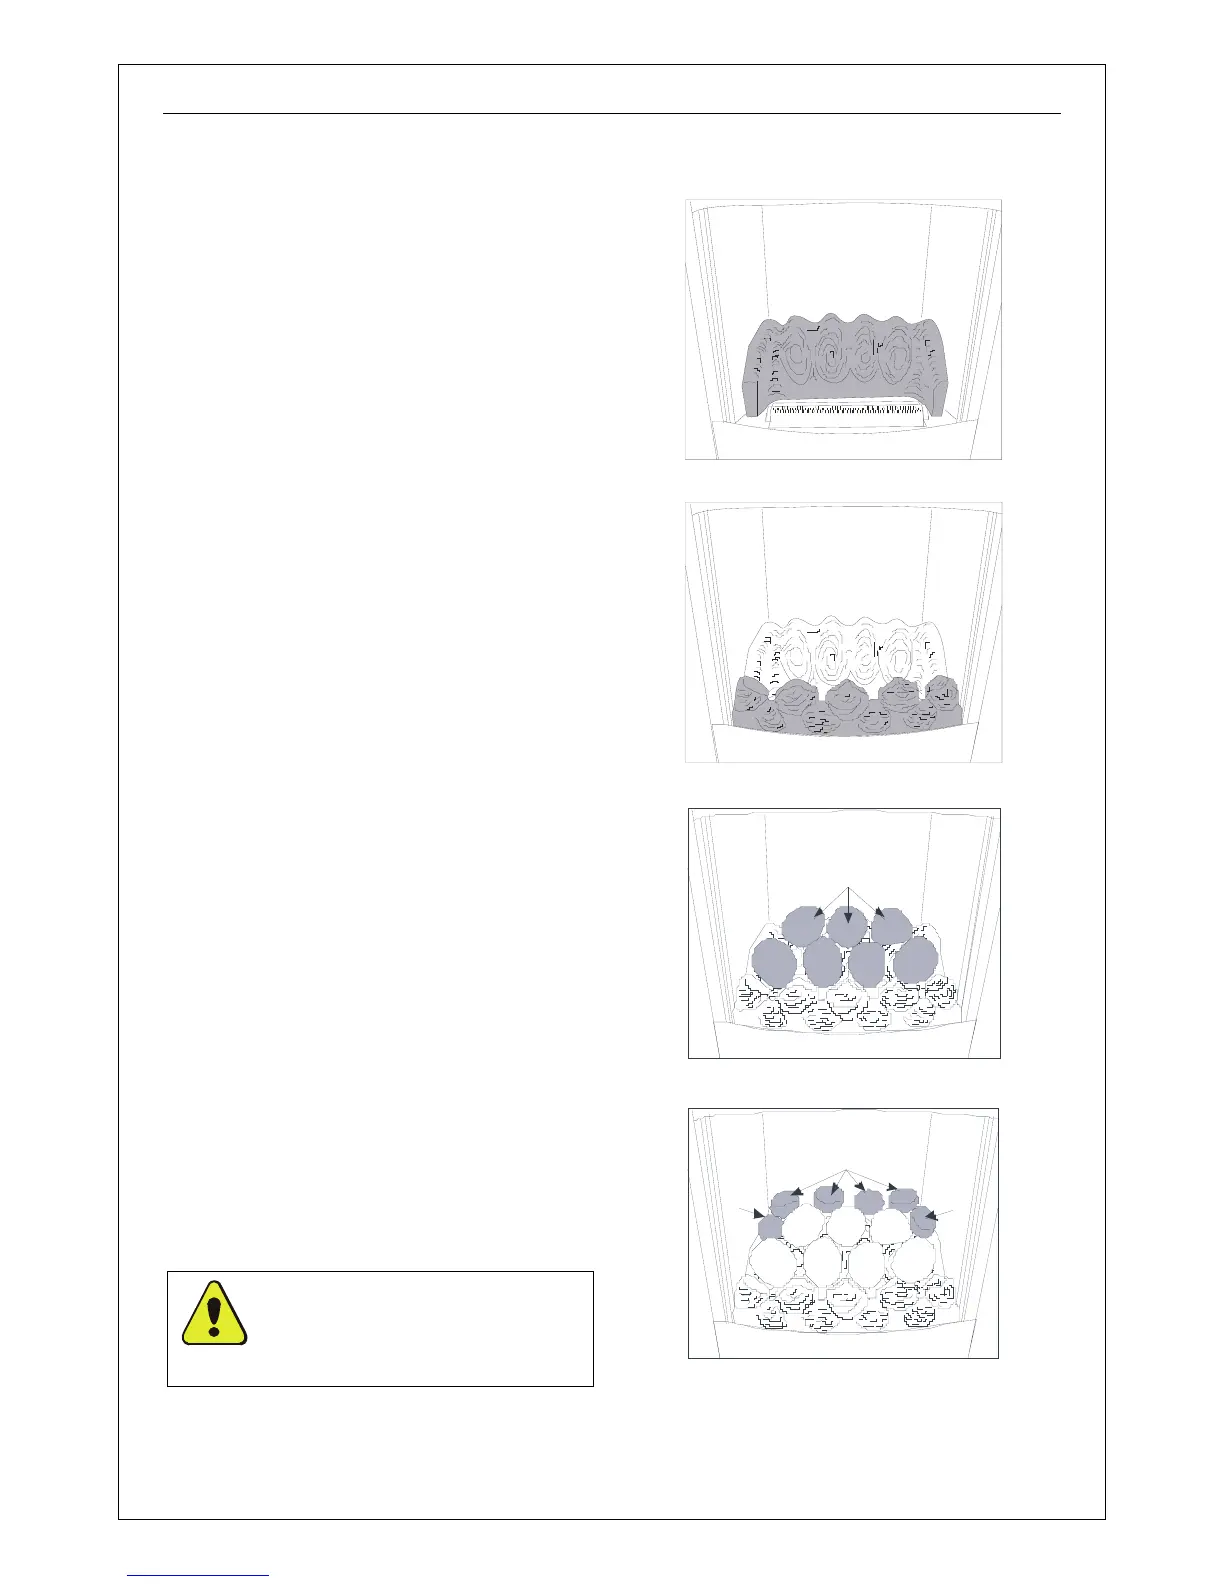
2.4.2. Pebble Effect Layout
The fire is supplied with ceramic pebble sets
as follows:-
Qty
Large Pebbles (A, B, K, L & M) 7
Small Pebbles (E & G) 6
Rear Matrix 1
Front Matrix 1
NOTE: When placing pebbles on the tray
ensure the lettering on them is facing down
and into the fire. After every step of pebble
laying ensure that they are stable.
Proceed with the pebble layout as follows:-
1. Position the rear matrix behind the
burner as shown in
XFigure 28X.
2. Position the front matrix in front of the
burner and ensure that it rests on the
base (see
XFigure 29X).
3. Place pebbles K, L & M in the order
shown in
XFigure 30X such that they are
bridging between the front and rear
matrix.
4. Place pebbles A & B on the rear matrix
as shown in Figure 8 such that they are
supported in front by the pebbles laid in
step 3.
5. Place the E & G pebbles on the sides
and around the back as shown in
XFigure
31
X.
6. After the appliance has been allowed to
warm up, small adjustments (using a
small pair of tongs) may be made to the
pebbles to achieve the desired flame
picture.
7. It is recommended that the pebbles be
left alone once the desired flame pattern
has been achieved. Constant
movement of the pebbles causes the
pebbles to disintegrate and/or cause
discolouration.
WARNING: Do not touch the
fire when it is alight. The fire
will remain very hot for a while
after extinguishing.
Figure 28
Figure 29
A & 2xB
KK
L
M
Figure 30
E
E
G
Figure 31
 Loading...