7 ENGLISH
Indicating the remaining battery
capacity
Only for battery cartridges with the indicator
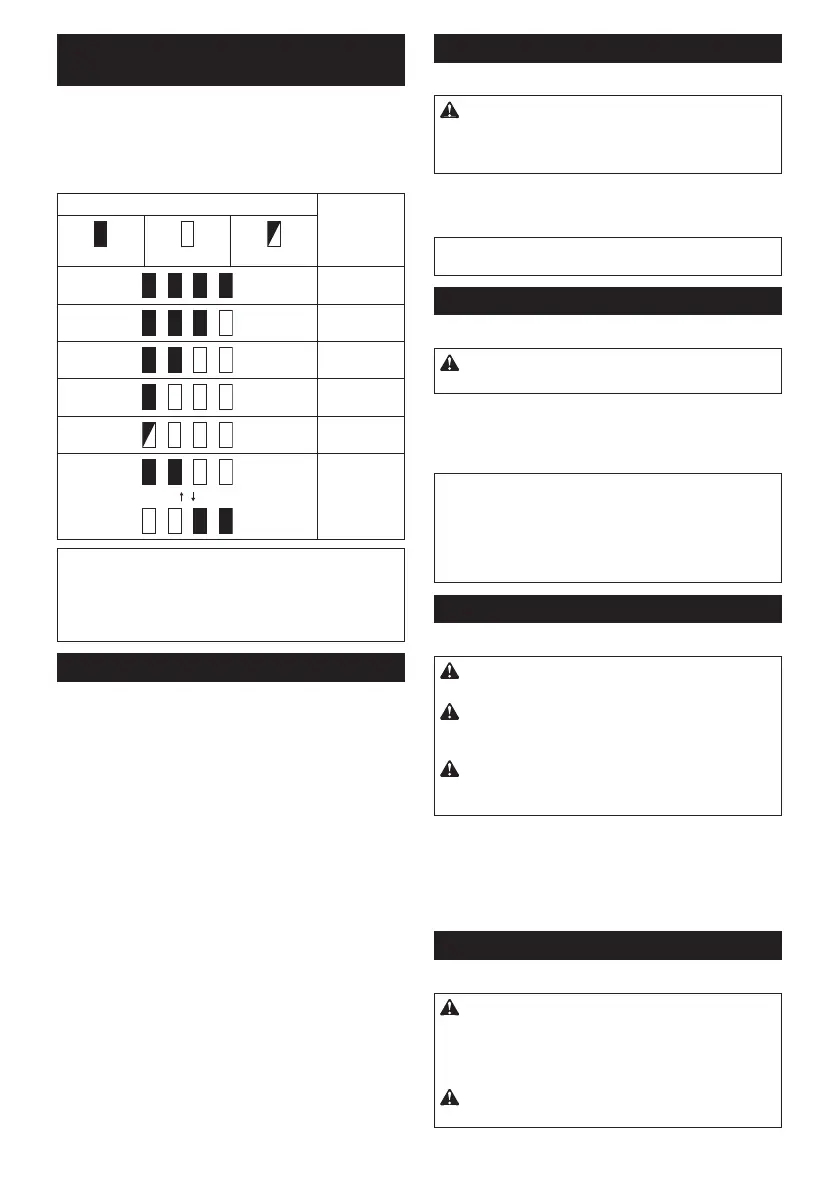
Fig.2: 1. Indicator lamps 2.
-
light up for a few seconds.
Indicator lamps Remaining
capacity
Lighted Blinking
75% to 100%
50% to 75%
25% to 50%
0% to 25%
Charge the
malfunctioned.
NOTE: Depending on the conditions of use and the
NOTE:
Tool / battery protection system
-
Overload protection
This protection works when the tool is operated in a
-
-
turn the tool on to restart.
Overheat protection
-
Overdischarge protection
Switch action
Fig.3: 1. Switch trigger
CAUTION: Before installing the battery car-
tridge into the tool, always check to see that the
switch trigger actuates properly and returns to
the "OFF" position when released.
trigger. Release the switch trigger to stop.
NOTE:-
Lighting up the front lamp
Fig.4: 1. Lamp
CAUTION: Do not look in the light or see the
source of light directly.
releasing the switch trigger.
NOTE:
When the tool is overheated, the tool stops auto-
NOTE:
the lamp. Be careful not to scratch the lens of lamp, or
Reversing switch action
Fig.5: 1. Reversing switch lever
CAUTION: Always check the direction of
rotation before operation.
CAUTION:
Use the reversing switch only after the
tool comes to a complete stop. Changing the direction of
CAUTION: When not operating the tool,
always set the reversing switch lever to the neu-
tral position.
This tool has a reversing switch to change the direction
of rotation. Depress the reversing switch lever from the
-
terclockwise rotation.
When the reversing switch lever is in the neutral posi-
Speed change
Fig.6: 1. Speed change lever
CAUTION: Always set the speed change lever
fully to the correct position.
damaged.
CAUTION: Do not use the speed change lever
while the tool is running.

 Loading...