12 ENGLISH
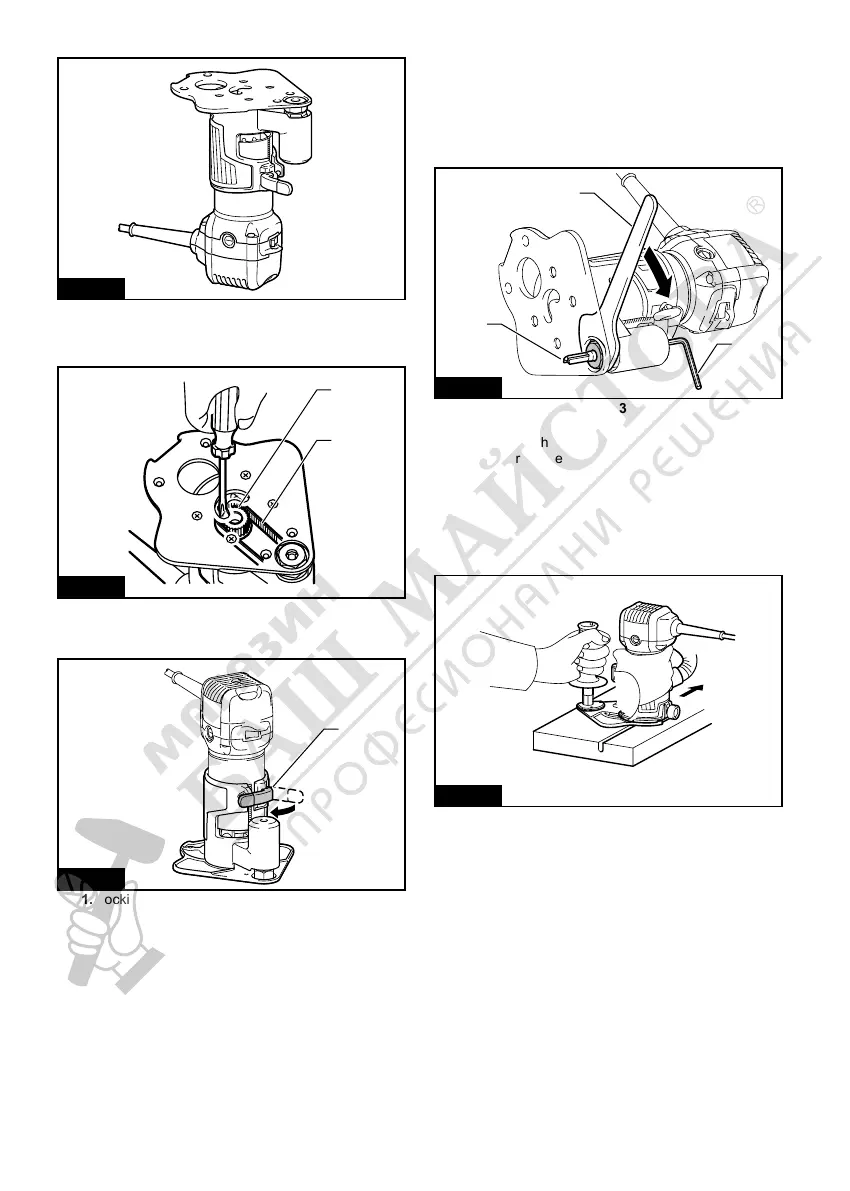
4. Mount the oset base on the tool.
Fig.32
5. Hook the belt over the pulley using a screwdriver
and make sure that its entire belt width ts over the
pulley completely.
1
2
Fig.33
► 1. Pulley 2. Belt
6. Close the locking lever.
1
Fig.34
► 1. Locking lever
7. Install the trimmer bit as follows.
Lay down the tool with the oset base. Insert the hex
wrench into the hole in the oset base.
With the hex wrench held in the position as shown in
the gure, insert the trimmer bit into the collet cone on
the shaft of the oset base from the opposite side and
tighten the collet nut rmly with a wrench.
1
2
3
Fig.35
► 1. Wrench 2. Hex wrench 3. Trimmer bit
8. To remove the trimmer bit, follow the installation
procedure in reverse.
Using the base with the oset base
plate and grip attachment
The oset base can also be used with a base and a grip
attachment (optional accessory) for more stability.
Fig.36
 Loading...