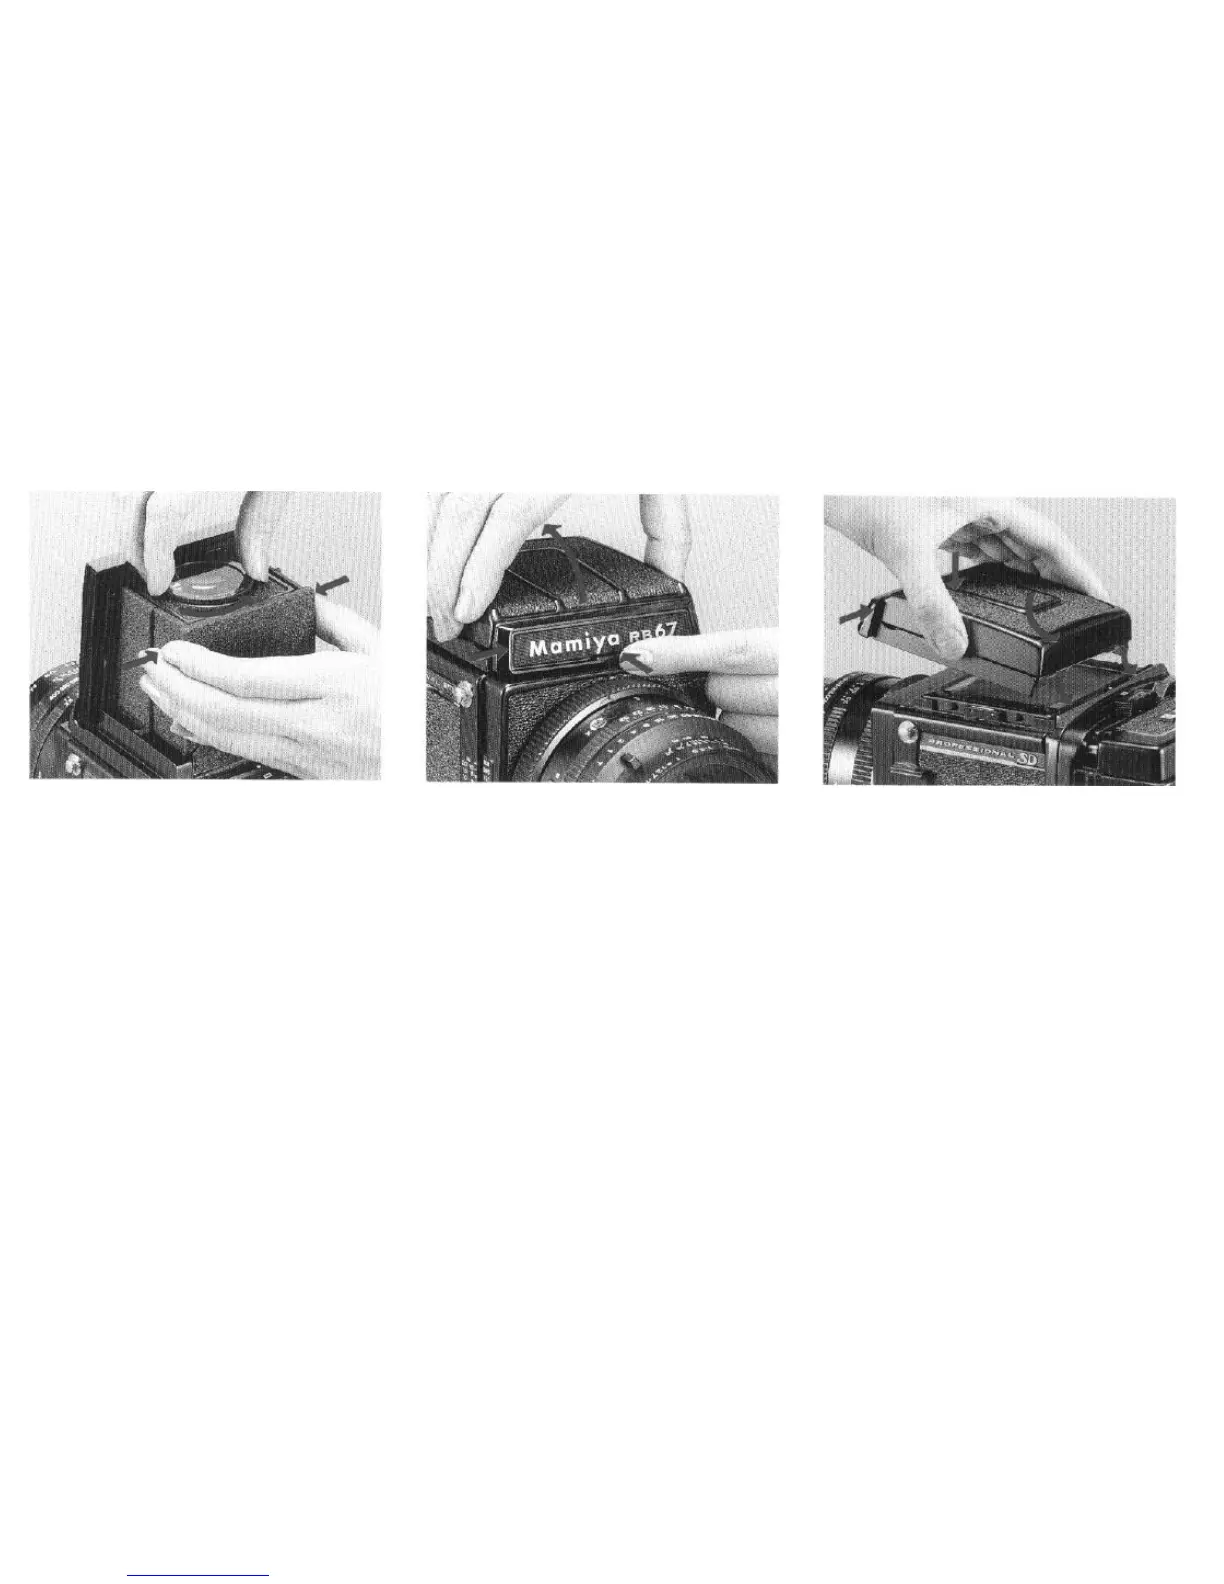
Changing the diopter lens
While holding the diopter lens base plate
with both side panels of the finder, turn the
diopter lens counterclockwise, and at the point
where the white dot on the diopter lens aligns
with the white dot on the base plate, remove
the diopter lens.
To mount another diopter lens, simply
aligns its white dot with that of the base plate
and turn clockwise.
l In addition to the standard (-1.5) diopter
lens, there are 5 others:
+1
,
0,
-1,
-2,
and -3.
Detaching the finder
While pressing the finder latch (A), as viewed
from the front, slide the nameplate to the right,
and while slightly raising the front remove
the finder.
Attaching the finder
Insert the two prongs on the back of the
finder into the slots on the camera body, and
while pressing the front portion of the finder
toward the camera body, return the nameplate
to its original position. The latch will pop out
and the finder will lock automatically.
12