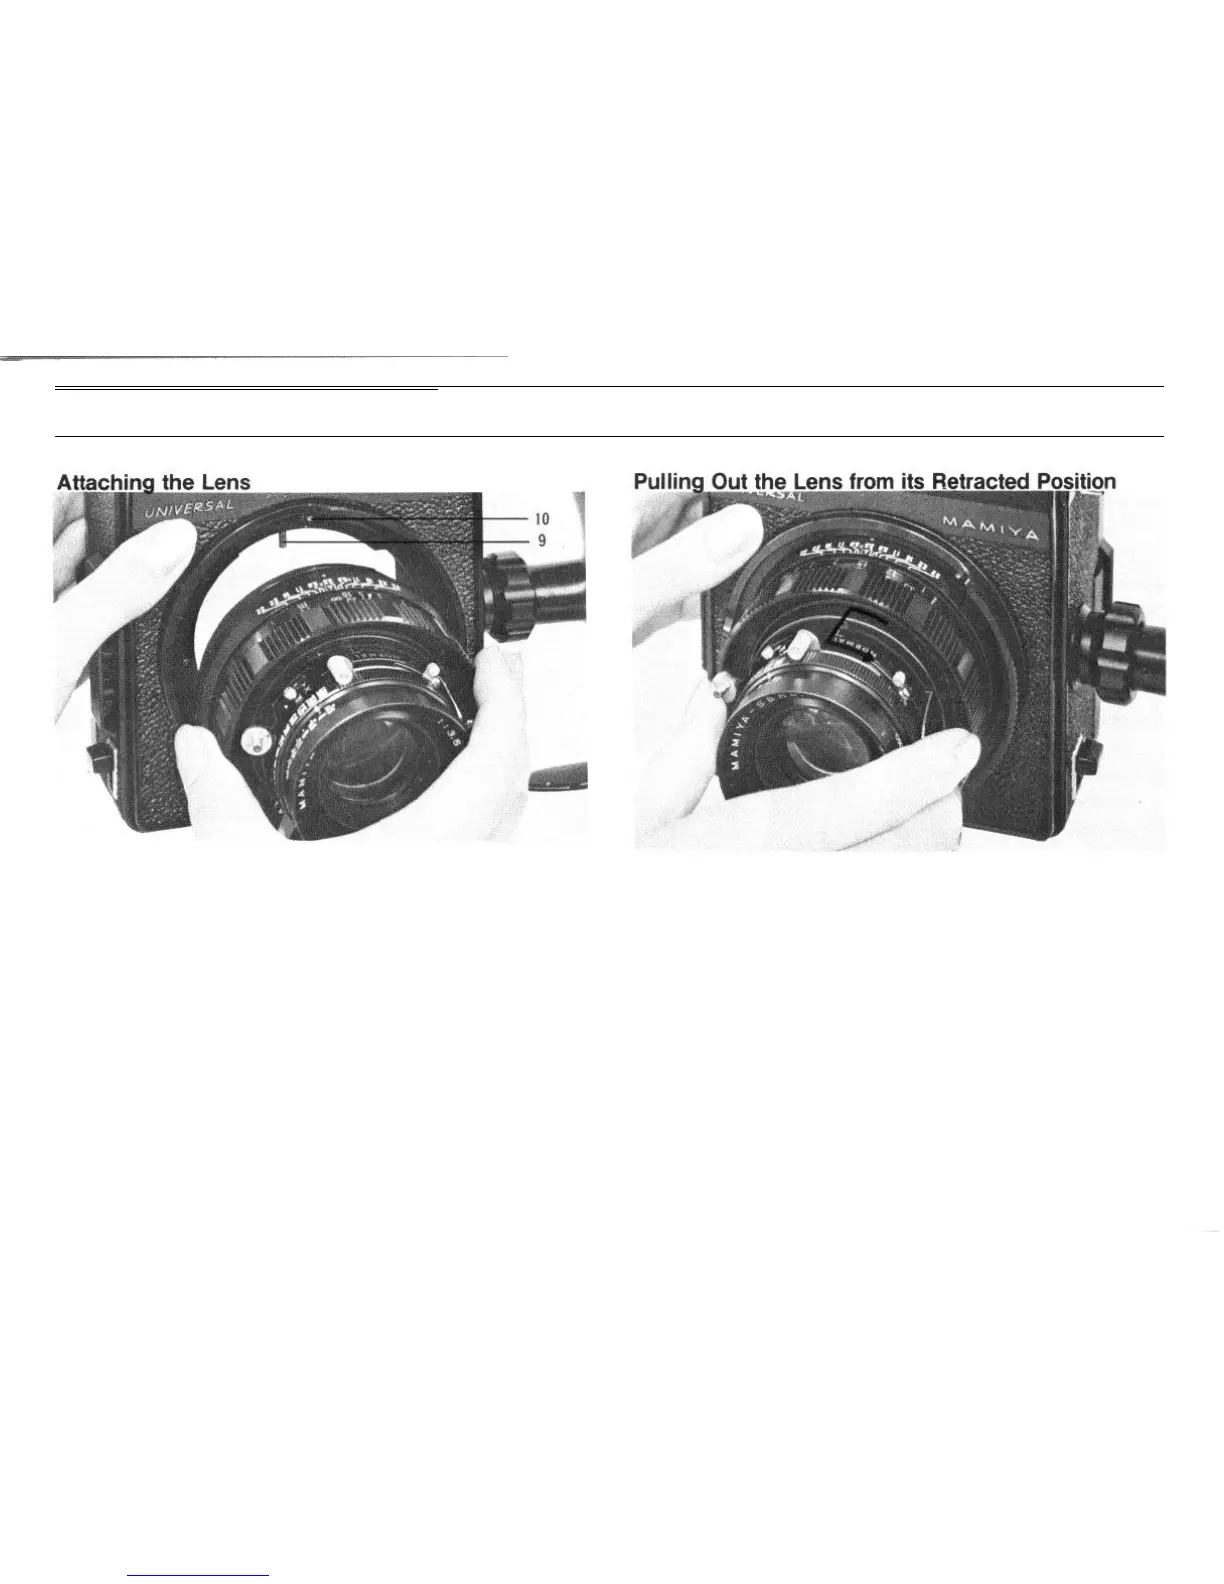
Assembling
By rotating the bayonet ring counter clockwise until it stops, the red
dot of the lens coupling mark on the bayonet ring comes to the top, and
the dust cap on the front of the camera body can be removed. At this
position of the bayonet ring, insert the lens, matching the red mark on
the lens to the red mark on the bayonet ring. Then turn the bayonet ring
clockwise, locking the lens in place.
Detaching the lens is done in a reverse order to that described
above.
PRECAUTION !
Do not touch the pin (9) on the camera body used to couple the lens
to the rangefinder.
If the lens is changed while a loaded film holder is attached to the
camera, be sure to insert a dark slide into the holder.
When using the 100mm f/3.5 standard lens, the lens-shutter assembly
must be pulled out from its retracted position before taking general
photographs. Grip the lens-shutter assembly firmly, turn it slightly coun-
terclockwise, and pull it out; then, turn it clockwise (in the arrow direction)
and secure it in place.
If the lens-shutter assembly is left in its retracted position, the
coupled rangefinder will not function even when the two images coin-
cide and form a single image.
Although the lens is not used for normal photography with the lens-
shutter assembly in its retracted position, the lens is designed to allow
its lens-shutter assembly to remain retracted so that it can be used even
when extension rings are used.
Also lens retraction is necessary, when using this lens with another
camera whose back mount can be extended, when taking a picture with
the back mount tilted.
7