National Crane Published 12-21-2011 CTRL #050-09 4-5
1300A OPERATOR’S MANUAL SET-UP
..
10. Using tag line, swing jib into deployed position.
11. Remove cable keeper pins from boom sheave case and
jib. Remove hook block. Pivot jib slightly to allow for
loadline to be removed from boom sheave case.
Remove loadline from boom sheave case and place in
an area to minimize possible damage.
12. Pivot jib into place, visually aligning the upper C2 pin
holes. Install upper C2 pin and spring clip. A slight
hammer strike may be necessary to install pins. Always
use proper eye protection during this step.
13. Using jib jack, position jib so that lower C2 pin holes are
in alignment and install lower C2 pin and spring clip.
a. Remove the jack handle and check that the jack
release valve is closed.
b. Extend the jack so that the lower C2 pin holes are
aligned.
c. Install the lower C2 pin and spring clip.
d. Open the jack release valve and retract the jack.
14. Using hoist function, unspool enough loadline to reeve
loadline over jib sheave case. Keep slight tension on
loadline to avoid bird caging of loadline on hoist drum.
15. Route loadline over jib sheave and install keeper. Install
line block to end of loadline.
16. Remove anti-two-block switch and weight/chain
assembly and install on jib tip. Be certain to use keeper
provided with switch.
17. Disconnect twist lock quick coupler on anti-two- block
cord going to boom anti-two-block switch and attach to
quick coupler on jib anti-two-block wire on rear of jib
between the upper and lower jib ears.
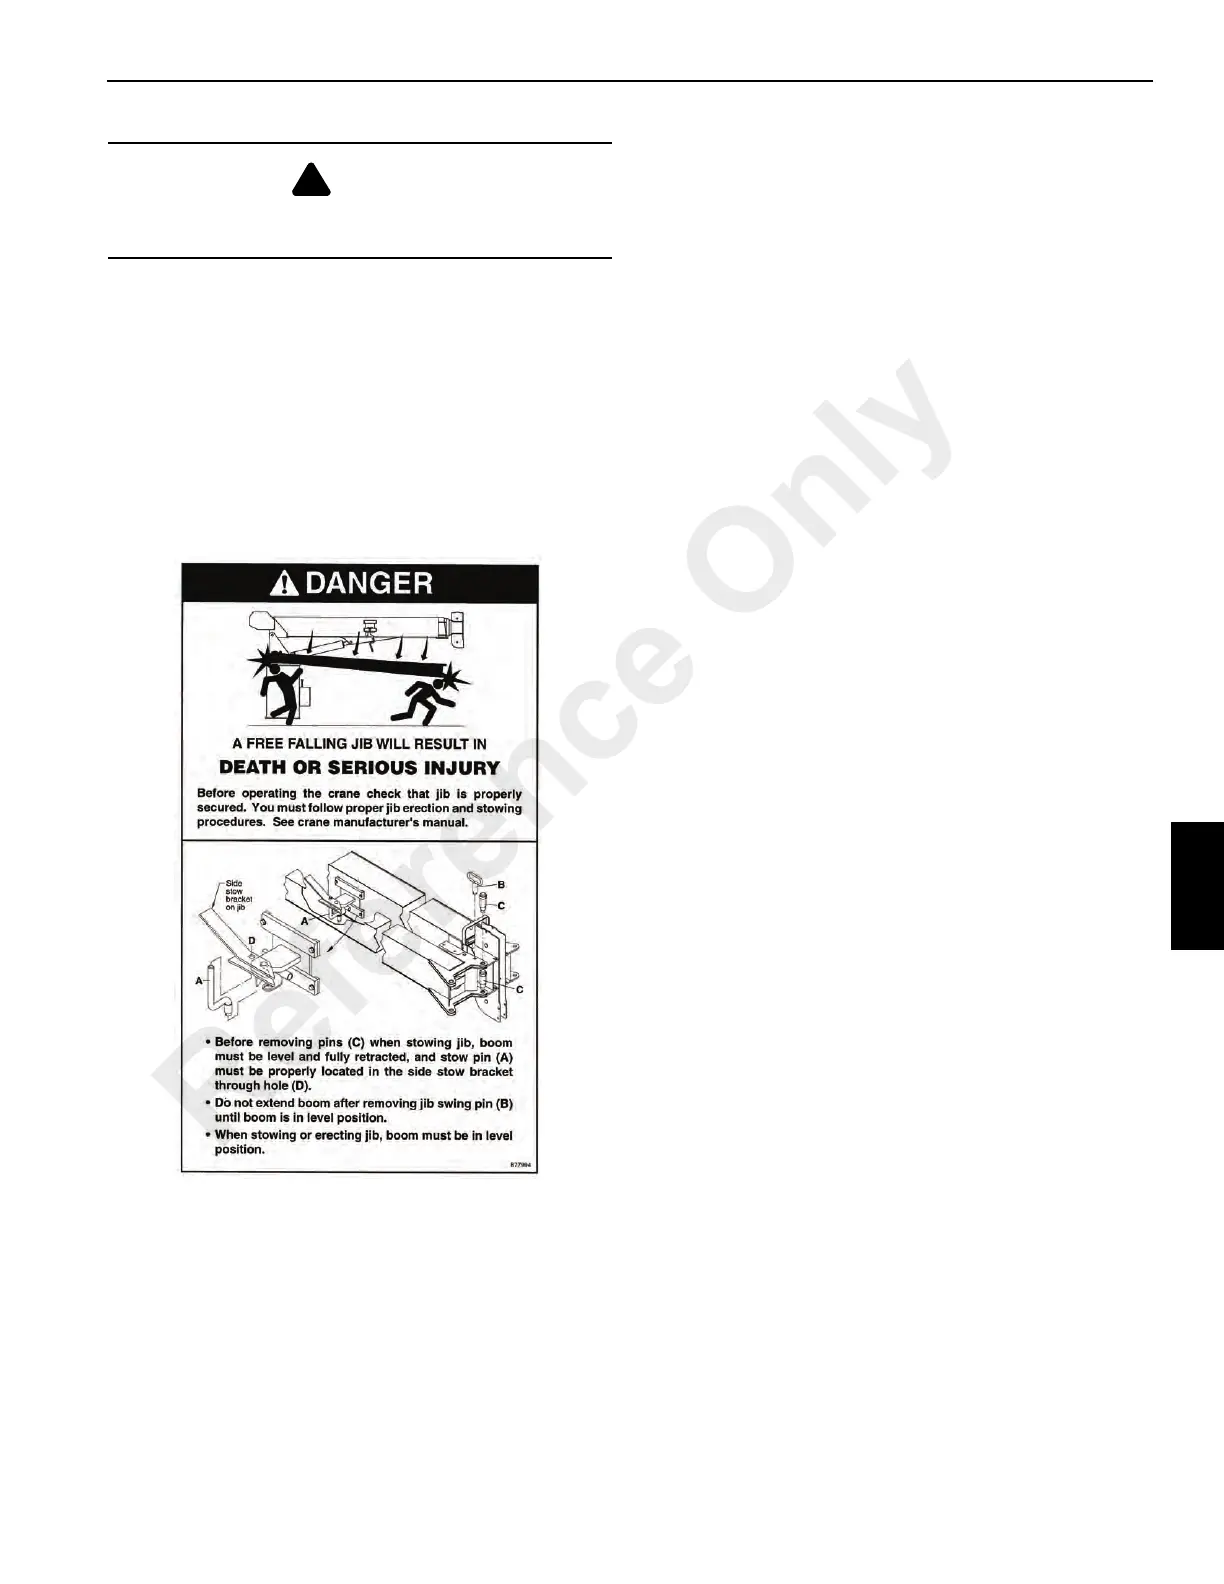
18. Install jib swing pin B and spring clip into jib ears.
19. For manually extendable jibs, pull extension retaining
pin E, and extend second section out by pulling on
sheave case. The second section jib, as it extends, will
hit a mechanical stop that allows for extension pin E
installation. Install pin E and spring clip.
20. Make ATB cord connections as required.
Stowing Procedure
1. Using lift function, lower boom so that jib deployment
pins C1 and C2 are easily accessible from the ground.
NOTE: When lowering the boom below horizontal, two
persons may be required. With the telescope
control in neutral, the boom may creep out when
below horizontal.
2. For manually extendable jibs, pull extension retaining
pin and fully retract extendable 2
nd
section jib into the 1
st
section. Retraction of 2
nd
section may be facilitated by
attaching loadline wedge socket to jib nose. Slowly
activate the hoist up function until the 2
nd
section is fully
retracted.
3. Reinstall extension retaining pin through the 1
st
and 2
nd
section jib assembly and install spring clip.
4. Remove loadline from jib sheave case. Place loadline in
area to avoid possible damage from stow procedure.
5. Disconnect twist lock anti-two-block wire connector at
rear of 1
st
section jib. Connect twist lock connector to
anti-two-block switch connector on boom tip. Move
weight/chain assembly to boom tip.
6. Attach tag line to sheave case end of jib.
7. Remove spring clips from pins C2 on both upper and
lower jib ears.
8. Remove jib swing pin B from the boom nose.
9. Remove pins C2 from upper and lower jib ears. Do not
remove C1 pins at this time. C1 pins will be used as a
pivot point to swing jib into stow position. A slight
CAUTION
Use caution during this step. The jib is free to swing away
from the boom upon boom extension.
Reference Only
 Loading...