Service and maintenance 21
Installing optional diffuser filters
A set of eight medium-angle diffuser filters can be ordered from Martin (P/N 91616018) as an optional
accessory for the MAC 101. A diffuser filter softens the output from the LEDs and provides a wider beam
angle.
To install a diffuser filter:
1. Shut down power to the fixture and allow it to cool for
at least 10 minutes.
2. Release the Torx screw in the center of the spill ring on
the front of the head and lift the spill ring off. Keep the
screw for use during reassembly and keep the spill
ring for possible future use.
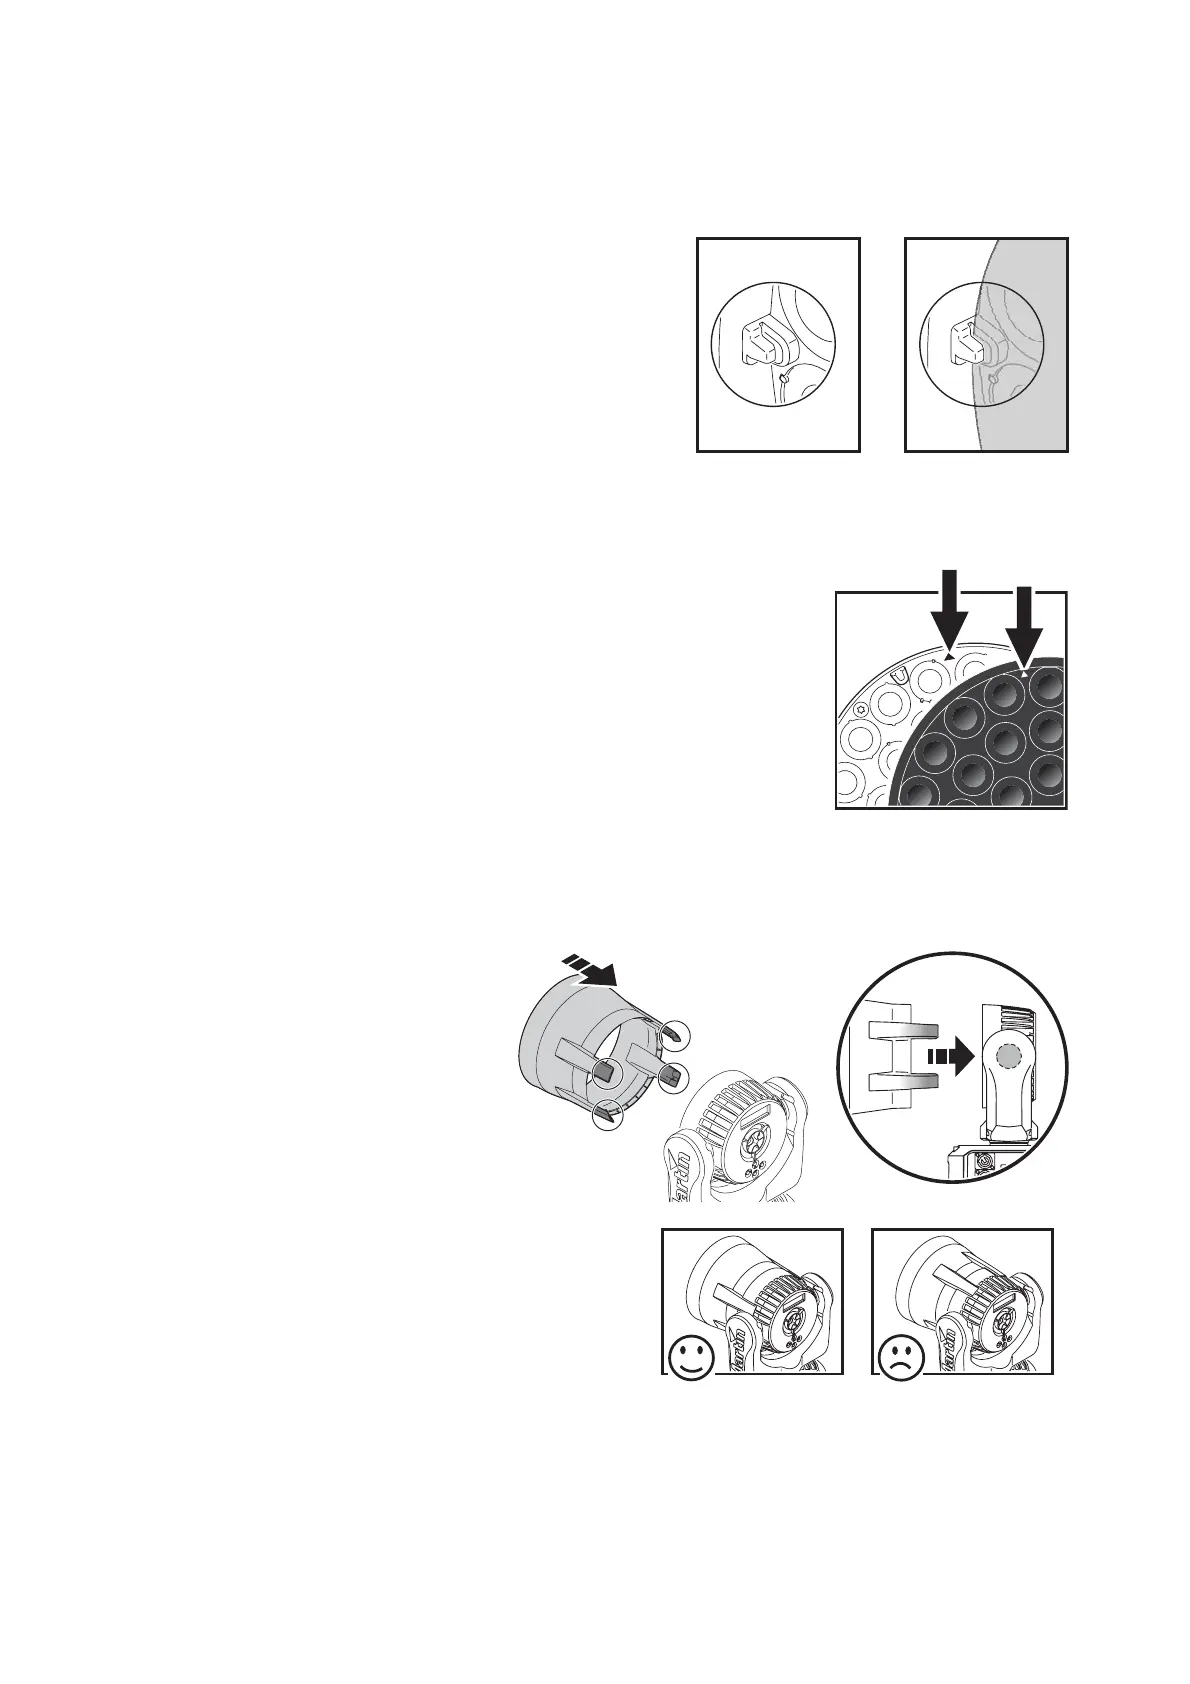
3. Place the diffuser filter over the lens plate so that the
cutouts in the diffuser locate over the tabs around the
edge of the lens plate (see Figure 5).
4. Do not reinstall the spill ring, as this will limit the beam
angle with the diffuser filter installed. Reuse the screw
from step 2. in the center of the diffuser filter to secure
it.
If you remove the diffuser filter in the future, we recommend that you
reinstall the original spill ring. See Figure 6. Line up the two small
arrowheads (arrowed) molded into the lens plate and spill ring and press
the spill ring onto the lens plate so that the locating tabs in the lens plate
engage in the cutouts in the spill ring.
Fasten the spill ring to the head reusing the Torx screw in the center of the
spill ring.
Installing an optional top hat
Top hats (P/N 91611358) can be
ordered from Martin as optional
accessories for the MAC 101. The
Martin top hat reduces glare and
spill from the MAC 101 and installs
in seconds.
Important! The top hat has a
lightweight design. Avoid
shocks and rough handling.
To install a top hat:
1. Enable the
TOP HAT setting in
the
PERSONALITY menu. This
will limit tilt by a few degrees
each side to avoid collisions
between the top hat and the
MAC 101’s base at maximum
tilt.
2. See Figure 7. Line up the top
hat so that the pairs of retaining
clips pass closely on either side
of the tilt pivots in the sides of
the head.
3. Push the top hat onto the head and engage all four clips firmly in the cooling vents in the back of the
head.
Figure 5: Diffuser filter locating tabs
Figure 6: Alignment
arrowheads
Figure 7: Installing a top hat