16
Turn 1/8 Clockwise
to lock - logo should
be level
Tether
Adjustments
Bulb Removal and Replacement
Note: For maximum reliability and optimum operation, always use Marus replacement bulb #014R207.
WARNING!
Do not attempt to remove the bulb for 2 minutes after the light has been
turned off or until the bulb has cooled.
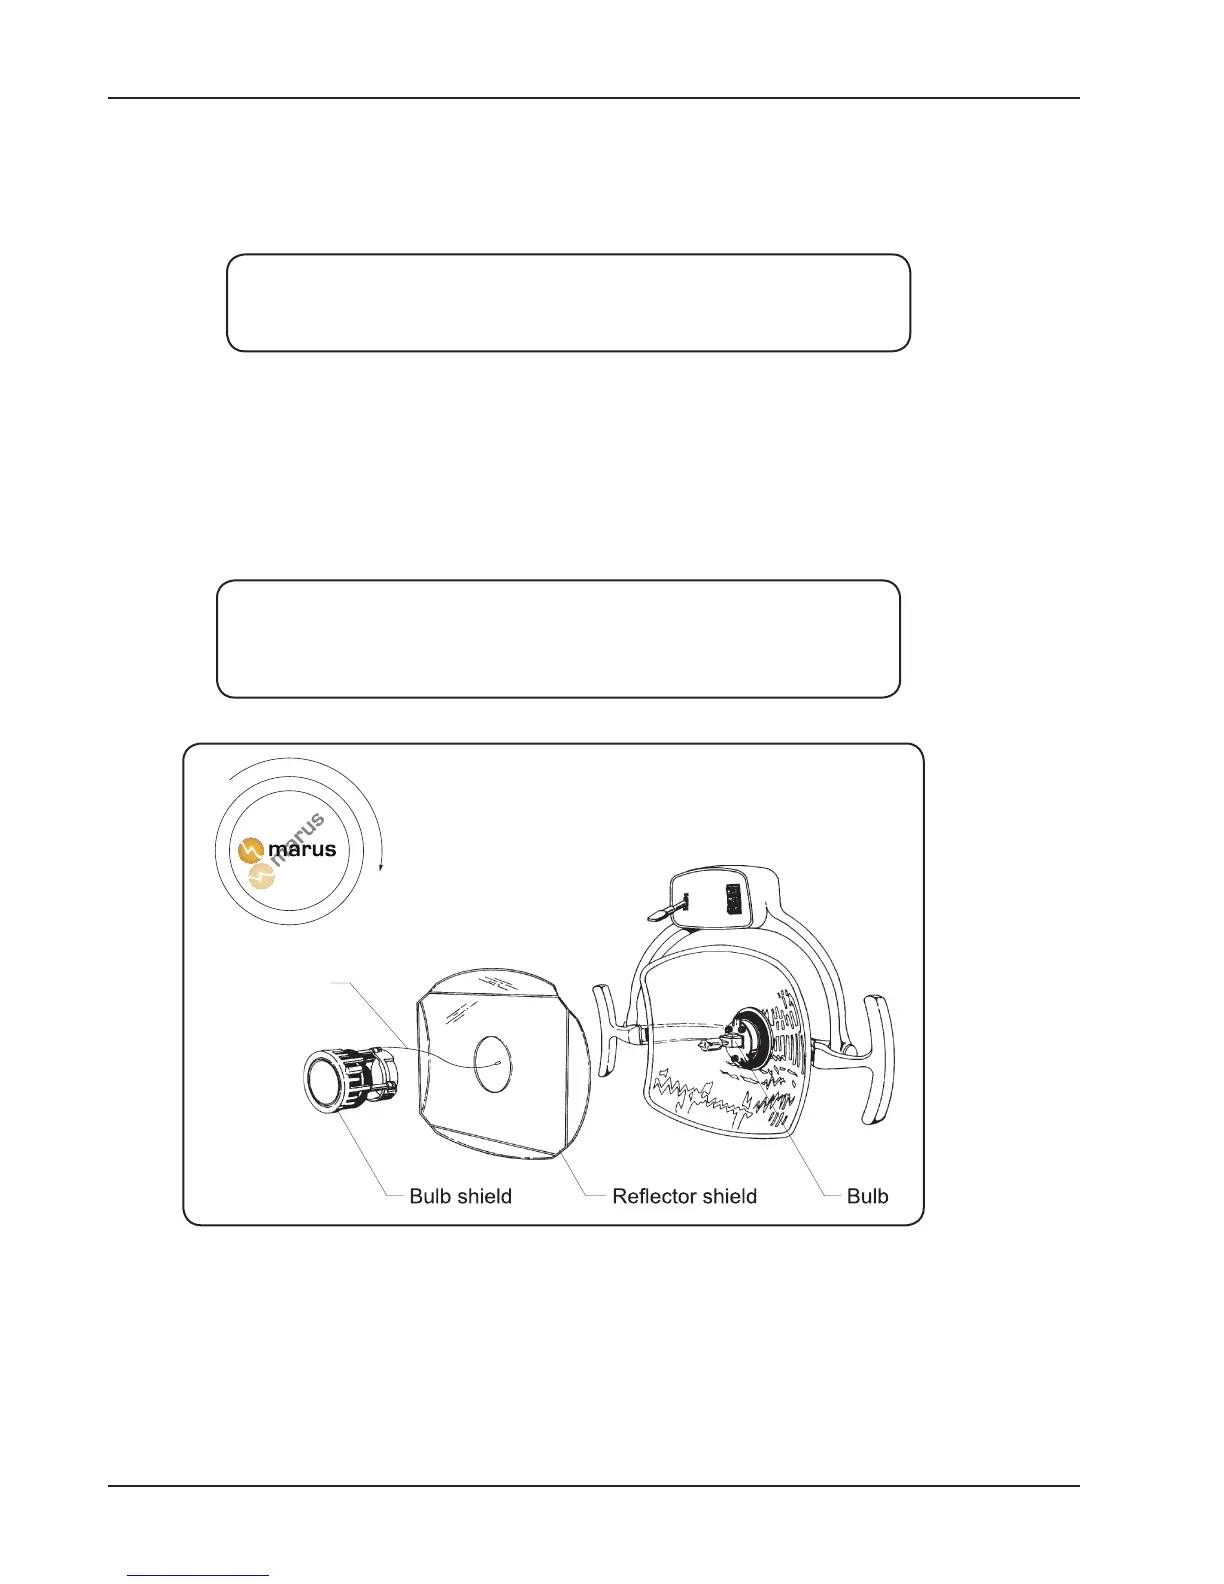
To Remove Bulb
The bulb shield is secured by a twist-lock. To remove the shield, twist counterclockwise and pull straight out-
ward until it clears the bulb and reector shield and let hang on the tether out of the way; then lift off the cover.
The bulb is a two-prong push-in type with one prong larger than the other to prevent improper installation. To
remove the bulb, grasp the base of the bulb and pull straight outward; a slight side-to-side rocking motion will
work the bulb loose.
Always grasp the bulb by the base when inserting. Do not touch bulb
or reector. If the bulb or reector have been handled or touched,
they MUST be wiped clean using denatured alcohol before putting
into operation.
To Replace Bulb
Grasp the bulb by the base, align the matching pins and holes and press the bulb in rmly until it bottoms.
Wipe the glass portion clean with denatured alcohol. Place the reector cover over the reector and replace
the bulb shield in the reverse manner from which it was removed. Replace the shield by pushing it straight in
and twisting 1/8 turn clockwise. BE CERTAIN THE BULB SHIELD IS LOCKED SECURELY IN PLACE PRIOR
TO OPERATING THE LIGHT! The logo on the front of the bulb shield will be straight and level when the
shield is correctly locked in place.
Figure 12