13
3.4.4 - QR15 or QR20 quick release axle - wheel installation
320 350
44 55
SLOPE CR
WARNING!
Always check the cleanness of the fork dropouts and remove
the possible dirt and mud before installing the wheel. Dirt
can compromise the correct functioning of the axle and the
fastening safety. An incorrect wheelfastening can cause
serious accidents, even fatal ones. Do not tighten the axle
without having put the hub between the fork dropouts fi rst.
Do not ever use other tools during the tightening of the wheel
axle. An excessive tightening can damage the axle and the
fork.
The QR15 and QR20 axle systems allow a quick assembling and
disassembling of the front wheel, without the use of tools.
The wheel locking procedure is as simple as the locking of a 9mm
QR with an eccentric lever. The installation procedure is very similar
as well.
For optimum fork performance, please follow the instructions below
when installing the wheel:
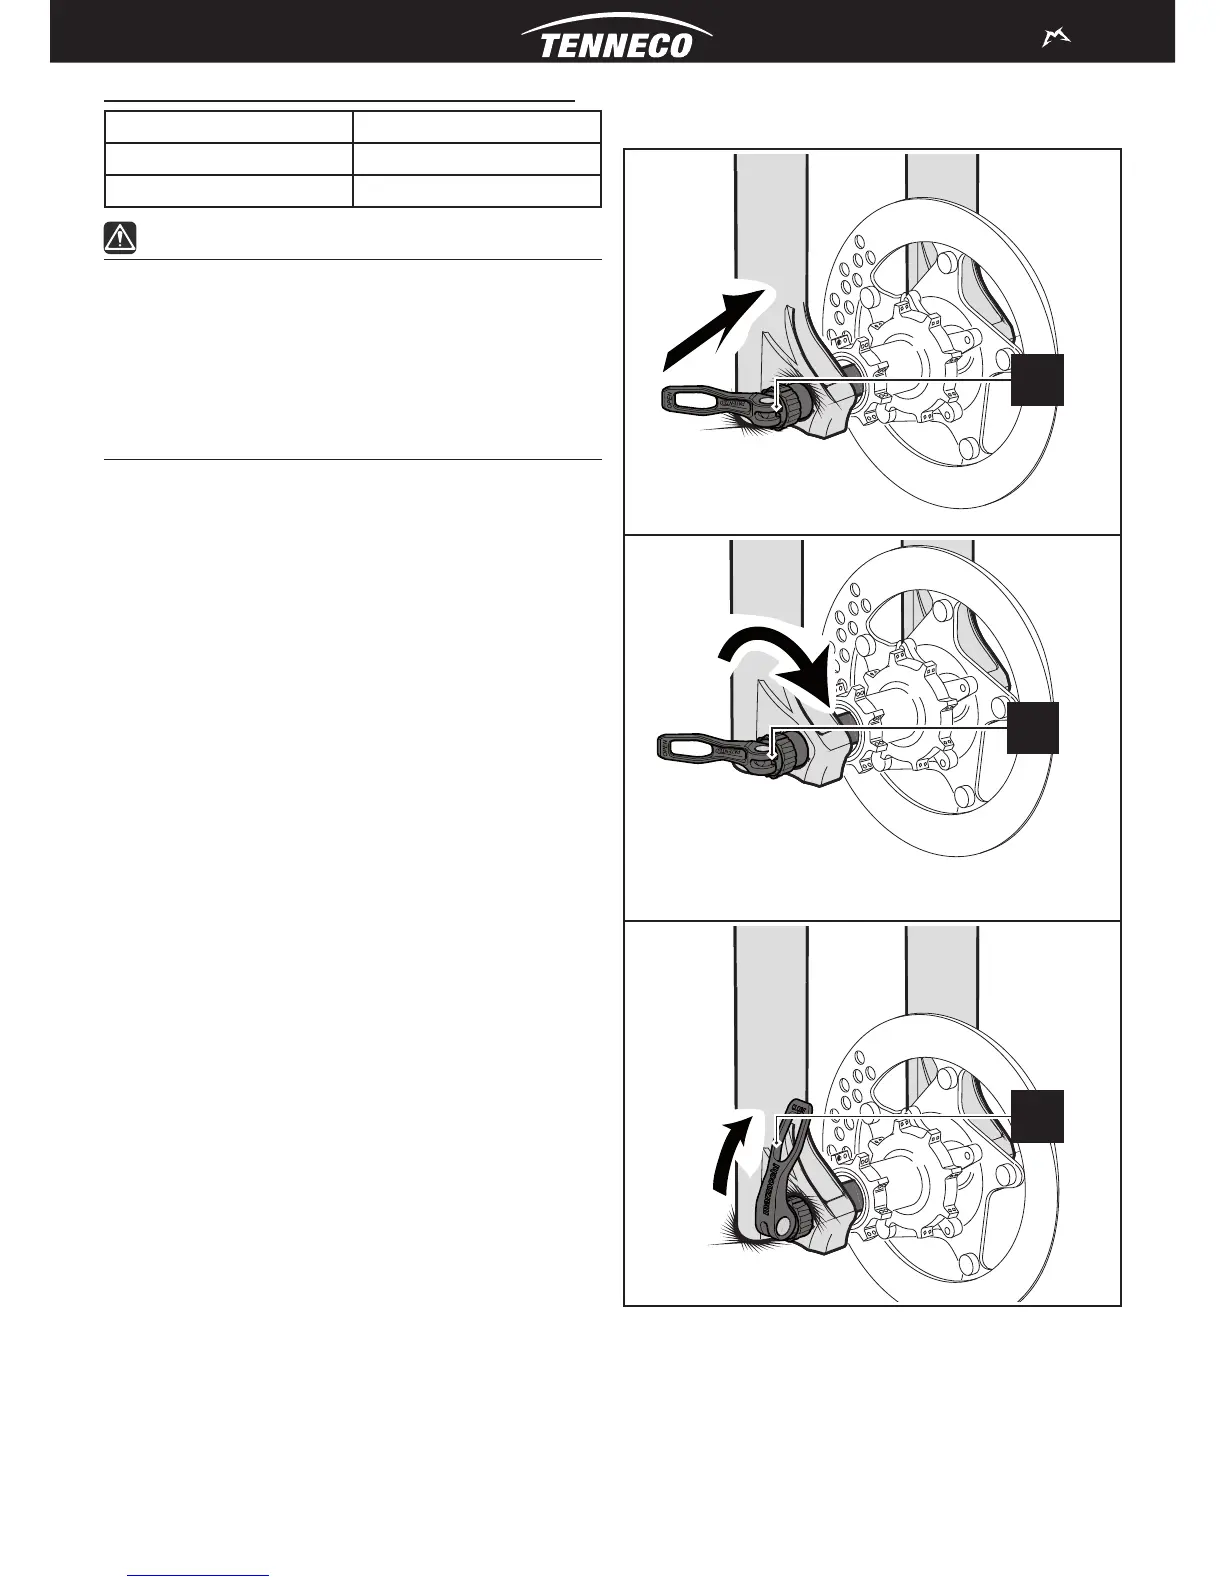
Place the wheel hub between the two fork dropouts.•
Align the wheel hub on the fork dropouts (see • 5A of Picture 5).
Install the axle through the right wheel axle dropout. (see • 5A
of Picture 5).
Pass through the hole in the centre of the hub until it stops against •
the left wheel axle dropout.
Rotate the axle clockwise until resistance to the screwing is •
perceived (see 5B of Picture 5).
On all QR20 wheel axles and QR15 of 320 and 350 series keep the
lever fully opened to screw and unscrew the axle.
On QR15 axle of 44 series hold the axle bolt (on the left side) with
the second hand while screwing or unscrewing the axle.
During the screwing operation, do not use the QR axle lever to
increase the tightening torque.
Position the lever in the preferred direction then close it to lock •
the axle (see 5C of Picture 5).
The lever must cause resistance during the rotation of the closing
in order to have correct fastening strength and tightness. When the
closing is fi nished, a slight depression of the lever can be noticed
on the hand.
Open the quick release lever in order to increase tension and screw
further on the axle, rotating clockwise, until the correct tension
during the closing is felt and seen on the hand.
If the lever does not manage to rotate completely to the closed
position, it means that the axle has been screwed into the fork
dropout too much. In this case tension must be reduced, to do this
screw the axle slightly, rotating it anticlockwise, until the correct
tension during the lever’s closing is felt and seen on the hand.
Check that the release lever is in a position that assures the •
correct fastening of the axle, and that it is in a position that it is not
subject to collisions during the use (see 5C of Picture 5).
Check for the proper fork-wheel alignment. To do this, begin by •
fully compressing the fork a few times. The wheel should not
make contact with, or come close to any portion of the fork. Then
lift the front of the bicycle and spin the wheel a few times to verify
the correct alignment with the disk brake. The wheel should not
wobble from side to side or up and down. Check the owner’s
manual of the brake system for the proper specifi cations.
Do not rotate or change the lever position after having closed the
quick release lever. The shift of the fastening lever can compromise
the wheel fastening safety causing the axle to loosen.
5A
5B
5C
Picture 5 - QR15 or QR20 quick release axle - wheel installation