5
Masimo
www.masimo.com
4
Masimo
www.masimo.com
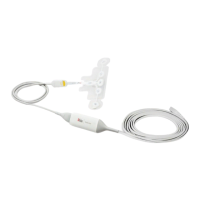
Applying the Sensor To connect the sensor and place on a patient:
Applying the Sensor
A B C D
E
1. Prepare the forehead skin with alcohol and dry it before applying the sensor.
2. Detach the sensor connector from the back of the tray (A).
3. Snap off the outer edges of the tray from the center tray (B).
4. Peel the center of the sensor from the tray and discard.
5. Center CT/CB electrodes on the forehead above the nose. Press the white lining around the electrodes rmly on the
forehead to secure the sensor. Do not press directly on the electrode as the gel may leak out (C).
6. Apply R1/L1 to either side of CB.
7. Peel back the R2/L2 from the outer tray edges and apply R2/L2 to the hairless area just above the temple (D).
8. Align the yellow indicator on the end of the patient cable to the yellow indicator on the sensor connecter (E).
9. Push together until the sensor connector ts into the patient cable.
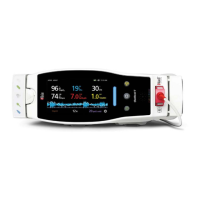
10. Ensure the SedLine module is connected to the SedLine patient cable and the Root monitor.
11. If any of the electrodes is displayed on screen in red, yellow, or blue, push or wiggle the white lining around the electrode
until displayed in green. Do not press directly on the electrode as gel may leak out.
12. For additional details, see the SedLine Operator’s Manual.
F G
Applying alongside an O3
™
sensor (when using O3 Regional Oximetry)
Following the application of the RD SedLine EEG sensor, align the rounded section of each O3 sensor with the curved O3
sensor guidelines marked on the T-section of the RD SedLine EEG sensor (F) and position above L1/R1 and L2/R2 (G).
 Loading...