Owner’s Manual
9
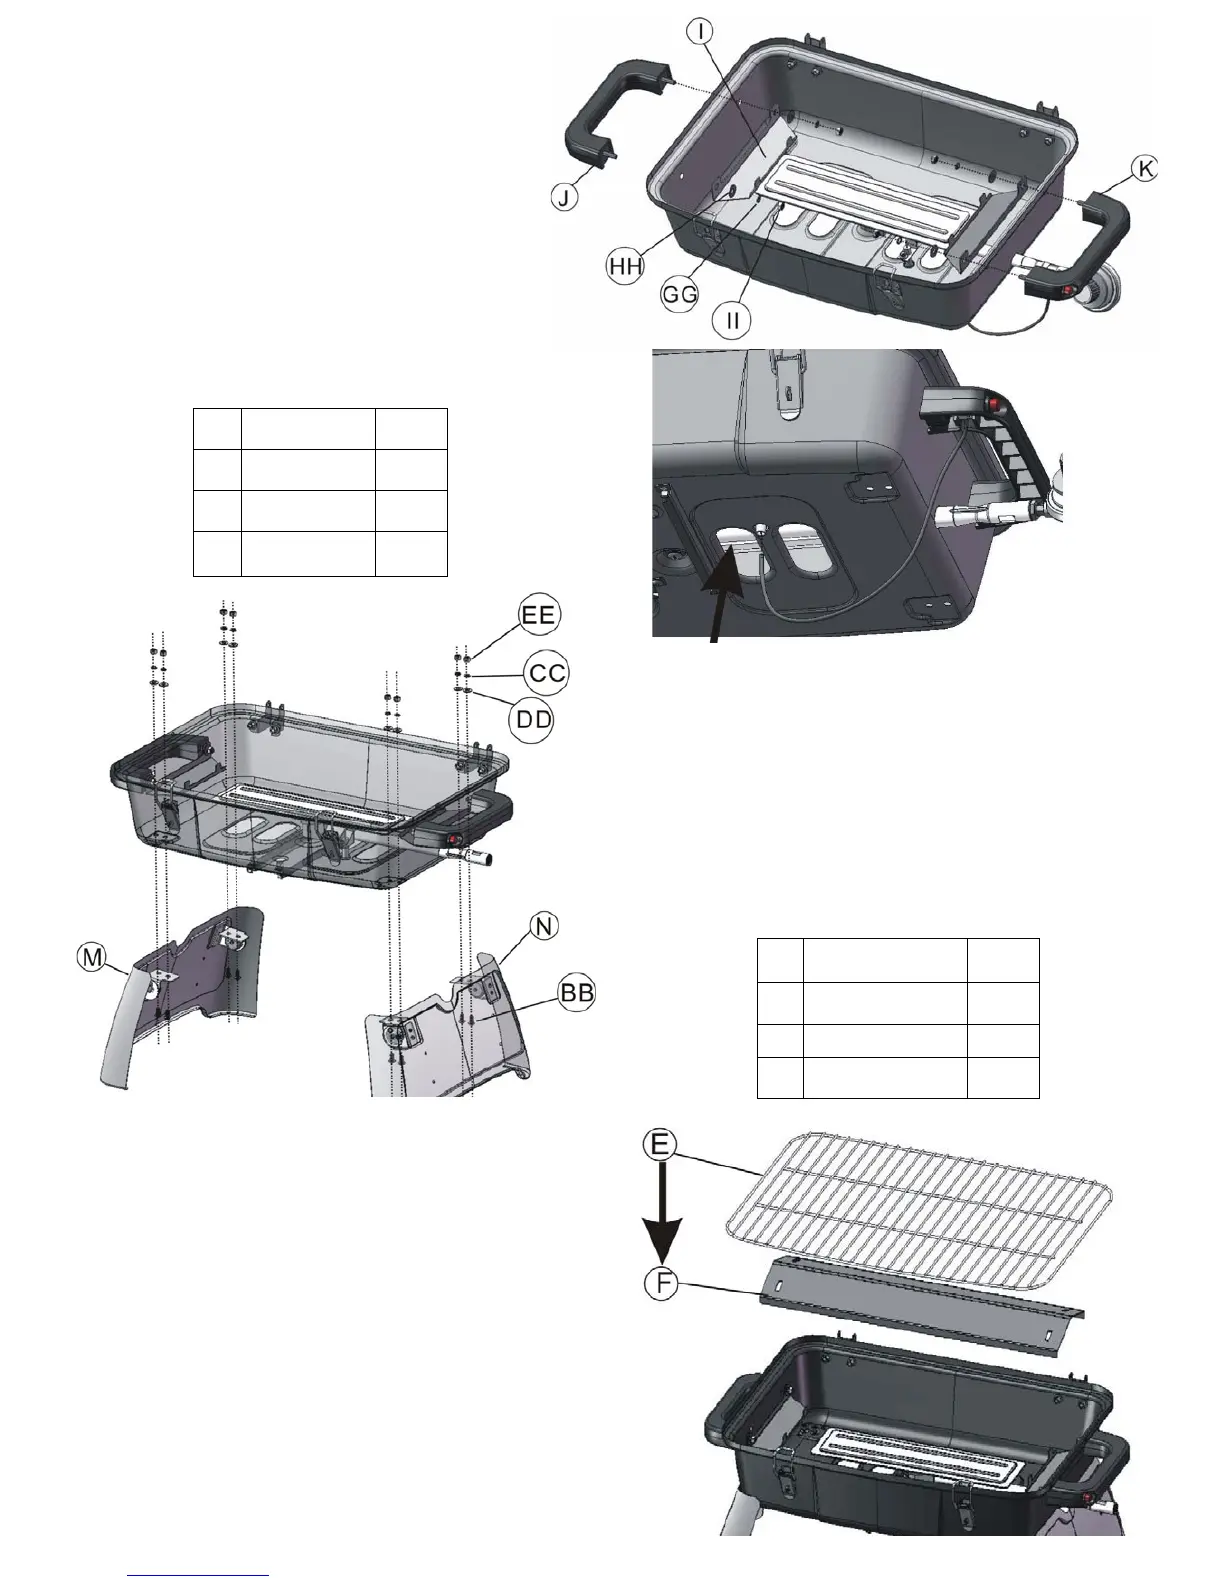
EE M5 Nut 1 PC
HH Flat washer 4 PCS
GG Spring washer 4 PCS
II M6 Nut 4 PCS
Step 4
a) Align the holes on the lower right front side and lower right back
side of the body assembly with the holes on the right leg (N).
b) Insert one bolt (BB) into each pre-drilled hole and seal it with
one flat washer (DD), one spring washer (CC) and one nut
(EE).
c) Repeat the procedure for the left leg (M).
d) Go back and tighten all the bolts using the screwdriver
rovided.
BB
M5 × 10 Bolt
8 PCS
DD
Flat washer
8 PCS
CC
M5 Spring washer
8 PCS
EE
M5 Nut
8 PCS
Step 3
a) Align the holes on the left side of the body with the
holes on the heat plate support (I).
b) Insert the bolts on the left handle (J) into each
pre-drilled hole and seal one flat washer (HH),
one spring washer (GG), and one nut (II) in
sequence.
c) Repeat the procedure for the right handle (K) and
another heat plate support (I) with the right side of
the body.
d) Go back and tighten all the nuts using the wrench
provided.
e) Insert the ignition cable into the electrode
underneath the body. (See the figure on right.)
Step 5
a) Place the heat plate (F)
on the heat plate support.
b) Place the cooking grill (E)
upon the heat plate and make
certain the cooking grid is clipped by the fastener.
Insert the ignition cable into the electrode
underneath the body.